


51
The AVP2 can provide this automatic searching for and selection of the best avail-
able soundtrack for you, according to priorities you establish during setup. In es-
sence, you are about to describe the order in which you want the AVP2 to look
for signals, establishing your first, second and third choice. Typically, this will be
RF (AC-3, Dolby Digital), normal digital (which might be a digital version of
Dolby Pro Logic, DTS discrete digital, MPEG/Musicam, or ordinary two-channel
digital stereo), and finally analog (if there is no digital signal available).
Let’s get started.
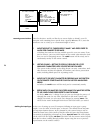
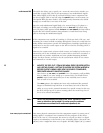
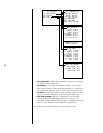
1 MOVE TO THE “AUDIO CONNECTORS:” ITEM IN THE MENU, PRESS THE
ENTER BUTTON, AND USE THE VOLUME ± BUTTONS TO INFORM THE
SYSTEM HOW MANY CONNECTIONS ARE NEEDED; PRESS ENTER AGAIN
TO SAVE THE CHANGE
Choose 3 audio connectors if you have an AC-3 RF output on your
laserdisc player, 2 audio connectors if you have only analog and digital out-
puts. Once the AVP2 knows how many connections you need for this par-
ticular component, it updates its menu to provide for defining those con-
nections.
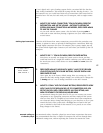
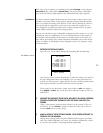
2 DEFINE CONNECTOR “1:” AS YOU DID FOR THE CD TRANSPORT, USING
YOUR FIRST CHOICE CONNECTION PREFERENCES FOR LASERDISC;
SAVE YOUR CHOICES BY PRESSING ENTER
If you have an RF (AC-3)-equipped laserdisc player and the Audio Video
Preamplifier’s optional internal RF demodulator installed, this choice should
be
digital (vs. analog) and dig 3 RF. Otherwise, you probably have only two
connections that need to be made, digital and analog; in this case, you’ll
want to choose digital and whatever input you used during hookup for
your laserdisc player’s digital output.
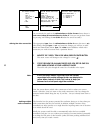
3 REPEAT THIS PROCESS FOR YOUR SECOND CHOICE (2:) AND THIRD
CHOICE (3:) CONNECTIONS AS NEEDED
With three connections, your second choice will be digital, with the third
choice being analog. If you chose to set up two connections (lacking an RF
output), then your second connection will be your analog hookup. Choose
audio: analog in the submenu, and then choose the analog input where
you hooked up the analog connections from your laserdisc player). Save
your choices by pressing enter.
setting & saving input levels The AVP2 includes a high quality analog to digital converter (ADC). Since all pro-
cessing in the AVP2 is handled in the digital domain, analog signals that are to be
changed in any way (other than volume) must first be converted to digital form.
It is extremely important to avoid overloading or “clipping” the ADC, since doing
so results in a nasty burst of distortion that sounds similar to a power amplifier
clipping. Unlike power amplifiers, this sort of clipping can occur at any volume
level, since the ADC is being clipped well before the volume control in the signal
path.
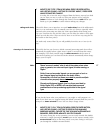
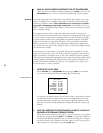
Fortunately, the AVP2 can detect when its ADC is being clipped, and posts a no-
tice to that effect in its front panel display and on the on screen display. If over-
load should occur, the AVP2 will indicate it by displaying ADC CLIPPING on the
screen (and “Clip!” in the main display). If you see such a message, you should
turn down the input level on the AVP2 (which turns down the volume of the sig-