


42
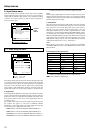
4-4. IR IN Setup sub-menu4-2. Headphones Level sub-menu
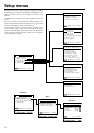
Setup menus
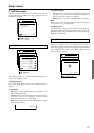
Menu
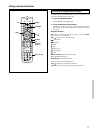
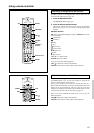
1.Speaker Setup
2.Input Setup
3.Listening Mode Setup
4.Preference
5.OSD Setup
|ENTER| Quit:|OSD|
4.Preference
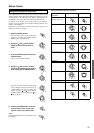
1.Volume Setup
2.Headphones Level
3.DTS LFE Level Setup
4.Powered Zone2 Setup
|ENTER| Quit:|OSD|
4-2.Headphones Level
a.Headphones Level
: 0dB
Quit:|SETUP|
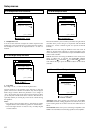
Menu
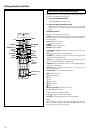
1.Speaker Setup
2.Input Setup
3.Listening Mode Setup
4.Preference
5.OSD Setup
|ENTER| Quit:|OSD|
4.Preference
1.Volume Setup
2.Headphones Level
3.DTS LFE Level Setup
4.Powered Zone2 Setup
|ENTER| Quit:|OSD|
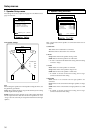
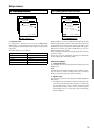
4-3.Late Night Setup
a.Late Night :Off
Quit:|SETUP|
4-3. Late Night Setup sub-menu
a. Headphones Level
You can use this sub-menu to adjust the volume output from the
headphones so that it matches the level output from the speakers.
The headphone volume can be adjusted between –12 and +12
decibels.
a. Late Night
Sets “High,” “Low,” or “Off” for the late night function.
Cinema sound has a vast dynamic range; therefore, to hear the
quieter sounds such as human conversations, they must be played
back at larger volumes. When this parameter is set to “High” or
“Low,” the dynamic range of the sound is narrowed down to allow
you to easily hear minute sounds at low volumes. This function is
especially useful if you wish to play a movie at low volumes during
the nighttime.
Notes:
• The depth of the Late Night effect is determined by Dolby
Digital software. Some sounds may produce no or little effect.
• The Late Night function is effective only on Dolby Digital
encoded software.
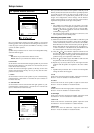
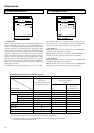
This sub-menu allows you to set where you will be using the remote
controller when you are using it in conjunction with the IR IN
terminal (i.e. remote controller signals are input at the IR IN
terminal).
Main: Select this when using the DTR-6.2 in the main room. If
“Main” is selected at this sub-menu, to perform operations in the
remote zone (Zone 2), you will first have to press the ZONE 2 button
on the remote controller.
Zone 2: Select this when using the DTR-6.2 in the remote zone
(Zone 2). When this is selected, the ON/STDBY, INPUT
SELECTOR, CH
, and LEVEL / (or VOLUME ) buttons
work without having to press the ZONE 2 button on the remote
controller.
4-5. Powered Zone 2 Setup sub-menu
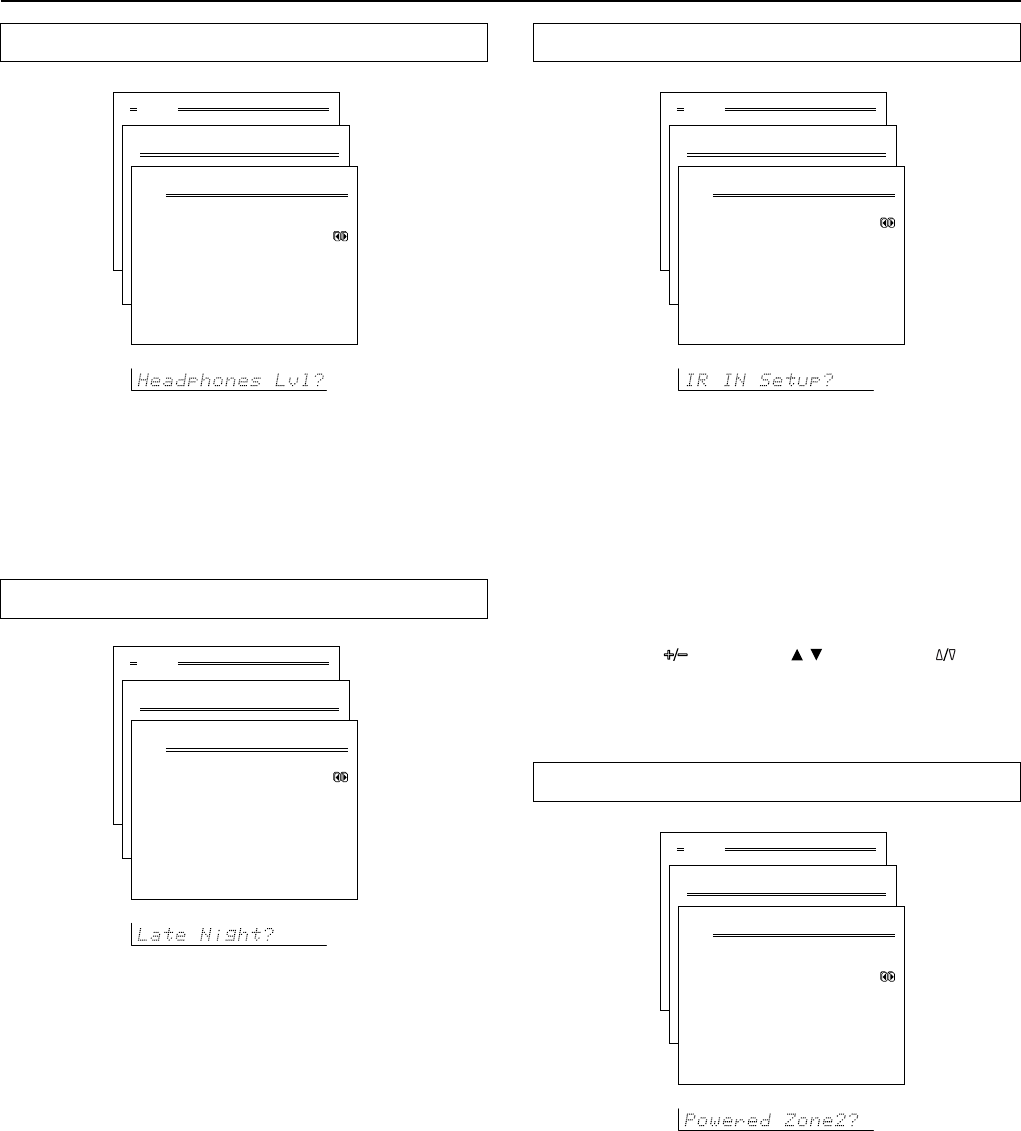
Menu
1.Speaker Setup
2.Input Setup
3.Listening Mode Setup
4.Preference
5.OSD Setup
|ENTER| Quit:|OSD|
4.Preference
1.Volume Setup
2.Headphones Level
3.DTS LFE Level Setup
4.Powered Zone2 Setup
|ENTER| Quit:|OSD|
4-4.IR IN Setup
a.Position :Main
Quit:|SETUP|
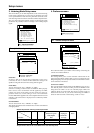
Activated: Select when speakers are connected to the ZONE2
SPEAKERS terminals. During playback in the remote zone (Zone
2), the listening mode for the main zone becomes either Stereo or
Direct.
Not Activated: Select when you are connecting an amplifier to the
ZONE 2 OUT terminals and connecting speakers to that amplifier.
Menu
1.Speaker Setup
2.Input Setup
3.Listening Mode Setup
4.Preference
5.OSD Setup
|ENTER| Quit:|OSD|
4.Preference
1.Volume Setup
2.Headphones Level
3.DTS LFE Level Setup
4.Powered Zone2 Setup
|ENTER| Quit:|OSD|
4-5.Powered Zone2 Setup
a.Powered Zone2
:Activated
Quit:|SETUP|