35
Setting procedures and button operations
Remote controller DTR-6.2
Main menu
Display menu
(display OSD menu)
Select item
Enter selected item
Menu
Select item
Enter selected item
Submenu
Select item
Set parameter
Other
Move up one level
Exit OSD menu
1. Press the SETUP button.
The main menu screen of the Setup menu
appears on your television monitor and the
DTR-6.2 enters the setup mode.
Setup menus
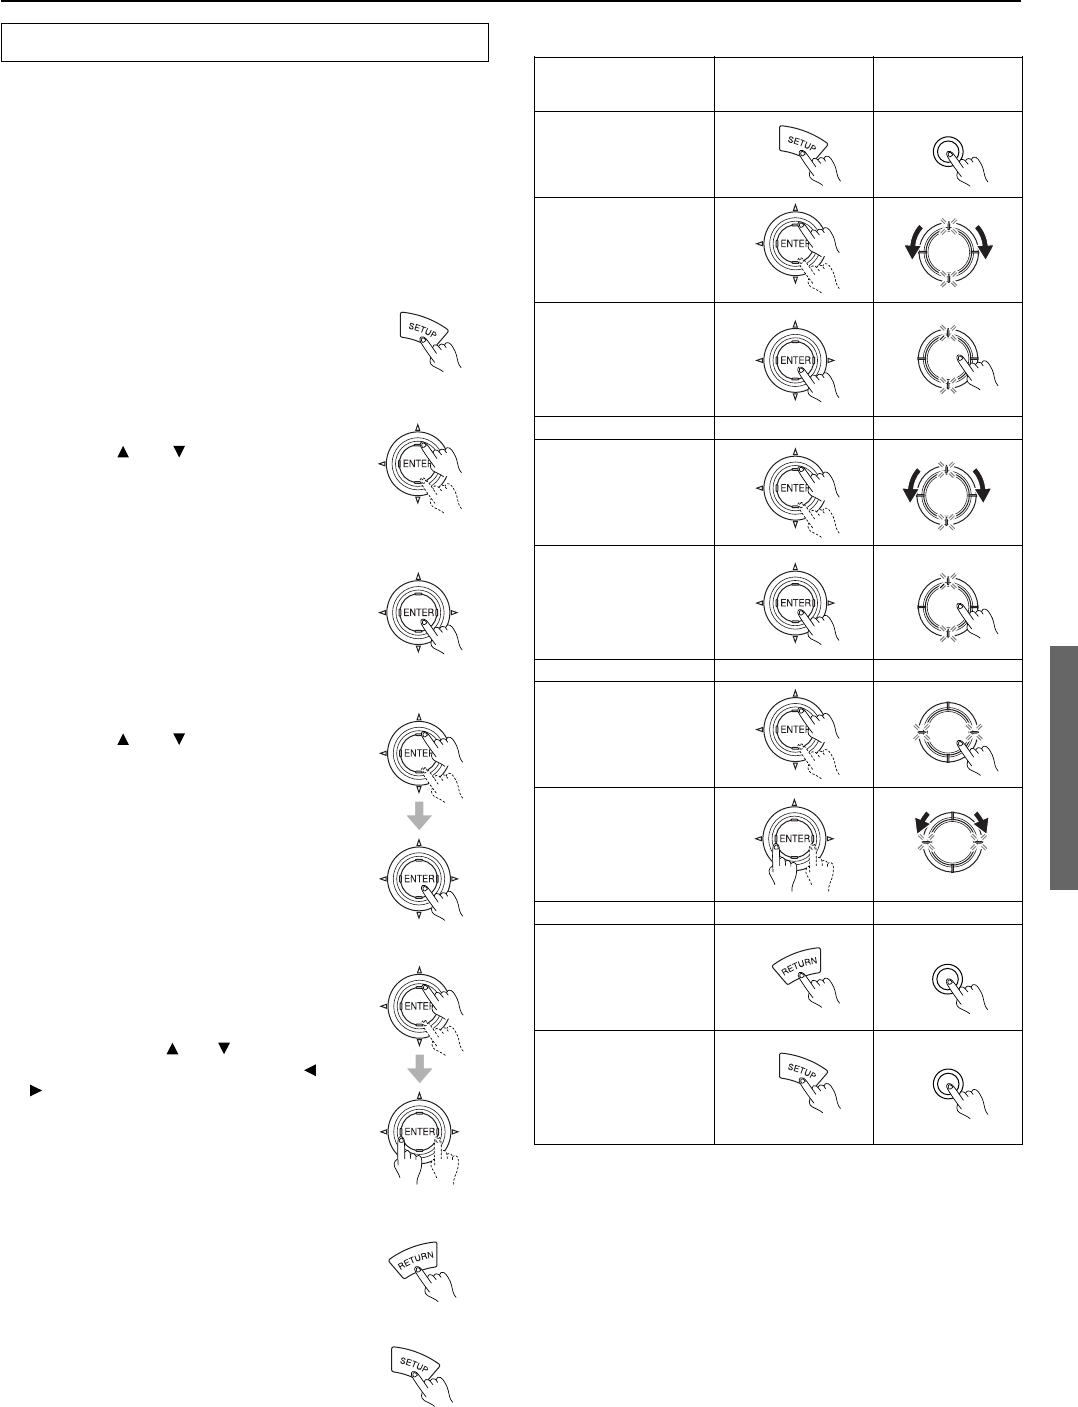
Navigating through the Setup menu
The explanations here assume you are using the buttons on the
remote controller when entering the Setup menu. However, you can
use the buttons on the DTR-6.2 as well. When using the buttons on
the DTR-6.2, refer to the table on the right and pages 24 to 26.
In addition to the display of the Setup menu on your television
monitor, the corresponding menu will also be displayed in the front
display on the DTR-6.2.
The buttons on the remote controller correspond to those on the
DTR-6.2 as shown on the right.
Setup
Setup
Push To Enter
DSP
/
Mode ADJ
Push To Enter
DSP
/
Mode ADJ
Push To Enter
DSP
/
Mode ADJ
Push To Enter
DSP
/
Mode ADJ
Push To Enter
DSP
/
Mode ADJ
Push To Enter
DSP
/
Mode ADJ
Return
5. Press the RETURN button to return
to the previous menu screen, and
again to return to the main screen.
Note:
Press the SETUP button to exit the Setup menu
immediately.
4. Using the and cursor buttons,
select the sub-menu that you want to
enter, and press the ENTER button.
3. Press the ENTER button to enter the
selected menu.
The screen for that menu appears.
2. Using the and cursor buttons,
select the menu that you want to
enter.
Each sub-menu has different settings that
can be changed as desired, and they are all
explained below. To change a setting, first
select it using the
and cursor buttons,
and then change the setting using the
and
cursor buttons.