


Wolf Cinema Owner's Manual
4-10
Section4►Maintenance
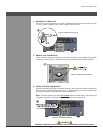
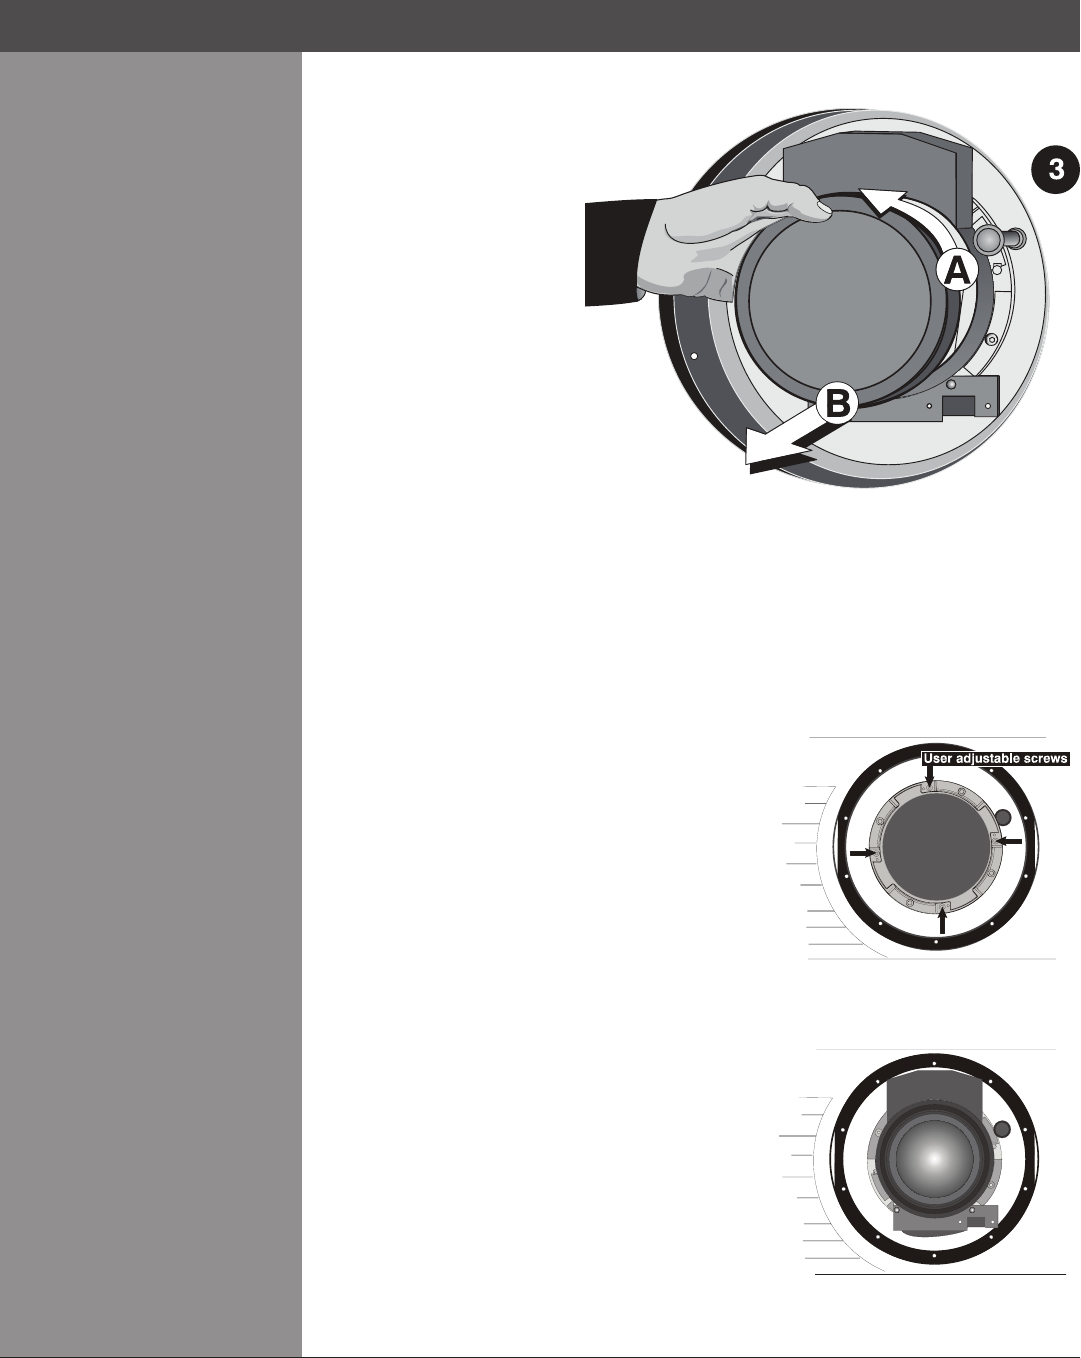
STEP 3 >
STEP 4 >
STEP 5 >
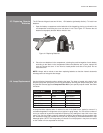
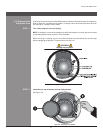
Rotate the lens
Rotate the lens counter-
clockwise until the tabs are
free from the lens retainer ring.
See Figure 4.10A.
NOTE: The connector slide
assembly allows the connector
to move as the lens is rotated.
Pull lens out
Lens connectors will disconnect
when you pull the lens straight
out from the projector. See
Figure 4.10B.
Insert new lens
NOTE: Remove small rear cap! Keep front cap on.
Electrical connector:• Line up male connector on the lens with the female connector on the
connector slide assembly.
Insert lens: • Align the tabs on the lens plate lock with the slots in the lens retainer ring. Push
the lens in approximately ½ inch.
Rotate the lens:• Rotate the lens clockwise until the tabs are tightly secured and the lens
release button CLICK.
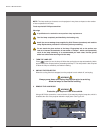
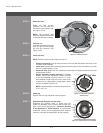
Secure lock-down screws (optional):• For added
stability, secure the adjustment screws provided
on the lens-retaining ring (see Figure 4.11). If you
have installed a large zoom lens, one or more of the
screws may be inaccessible—simply tighten those
that are accessible (Figure 4.12).
NOTE: Recommended for heaviest lenses such as
0.73:1 and 1.2:1.
Power Up
Remove the lens cap and power up the projector.
Reposition the Projector for New Lens
Reposition the projector closer or further from the
screen as necessary for the screen and the new lens
type – refer to lens descriptions in Section 2, Section
6 and Appendix D, Throw Distance. In a permanent
installation, always use the appropriate throw distance
formula to calculate the best position for the projector.
Figure 4.10. Rotating the Lens
STEP 6 >
Figure 4.11. Adjustable Screws on
Retaining Ring
Figure 4.10. View with Zoom Lens installed
STEP 7 >