53 Setting up
Device approval and conformity with EC directives
In its original condition the unit meets all currently valid
German and European regulations. It is approved for use
as stipulated within the EC.
By attaching the symbol to the machine,
de-
clares its conformity with the EC directives 89/336/EEC,
amended by 91/263/EEC and 93/68/EEC, and
73/23/EEC, amended by 93/68/EEC and the national
laws based on those directives.
The original, unaltered factory serial number must be pre-
sent on the outside of the unit, and must be clearly legible.
The serial number is a constituent part of our conformity
declaration and therefore of the approval for operation of
the device. The serial numbers on the device and in the
original
documentation supplied with it (in particular
the inspection and guarantee certificates), must not be
removed or modified, and must match exactly.
Infringing any of these conditions invalidates
con-
formity and approval, and the unit may not then be oper-
ated within the EC. Improper use of the equipment ren-
ders the user liable to penalty under current EC and
national laws.
Any modifications or repairs to the unit, or any other
intervention by a workshop or other third party not
authorised by
, invalidates the approval and opera-
tional permit for the equipment.
Only genuine
accessories may be connected to the
decoder, or such auxiliary equipment which is itself ap-
proved, and fulfils all currently valid legal requirements.
When used in conjunction with auxiliary devices or as
part of a system, this unit may only be used for the pur-
poses stated in the section entitled 'Approved usage'.
Care of the K6
Always disconnect the unit from the mains supply before
cleaning it. The surfaces of the case should be wiped
clean with a soft, dry cloth only. Never use abrasive or
solvent-based cleaners! Before switching the unit on
again check carefully that no short-circuits exist at the
terminals, and that you have not disturbed any connec-
tions.
Switching the remote control address
Switching the K6
If the K6 responds to the remote control commands in-
tended for another piece of equipment (TV or video re-
corder),it can be switched to an alternative remote control
address. This is the procedure:
Switch the K6 off, and then on again. Immediately after
switching on, press the left-hand select button under
the machine’s front panel, and hold it pressed in until a
running script appears on the integral screen.
Select
button
Change
buttons
Release the switch, and hold the left select button
pressed in again until the K6 switches to the next remote
control address. The message on the integral screen
('RC-ADR 1' or 'RC-ADR 2') tells you the address
(RC-ADR) to which the K6 has now switched.
Switching the remote control address
Now you must set up the address of the F6 RC handset
to match the K6:
Hold the
button and the numeric button
pressed in simultaneously. After about 10 seconds the
LED will flash. Now press the numeric button
or
.
Pressing the numeric button
sets the remote
control system to the standard RC address
( RC-ADR 1 ), whereas button
sets the alterna-
tive address ( RC-ADR 2 ). The LED goes out to confirm
that you have switched the setting.
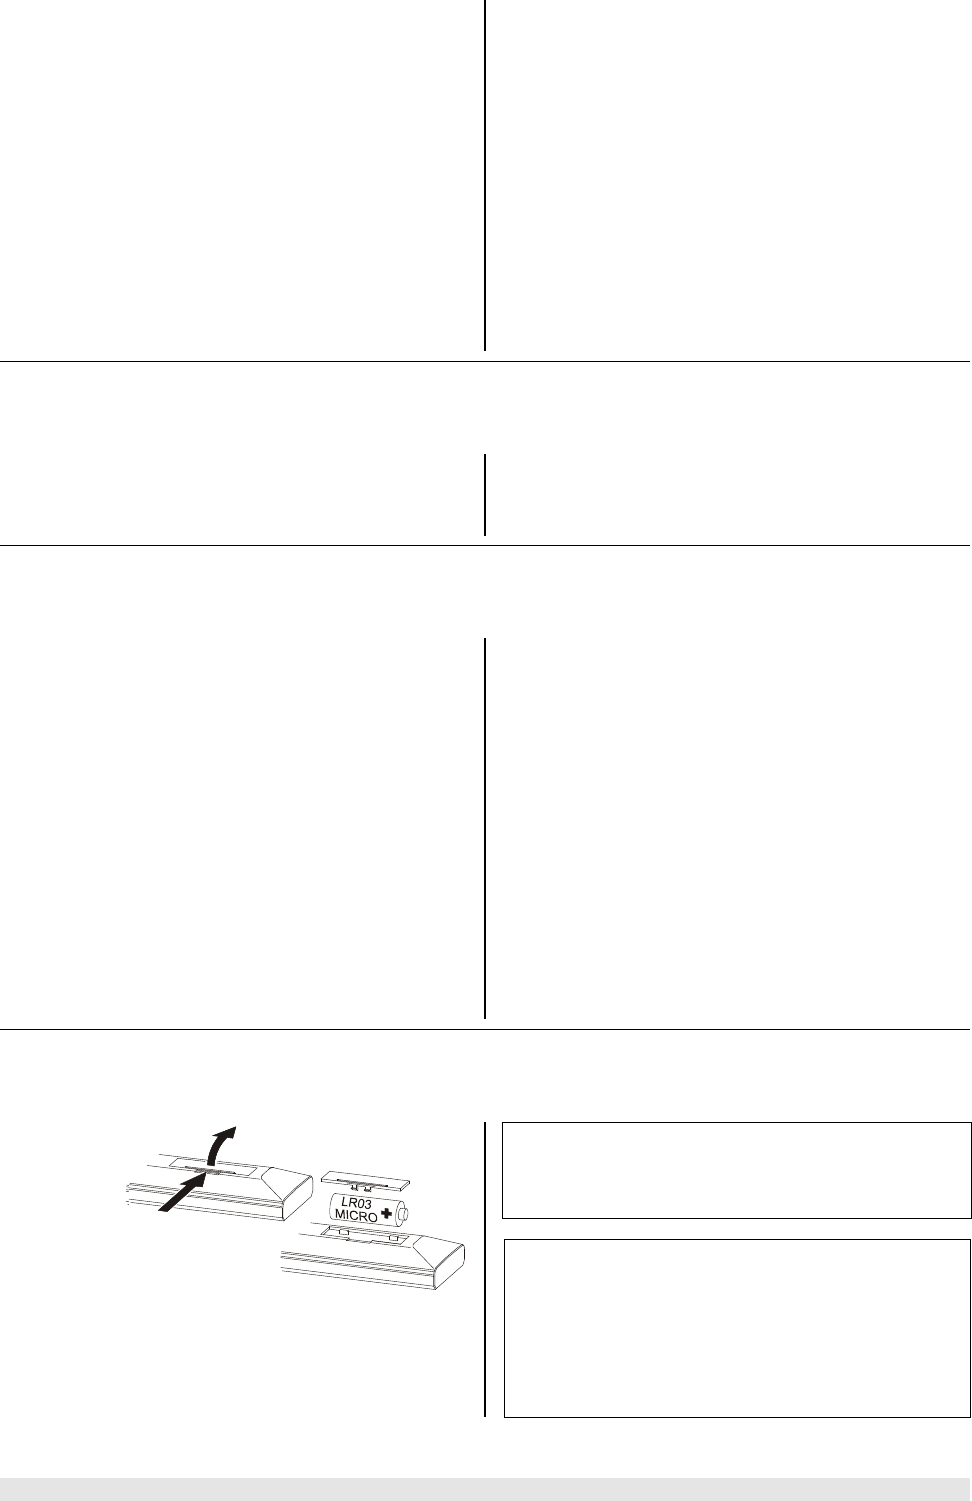
Changing the batteries
To open the
battery com-
partment
disconnect
the latch by
pressing in,
then lift the
cover out.
Remove the
old cells and fit three new dry cells of the LR 03 (MICRO)
type in the battery compartment, taking care to fit them
with correct polarity. Please remember that all the cells
must be replaced at the same time.
Note
If you have already re-set the remote control system to
Address 2 (see above), you will need to repeat the
change procedure after fitting new batteries.
Disposing of exhausted batteries
Exhausted batteries must never be thrown into the
household waste! They should be returned to the battery
vendor (specialist dealer) or your local toxic waste
collection point, so that they can be recycled or disposed
in a proper way. Most local authorities provide collection
centres for such waste, and some provide pick-up
vehicles for old batteries.


