


7
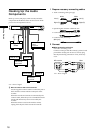
Location and Function of Parts
Preparation
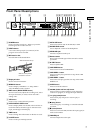
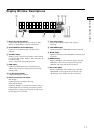
11 2 3 4 5 7 89q;qa qs6
qd qf qg qk ql wa ws wd wfqh qj w;
1 POWER button
Press to turn the recorder on. When you press the
button again, the recorder turns off.
2 INPUT selector
Use to select the input jack (or connector) of the
program source to be recorded.
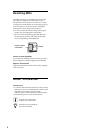
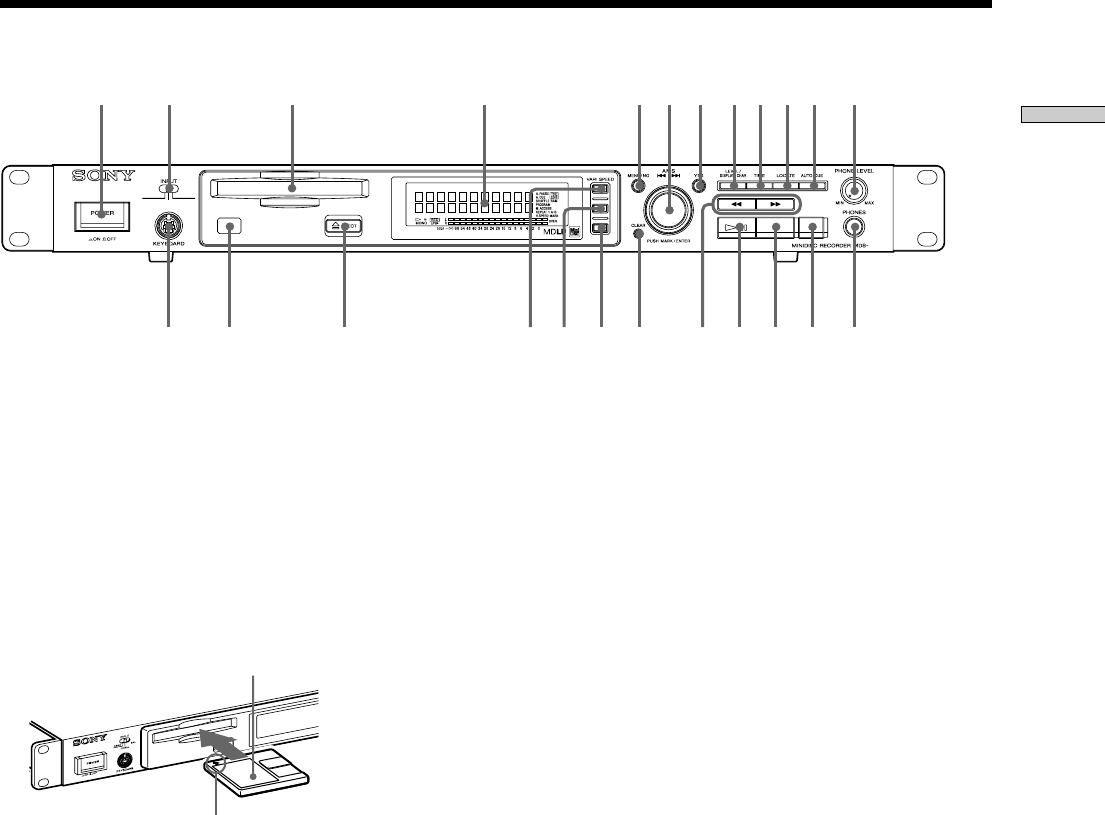
3 MD insertion slot
Insert the MD as illustrated below.
With the arrow pointing
towards the recorder
With the labeled side up
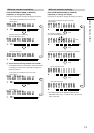
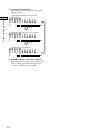
4 Display window
Shows various information.
5 MENU/NO button
Press to display “Edit Menu” or “Setup Menu.”
Also, the MENU mode is cleared.
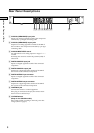
6 AMS control (MARK/ENTER button)
Turn to locate tracks, adjust the recording level, select
the input characters, or select a menu item and a
setting value.
7 YES button
Press to carry out the selected operation.
8 LEVEL/DISPLAY/CHAR button
Press to display INPUT or OUTPUT level and disc or
track information, select the type of characters to be
input, and change to time display.
9 TIME button
Press to change time information on the disc or track.
0 LOCATE button
Press to locate pre-marked positions.
!¡ AUTO CUE button
Press to set AUTO CUE, AUTO PAUSE, or OFF.
!™ PHONE LEVEL control
Use to adjust the volume of the headphones.
!£ KEYBOARD jack
Connect a keyboard to this jack.
!¢ Remote sensor
Receives the infrared signal of the remote for remote
operations.
!∞ Z EJECT button
Press to eject the MD.
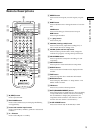
!§ VARI SPEED button
Press to turn on and off VARI SPEED.
!¶ VARI SPEED + button
Press to increase play speed at 0.5% step when VARI
SPEED is on.
!• VARI SPEED _ button
Press to decrease play speed at 0.5% step when VARI
SPEED is on.
!ª CLEAR button
Press to cancel the selection.
@º m/M (backward/forward) button
Press to lacate a portion whithin a track, change the
contens of a program, or change the input character.
@¡ 7 (play/pause) button
Press to start play and pause or resume play or
recording.
@™ x (stop) button
Press to stop play or recording, or cancel the selected
operation.
@£ z (record) button
Press to record on the MD, monitor the input signal, or
mark track numbers.
@¢ PHONES jack
Connect headphones to this jack.
Front Panel Descriptions