19
Recording on MDs
Notes on Recording
When “ Protected” is displayed
The MD is record-protected. To record on the MD, slide
the tab to close the slot (see “To prevent accidental erasure
of the recorded material” on page 19).
When the record-protect slot is closed and recording is
possible, “Protected” may be displayed and recording may
not be possible. In this case, press z (record) again to
enable recording.
When “Din Unlock” flashes
• The digital component selected with the INPUT selector
is not connected correctly. Connect the component
correctly.
• The selected digital component is not turned on. Turn
on the component.
Marking track numbers depends on the program
source to be recorded.
• When the CD or MD is a program source and they are
recorded through the digital input connector, track
numbers are marked similarly with the CD or MD as the
program source. However, only one track number may
be marked on the recorded portion as below.
- A portion recorded by repeating the same track of the
same disc (by one track repeat)
- A portion recorded by continuing the same track
number of a different disc
When the MD is the program source, a number for a
track of 4 seconds or less may not be marked.
• If the sampling frequency of the input connector changes
when the DAT tape is a program source and it is
recorded through the digital input connector, track
numbers are changed automatically.
When TOC indicator flashes
Do not turn off the recorder, disconnect the AC power, or
move the recorder when recording on the MD because the
recording will be lost. If you turn off the recorder or
disconnect the AC power immediately after recording, the
recording will be lost.
When PLAY MODE is “PROGRAM,” “SHUFFLE,” or
“M.ACCESS” (pages 32, 33, 34)
PLAY MODE changes automatically to “CONTINUE” and
recording pauses.
When ”Cannot Copy” flashes
The mini-disc recorder conforms to the Serial Copy
Management System. MDs recorded through the digital
input connector cannot be copied to other MDs through
the digital output connector (page 61).
Operations you may want to do during recording
To Press
Stop recording x
Pause recording 7
Resume recording after 7
Eject the MD after stopping recording A
Changing display during recording
Press LEVEL/DISPLAY/CHAR (DISPLAY) repeatedly.
For the contents of display, see “Using the Display
Window” on page 12.
When you pause recording
The track number increases by one. For example, if you
pause recording while recording track 4, the track number
will be 5 when you resume recording.
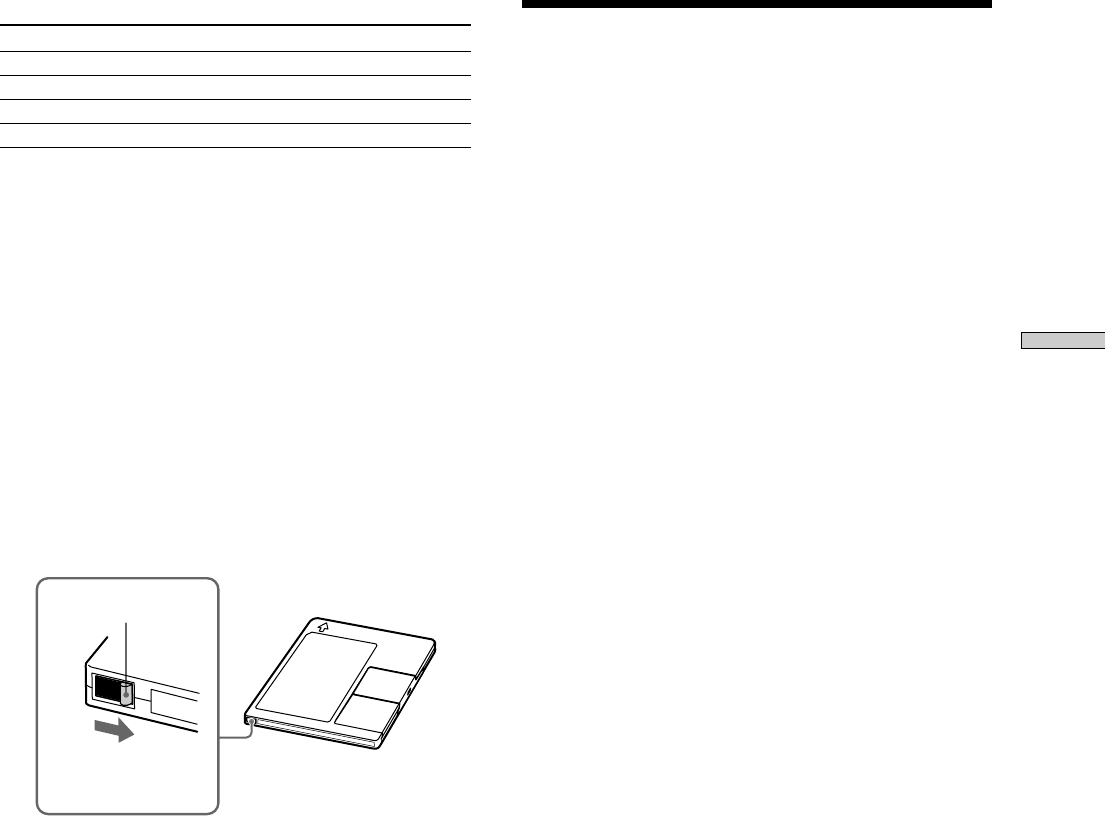
To prevent accidental erasure of the recorded
material
To make it impossible to record on an MD, slide the
record-protect tab in the direction of the arrow (see
illustration below) to open the slot. To enable recording,
close the slot.
Record-protect tab
Slide in the direction
of arrow
z You can play the tracks you have just recorded
Press 7 or AMS immediately after stopping
recording.
The recorder starts to play from the first track of the
material just recorded.
z You can play from the first track of the MD after recording
1 Press x again after stopping recording.
2 Press 7
The recorder starts to play from the first track of the
MD.
Notes
• You can’t record over existing material when Shuffle
Play (page 32), Program Play (page 33), or Multi-access
Play (page 34) has been selected. “Impossible” appears
in the display at this time.


