


115
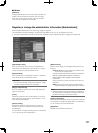
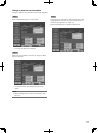
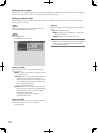
Step 5
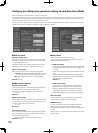
Set the start point of the detection area.
Move the cursor to the desired start point, and click the
mouse button.
Step 6
Set the end point of the detection area.
Move the cursor to the desired end point, and click the
mouse button. To determine the detection area, select the
[Back] button.
Note:
• Detectionareaswillbesetaccordingtothegridforthe
detection areas of the SD5 camera. It may be possible
that the actual detection areas will not be exactly the
same as the designated start and end points.
• Upto2areasfor"Motiondet."and"Objectdet."respec-
tively by repeating Step 4 to 6.
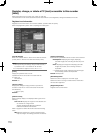
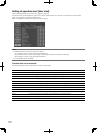
Note:
• Todeleteasetdetectionarea,selectthe[Areadelete]
tab on the setup page for camera's i-VMD function, and
click the [Delete] button of the area (White/Blue/Green/
Red) to be deleted.
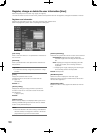
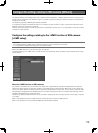
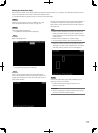
Step7
Set the size of an object to be detected ("Size").
It is possible to apply the setting to "Motion det." and
"Object det." respectively.
Off: Detects any moving objects regardless of the size.
Small/Medium/Large:Determines the minimum size of
an object to be detected by the SD5Link camera.
On(Depth): Enables the depth correction function of the
SD5 camera.
Refer to page 117 for further information about how
to set the detection depth.
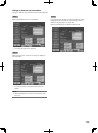
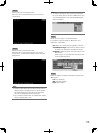
Step 8
Select the detection sensitivity of the detection areas set for
"Motion det.".
Low: Low sensitivity
Mid:Standard sensitivity
High: High sensitivity