


36
Notes:
• VMD should be used with an ordinary camera input
to the unit. Select [OFF] to avoid useless VMD when
a video multiplexer or combination camera supplies
the input to the unit.
• Set the ALARM SUSPEND to ON when VMD is
unnecessarily activated during the VMD setup.
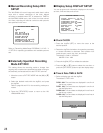
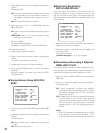
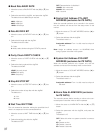
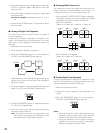
4. Set the upper-left end of the detection area. Move the
asterisk to the right or left with the JogDial, and up or
down by pressing the [D] or [C] button.
5. Press the JogDial to enter the upper-left end of the
detection area. The asterisk position is highlighted.
6. Set the bottom-right end of the detection area similar to
steps 3 and 4 above.
7. Press the JogDial. The area is highlighted.
Up to 4 areas can be selected. These may partially
overlap. Repeat steps 3 to 6 to select more areas. To
deselect an area, move the cursor to the upper-left end
of the area, and press the JogDial.
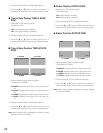
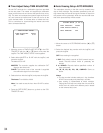
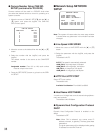
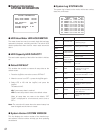
■ Communication Setup
COMMUNICATION SETUP
Communication parameters are set to match those of the
connected devices and the system configuration. The serial
port setup and network setup are made.
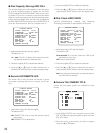
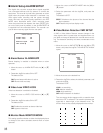
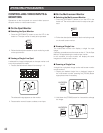
■ Serial Setup SERIAL SETUP
The SERIAL SETUP menu appears when it is selected in
the COMMUNICATION SETUP menu.
Note: Parameters marked with * in the following pages are
default settings applied to VCR.
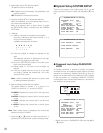
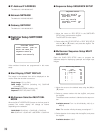
● Protocol PROTOCOL
1. Move the cursor to PROTOCOL with the [D] or [C] but-
ton.
2. Select a suitable protocol with the JogDial, and press
the JogDial.
The default is PS
•
DATA.
PS
•
DATA: Select when the communication chain uses
the PS
•
DATA protocol.
This selection enables the DATA terminal on the
rear panel for communication.
VCR: Select when other than PS
•
DATA is used.
This selection enables the RS-232C terminal on the
rear panel for communication.
Note: Parallel use of the DATA and RS-232C terminals
is not possible.
*
CAM1
PUSH • PAUSE
/
/
SET
REW/FF
/
STEP
/
q
w
e
r
SERIAL SETUP
PROTOCOL PS•DATA
BAUD RATE 9600
DATA BIT 8
PARITY CHECK NONE
STOP BIT 1
WAIT TIME OFF
CTL-UNIT ADDR 1
SYS-UNIT ADDR 1
ALARM DATA 1S
CAM NO.SETUPO
COMMUNICATION SETUP
SERIAL SETUPO
NETWORK SETUPO