


29Tact Audio
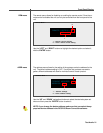
1 - Connect the RS 232 “Input” jack on the back of the RCS 2.0S to your
computers serial port using the supplied cables and adapters.
NOTE: These instructions assume that you have already established
communication between the RCS 2.0S and the Room Correction Software
on your computer. See page 25.
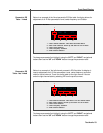
2 - If you have one or more TacT M2150/S2150 digital amplifiers connect
them to the RCS 2.0S. Please make sure that a unique address has
been set for each device. For further instructions please refer to your
M2150/S2150 owner’s manual.
CAUTION: To avoid damage through static discharge, we strongly
recommend to turn off the RCS 2.0 S at the rear panel mains switch
before connecting the microphone.
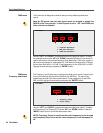
3 - Make sure that the RCS 2.0S is powered off from the rear panel mains
switch and connect the supplied measurement microphone to the “Mic Input”
connector on the back of the RCS 2.0S. Place the mic at the primary listening
position at the height of your head. This will require a microphone stand, or
something similar.
4 - Turn your RCS 2.0S on.
5 - Set the OUT setting for the RCS 2.0S. This is the speaker
configuration your system will be using. Please refer to page 18 for more
information and instructions.
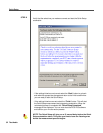
6 - Turn on your computer and start the TacT 2.0S Correction Software. If you have
not installed the software please see page 24 for instructions.
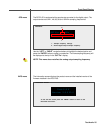
7 - Enable your microphone if you are using the Tact microphone that came with
your unit. To enable or disable the microphone click on the “mic:” display
window found on the main screen with your left mouse button to toggle its
setting. When the microphone number is displayed it is enabled. If you have
not installed your microphone please see page 24 for instructions.
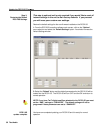
Quick Setup
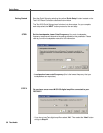
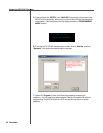
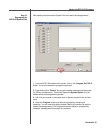
The Tact 2.0S Quick Setup wizard is designed to help both the first time and
experienced user perform complete room correction and create nine correction
presets quickly and easily. To perform the Quick Setup successfully you will need
to know your speaker configuration, your loudspeakers lower cut-off frequency, and
the type of amplifier(s) that you have connected. This information will allow the
Quick Setup to automate the room correction process for you so that you can
begin enjoying the benefits of room correction immediately. For a detailed
explanation of all of the software features and instruction for performing room
correction manually please see the online help available in the software.
Before You Begin