159
Editing a Sample
4.
Either turn the VALUE dial or use [INC][DEC] to set the
value.
•
1–16:
The sample or silence to be combined
•
TYPE
Value
Sample:
sample,
Time:
silent region (specified as time),
Beat:
silent region (specified as a note value)
•
BANK
(Bank that contains the sample)
Value
U:
user,
C:
card
* This will be displayed only if TYPE is set to Sample.
•
PRM
(Sample number, or the duration/note value of the silent
region)
Value:
1–10000 ms (if TYPE is set to Time), note value: 1/
32, 1/16T, 1/16, 1/8T, 1/8, 1/4T, 1/4, 1/2, 1/1, 2/1
(if TYPE is set to Beat)
The note value is based on the BPM of the sample immediately
before the silent region.
* If there is no sample immediately before the silent region, the current
BPM will be used.
5.
Use [CURSOR] to select a parameter and repeat step 4.
You can press [F6 (Preview)] to audition the selected sample.
6.
Press [F6 (Exec)].
A message will ask you for confirmation.
7.
To execute, press [F8 (Exec)].
* To cancel, press [F7 (Cancel)].
A newly loaded sample, as well as any changes you’ve made in the
settings for a sample will be lost as soon as you turn off the power. If
you want to keep such data, you must save it as follows.
1.
Press [SAMPLE EDIT].
2.
Press [F1 (Sample List)].
Samples displayed as “NEW” or “EDIT” have not yet been
saved.
3.
Select the sample that you want to save.
If you want to select two or more samples, press [F5 (Mark Set)]
to add a check mark (
✔
) to the samples that you want to select.
To remove the check mark, press [F4 (Mark Clear)].
If you hold down [SHIFT] and press [F5 (Mark Set All)], a check
mark will be added to all samples of the selected bank. If you
hold down [SHIFT] and press [F4 (Mark Clr All)], check marks
will be removed from all selected samples.
The edit screen for the selected sample will appear.
You can press [F8 (Preview)] to audition the selected sample.
4.
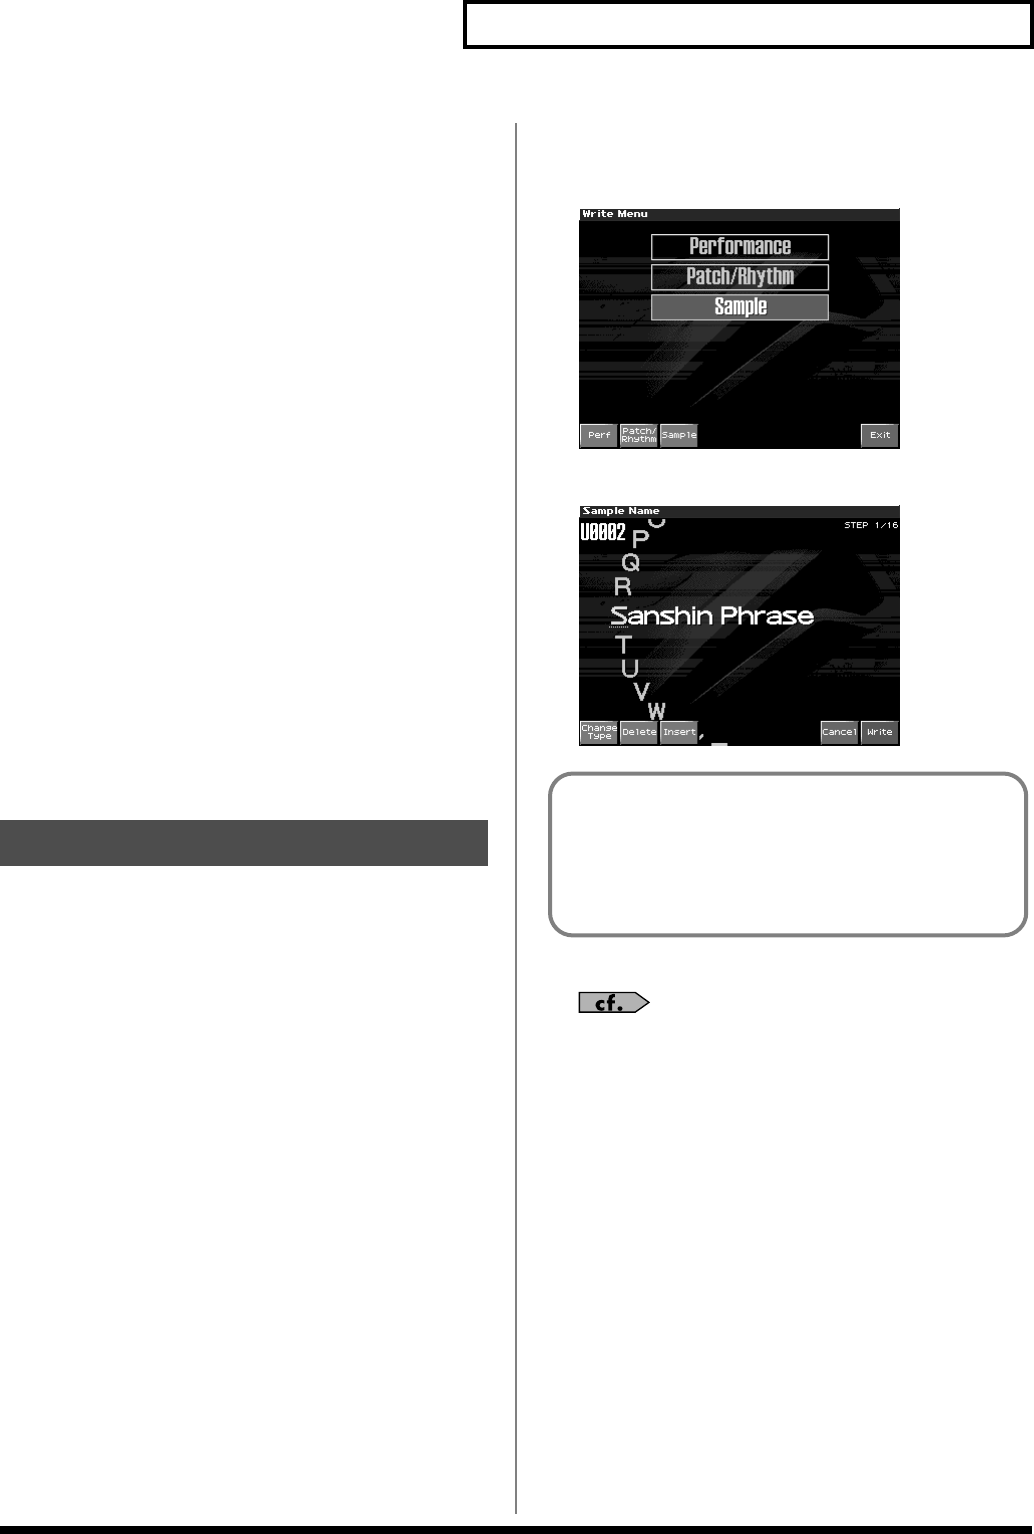
Press [WRITE].
The Write Menu screen will appear. Make sure that “Sample” is
highlighted.
fig.15-023_50
5.
Press [F3 (Sample)] or [ENTER].
fig.15-024_50
6.
Assign a name to the sample.
For details on assigning names, refer to
“Assigning a Name”
(p. 36)
7.
When you have finished inputting the name, press [F8 (Write)].
A screen will appear allowing you to select the write-
destination sample.
8.
Turn the VALUE dial, or use [INC][DEC] or [F2 (User)][F3
(Card)] to select the write destination and sample number.
The write destination can be either the Fantom-X’s internal user
memory (User), or a memory card (Card).
9.
Press [F8 (Write)].
A message will ask you for confirmation.
Never switch off the Fantom-X while data is being saved.
10.
Press [F8 (Exec)] to execute the save operation.
* To cancel the operation, press [F7 (Cancel)].
• You can't save by overwriting another sample.
• Stereo samples must be saved to two consecutive sample
numbers.
Saving a Sample
If you have selected more than one sample, a message will ask
you to confirm the writing operation. Samples will be written
into the identical number corresponding to each bank of the
sample list. Sample names will be assigned automatically. If
you want to write the samples, press [F8 (Exec)]. If you decide
to cancel, press [F7 (Cancel)].
Fantom-X678_r_e.book 159 ページ 2005年5月12日 木曜日 午後4時40分
