


DIRECTV SYSTEM FROM HUGHES NETWORK SYSTEMS - OWNER’S MANUAL
PAGE 4-18
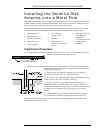
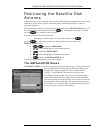
Pointing the Satellite Dish Antenna Using the “Box”
Method
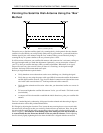
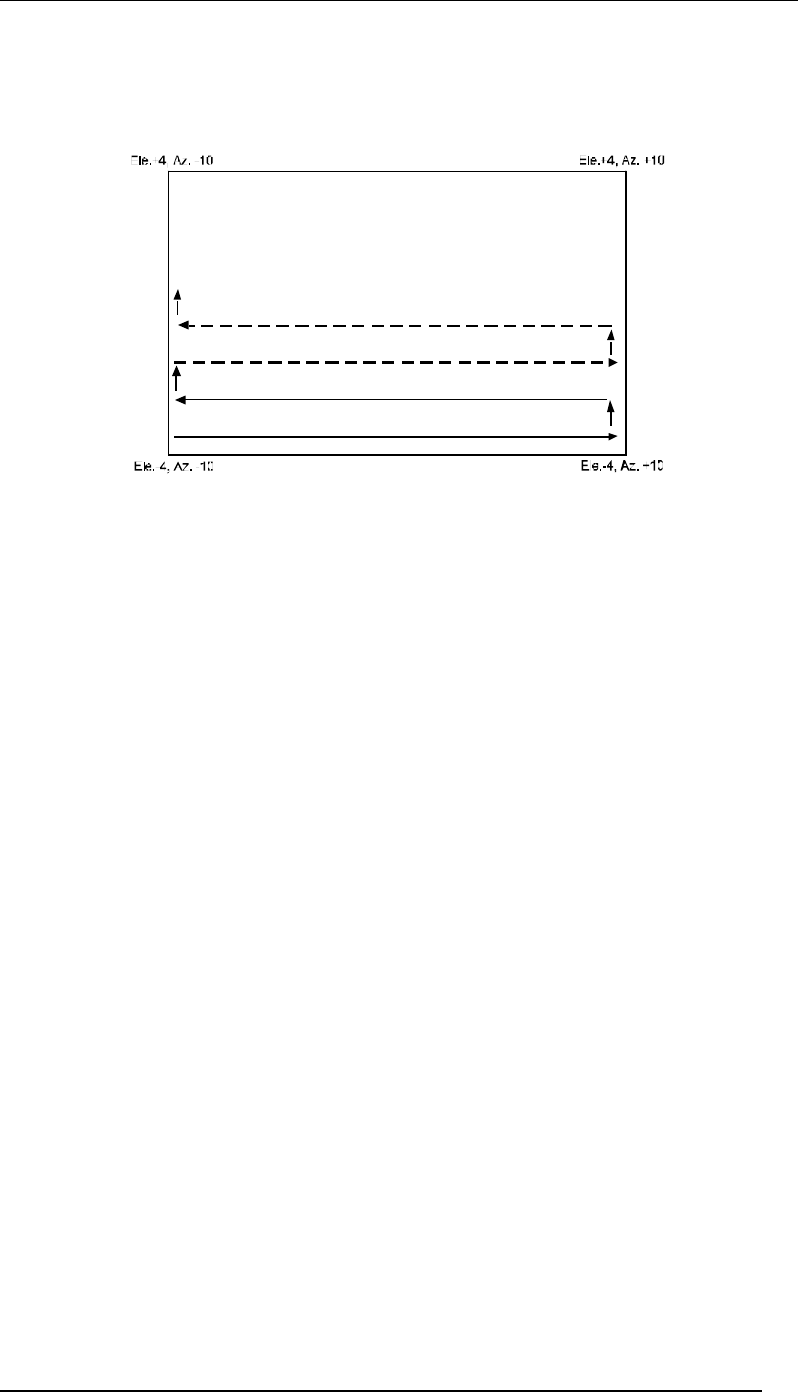
The easiest way to find the satellite signal is by scanning the sky in the general direction that the
satellite is located. While you could possibly achieve this by trial and error, you should be able to
find the signal in just a few minutes using the “box” method. What you are effectively doing is
scanning the sky in a pattern similar to the way a farmer plows a field.
It will be easiest to fine-tune your satellite dish antenna with someone else’s assistance, calling out
the signal strength while you make the adjustments. Optionally, you can turn up the volume of
your TV so that you can hear the beeps while you make adjustments. When there is no signal,
beeps will occur every few seconds so that you know it is searching. As the signal strength
increases, the beeps will become much more rapid.
Before you begin make these quick checks:
• Verify that there are no obstructions such as trees, buildings, etc., blocking the signal.
• Verify that you are using the proper cable type (RG-6) between the satellite dish antenna
and the digital satellite receiver. Also, be sure that the connections are tight and the center
wire in the cable extends about 1/8
th
-inch beyond the end of the connector.
• Verify that the azimuth and elevation values that you determined earlier are correct for
your area.
• To loosen and tighten the satellite dish antenna’s bolts, you will need a 7/16-inch wrench
(not included).
• A compass will also be needed to establish the initial direction to point your satellite dish
antenna.
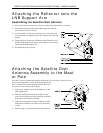
The “box” method begins by subtracting 10 degrees from the azimuth and subtracting 4 degrees
from the elevation values that you determined earlier.
We’ll begin by adjusting the elevation. First, loosen the nuts securing the two (one on each side)
elevation bolts just enough so that you can easily tilt the reflector up and down. Next, line up the
elevation indicator with the tick mark corresponding to the elevation calculated earlier (result
minus 4 degrees). This indicator is the leading edge of the metal just to the left of the bolt. It
is recessed inside the slot. Do not use the bolt or nut as a point of reference. Finish adjusting
the elevation by lightly tightening the bolts when the indicator is aligned with the correct tick
Pattern of scanning the sky