


Configuration and Firmware Update
61
MAX-CSE/MAX-CSD10 Operation/Reference Guide
6. Press the Submit button to begin the process of uploading and incorporating the new firmware
component to the target MAX unit.
7. Once the browser’s progress bar indicates it’s completed the upload and incorporation of the new
firmware, click the IP Settings button in the Navigation Bar.
8. From the top of the IP Settings page, click the Reboot button to restart the unit and incorporate the
new firmware.
9. After the unit completes its reboot process, connect back to MAX unit via the browser-based UI and
confirm the new firmware has been successfully installed.
Upgrading MAX-CSD10 Firmware - via the UI
1.
Download the latest MAX Decoder firmware file from ww.amx.com > Tech Center > Firmware
Files.
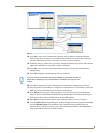
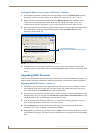
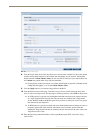
2. From the Decoder Manager UI, click on the Admin link to open the Administration page if it is not
already open.
3. Click the Upload a File button to select the firmware file.
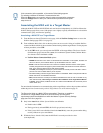
Upgrading the MAX’s Firmware - via NetLinx Studio
1.
Follow the procedures outlined within the Communicating with the Target Master via an IP section
on page 52 to connect to the target NI device via the web.
2. Navigate to the NetLinx Settings page of the UI and complete the steps necessary to "point" the
MAX unit to a particular target Master. Refer to the Associating the MAX unit to a Target
Master section on page 54 for the detailed procedures.
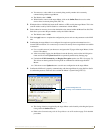
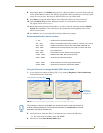
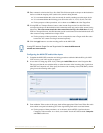
3. After Studio has established a connection to the target Master, click the OnLine Tree tab of the
Workspace window to view the devices on the System. The default System value is one (1).
4. Right-click the associated System number and select Refresh System. This establishes a new
connection to the specified System and populates the list with devices on that system. The
communication method is highlighted in green on the bottom of the NetLinx Studio window.
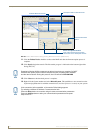
5. After the Communication Verification dialog window verifies active communication between the
PC and the target Master, verify the MAX unit appears in the OnLine Tree tab (FIG. 38) of the
Workspace window.
6. Verify you have downloaded the latest MAX firmware file by first logging into ww.amx.com >
Tech Center > Firmware Files. From within the MAX section of the web page, locate the Encoder
entry.
7. Click on the desired Kit file link and after you’ve accepted the Licensing Agreement, verify you
have downloaded the MAX firmware Kit file to a known location.
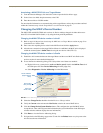
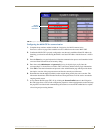
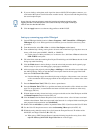
8. From within Studio, select Tools > Firmware Transfers > Send to NetLinx Device from the Main
menu to open the Send to NetLinx Device dialog (FIG. 39). Verify the target’s System number
matches the value listed within the active System folder in the OnLine Tree tab of the Workspace.
9. Select the particular MAX unit’s kit file from the Files section (FIG. 39).
10. Enter the System and Device numbers associated with the target MAX unit (listed in the Workspace
window). The Port field is greyed-out.
For the specific procedures for uploading a firmware file for the MAX-CSD10, refer to
the Updating Firmware section on page 42.