


Configuring Communication
57
MAX-CSE/MAX-CSD10 Operation/Reference Guide
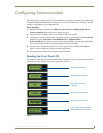
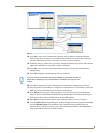
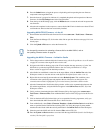
8. On the target Master, click Reboot (from the Tools > Reboot the Master Controller dialog) and wait
for the System Master to reboot. The STATUS and OUTPUT LEDs should begin to alternately blink
during the incorporation. Wait until the STATUS LED is the only LED to blink.
9. Press Done once until the Master Reboot Status field reads *Reboot of System Complete*.
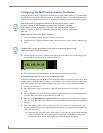
10. Click the OnLine Tree tab in the Workspace window to view the devices on the System.
The default System value is one (1).
11. Right-click the associated System number (or anywhere within the tab itself) and select Refresh
System. This establishes a new connection to the specified System and populates the list with
devices on that system.
12. Use Ctrl+S to save your existing NetLinx Project with the new changes.
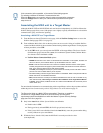
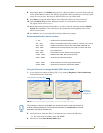
Recommended NetLinx Device numbers
Using the ID button to change the MAX-CSE’s Device Value
1.
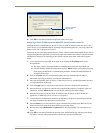
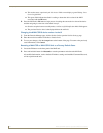
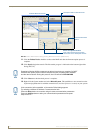
Access the Device Addressing dialog (FIG. 37) by selecting Diagnostics > Device Addressing
from NetLinx Studio’s main menu.
2. Locate the Device field (A in FIG. 37) and enter the new value for the MAX unit.
This value must fall within a range of 0 - 32767.
3. Press the on-screen Start Identify Mode button.
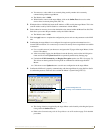
• 1 - 255 • Axcess Devices use Axcess standards
• 301 - 3072 • NetLinx CardFrames start at frame number 25 - (frame# * 12) + Card #
• 5001 - 5999 • ICSNet and IP NetLinx devices: NXI, NXM-COM2, NXM-IRS4, etc.
• 6001 - 6999 • ICSNet and IP Landmark devices: PLH-VS8, PLH-AS16, PLB-AS16
• 7001 - 7999 • InConcert Devices
• 8001 - 8999 • PCLink Device: PCLink devices are PC programs
• 10000 - 31999 • ICSNet Panels: DMS, IMS, and future panels
• 33001 - 36863 • Virtual devices: these start at 33001
• 32001 - 32767 • Dynamic devices: the actual range used by Master
• 32768 - 36863 • Virtual devices: the actual range used by Master
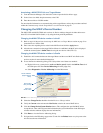
FIG. 37
Device Addressing dialog (using the ID mode to set the MAX device value)
Enter the new Controller value
Assign the
new value to
the MAX unit
A
B
The ID button on the front of the MAX unit can also be used to reset the unit back to
its factory-default parameters. Press and hold the button for 10 seconds to reset the
parameters and reboot the MAX unit.