


40 En
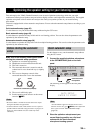
Optimizing the speaker setting for your listening room
Use this feature to review the result of the automatic setup.
You can also reload the automatic setup parameters in case
you are not satisfied with the speaker setup and sound
adjustments you have configured manually.
If you reload the automatic setup parameters, the settings you
have configured manually are cleared. To save the settings
before reloading the automatic setup parameters, see “System
Memory” (page 108).
1 Set the operation mode selector to FAMP
and then press IMENU.
The GUI menu appears in the video monitor.
y
If the menu directory other than “Top Menu” (page 84) is
displayed, press and hold IMENU to display the top GUI
menu.
2 Press 9k / n repeatedly to select “Setup”
and then press 9h.
3 Press 9k / n repeatedly to select “Auto
Setup” and then press 9h.
4 Press 9k to select “Information” and then
press 9h.
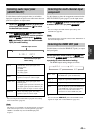
5 Press 9k / n repeatedly to select the
parameter of which you want to check the
setting.
Reviewing and reloading the
automatic setup parameters
Note
Parameter Descriptions
Multi Measure
(Multiple point
measurement)
Displays the number of listening position
actually measured.
Wiring
(Speaker wiring)
Displays the polarity of each connected
speaker.
– “NRM” appears when the polarity of the
connected speaker is normal.
– “REV” appears when the polarity of the
connected speaker is reversed.
– “DET” appears when this unit detects the
subwoofer is connected.
– “–––” appears when no speaker is
connected to the corresponding speaker
channel.
Distance
(Speaker
distance)
Displays the speaker distance from the
listening position. Press 9h repeatedly to
switch the unit to display the value of the
each speaker distance.
Size
(Speaker size)
Displays the size of the connected speakers
and the bass cross over frequency (“Cross”).
– “LRG” appears when the connected
speaker has the ability to reproduce the
low-frequency signals effectively.
– “SML” appears when the connected
speaker does not have the ability to
reproduce the low-frequency signals
effectively.
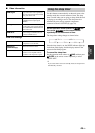
Equalizing
(Speaker
equalizing)
Displays the result of the adjustment of the
frequency responses of each connected
speaker. You can switch the parametric
equalizer type that appears in the result
display by pressing 9h repeatedly in the
“Equalizing” result display. To apply the
result that is displayed in the display, press
9ENTER.
Choices: Natural, Flat, Front
– Select “Natural” to average out the
frequency response of all speakers with
higher frequencies being less
emphasized. Recommended if the “Flat”
setting sounds a little harsh.
– Select “Flat” to average the frequency
response of all speakers. Recommended
if all of your speakers are of similar
quality.
– Select “Front” to adjust the frequency
response of each speaker in accordance
with the sound of your front speakers.
Recommended if your front speakers are
of much higher quality than your other
speakers.
Level
(Speaker level)
Displays the result of the adjustment of each
connected speaker output level. You can
display the result of the adjustment of the
speaker level for each parametric equalizer
type (see above) by pressing 9h
repeatedly. Select “Through” to display the
result when this unit does not use the
parametric equalizer.
Angle
(Speaker angle)
Displays the angles of the front speakers,
surround speakers, and front presence
speakers.