


37 En
Optimizing the speaker setting for your listening room
PREPARATION
5 If you have finished the settings, press 9l
to return to the previous menu level and then
press 9n to select “Start”.
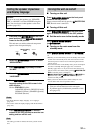
6 Press 9ENTER to start the measurement.
This unit starts to count down from 10 seconds.
y
• To start the measurement immediately, press 9ENTER
again.
• To cancel the automatic setup and return to the previous
screen, press ?RETURN and then 9ENTER.
Loud test tones are output from each speaker during
the measurement.
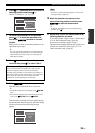
If you have selected “Angle” in step 4, the following
screen appears. Proceed to step 7.
If you have not selected “Angle” in step 4,
“Measurement Completed Successful” appears once
all items are measured. Skip to step 11.
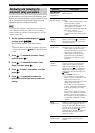
If an error or warning message appears, see “Error and
warning messages” (page 38).
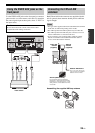
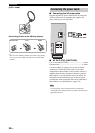
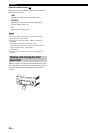
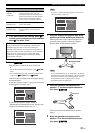
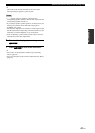
7 Place the supplied microphone base at the
position you will be seated most frequently.
Make sure that the arrow on the microphone base
points the center speaker or about the midpoint
between the front left and right speakers.
It is recommended that you use a tripod (etc.) to affix the
microphone base at the same height as your ears would be
when you are seated in your listening position. You can
use the attached screw of a tripod (etc.) to fix the
microphone base to the tripod (etc.).
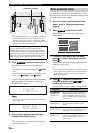
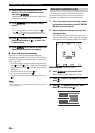
8 Place the optimizer microphone to the
position “1” on the microphone base and
then press 9ENTER.
This unit starts the measurement of the speaker
angles.
9 Move the optimizer microphone to the
position “2”on the microphone base and
then press 9ENTER.
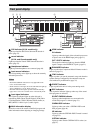
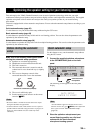
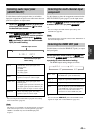
Equalizing
(Speaker
equalizing)
Parametric equalizer adjusts the level of the
specified frequency bands. This unit
automatically selects the crucial frequency
bands for the listening room and adjusts the
level of the selected frequency bands to
create a cohesive sound field in the room.
Level
(Speaker level)
This unit checks and adjusts the volume
level of each speaker.
Angle
(Speaker angle)
Checks the angles of the front speakers,
surround speakers, and front presence
speakers.
Before proceeding next operation
Once you perform the next operation, this unit starts the
automatic setup procedure in 10 seconds. During the
automatic setup procedure, do not perform any operation on
this unit. For more accurate measurements, we recommended
that you get out of the room or move to the wall where
speakers are not around during the measurement. It takes
approximately 3 minutes.
Parameter Descriptions
1
3
2
Equalizing
Level
Angle Check
Angle
Result
Put the microphone at
1st listening position
Next:ENTER
[ ]
Angle Check
Angle
Result
Measurement Completed
Successful
Detail:
Exit:ENTER
Note
Note
Pre Check
Main Check
Wiring
Retry
Exit Detail
E09:User Cancel
FRONT
DIRECTION
Microphone base