56
Remember: After making changes to the settings press/click the APPLY button.
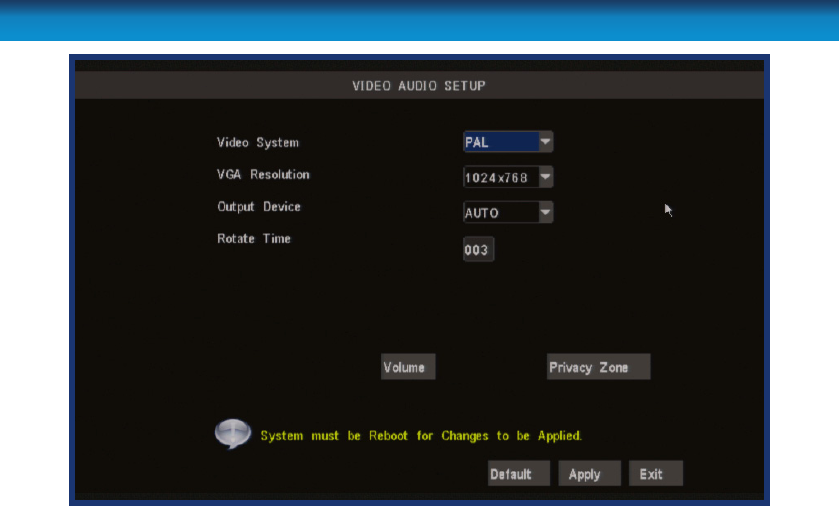
Video / Audio Setup Menu
Video System: Here you can choose between PAL and NTSC. PAL is used in Western
Europe and Australia, NTSC is used in the US, Canada and Japan. If the
DVR’s picture is black and white, ickering or similar, then this is probably
caused by the video system being set incorrectly.
VGA Resolution: This setting will determine how detailed the image sent to a VGA compatible
monitor (connected via the VGA port on the rear of the DVR) will be. The term
VGA is somewhat of an anachronism, referring to the plug-type, not to the
actual resolution. The DVR can be set to four dierent resolutions: SVGA (800
x 600), XGA (1024 x 768), SXGA (1280 x 1024) and 1440 x 900 (a resolution
which doesn’t have a short three-or-four-letter “name”). SVGA and XGA are
standard 4:3 monitors. SXGA monitors are 5:4 (slightly more square). 1440 x
900 is a widescreen format for 16:10 monitors.
Output Device: The primary display device you want to use. By default, the menus
and other on-screen displays will be shown on this device, unless
manually changed. The options are: VOUT, which will output to a TV via
the composite video output; VGA, which will output to a PC monitor
connected to the VGA port; and AUTO, which will detect which output has
a screen attached and display accordingly. See Output Device shortcuts,
opposite.
Rotate Time: How long channels will be displayed in Rotate mode.
Volume: Changes the audio output volume from the DVR.
Privacy Zone: Use this to mask (read: put a black square over) certain areas of your images.
You can dene up to four areas of the screen to mask. These areas are
dened in the same way as the motion detection area. This setting will aect
recordings - the black mask will still be there when footage is played back!


