


8
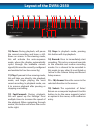
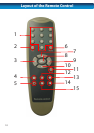
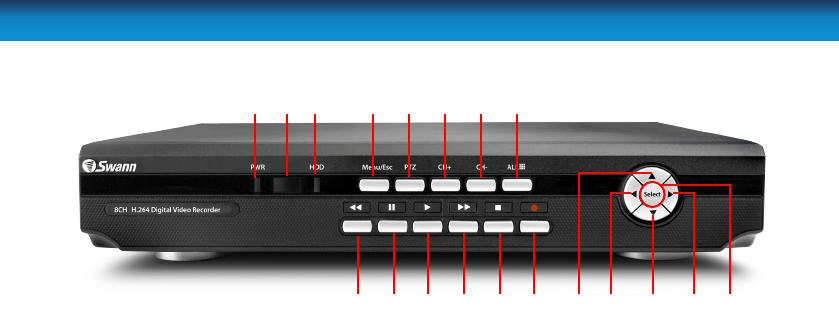
Layout of the DVR4-2600
1 2 3 4 6 7 8
9
5
10 11 12 13 15 16 17 18 1914
1) Power Indicator: This LED is
illuminated when the DVR is connected
to power and switched on.
2) Infrared Sensor: Monitors signals
coming from the infrared remote control.
If this sensor is blocked or obstructed,
then the functionality of the remote will
be impaired.
3) Hard Drive Indicator: Lights up
when the hard drive is active. It will ash
rapidly when recording or searching (in
time with the read/write cycles).
4) Menu/ESC: One of the primary
controls for navigating through the
menus. When in live-viewing mode, it
will enter the main menu. When pressed
in the main menu, it will return the DVR
to live-viewing mode. Finally, when in a
submenu, this button will return you to
the main menu.
5) PTZ: Opens the Pan, Tilt, Zoom pop-
up menu. This is used to control PTZ
capable camera systems, and will not
aect standard cameras.
6) CH+: Moves “up” one channel.
7) CH-: As 6, but descends one channel.
8) Display (All) Mode: Enters split-
screen multi-view. The whole screen
is split into four or nine sections, each
displaying the images from one camera.
Press multiple times to cycle through all
available viewing modes.
9) Rewind: During playback, this will
reverse the footage. Press multiple times
to increase the speed of the reversing.
When navigating through menus, this
button will move the cursor to the left.