


23
Remember: After making changes to the settings press/click the APPLY button.
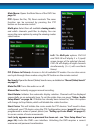
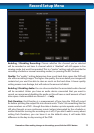
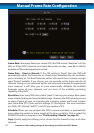
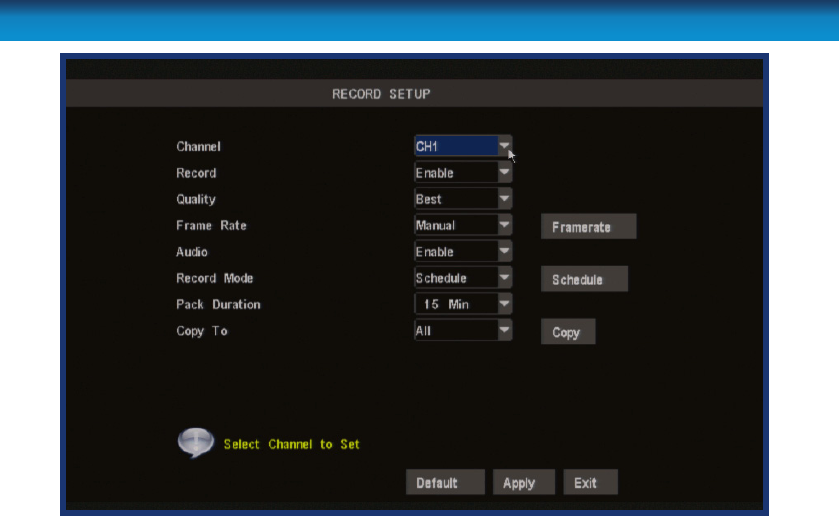
Enabling / Disabling Recording: Choose whether the channel you’ve selected
will be recorded or not here. A channel which is “disabled” will still appear in live
viewing mode, but won’t be recorded. This is a “master” setting, and will override the
recording schedule or manual recording modes (i.e. pressing the REC button).
Quality: The “quality” setting determines how much hard drive space the DVR will
use when recording images. The higher the quality, the more detail your images will
contain but you won’t be able to store as much on the hard drive. A lower quality
setting means more footage, but will reduce the amount of detail.
Enabling / Disabling Audio: You can choose whether the associated audio channel
will be recorded. Unless you have an audio device connected that you want to
record, we recommend disabling the audio as this will save a small amount of hard
drive space. Audioavailableonchannels1~4only.
Pack Duration: PackDuration is a measurement of how long the DVR will record
for before splitting the output le into discrete units. “Packs” are something like the
scene numbers on a DVD - though the video is broken up into separate units, it will
still play through as one continuous movie (unless interrupted by the schedule or
motion detection turning the recording on or o). If you don’t want to worry about
setting Pack Durations, you can leave it on the default value; it will make little
dierence to the day-to-day running of the DVR.
Record Setup Menu