Serial Number Code
The base serial number is required to be input to the beltpack
to allow communication with that base station. The number
like the encryption code, is composed of four hexidecimal
digits. This extra security along with the encryption code
means there is over 4 billion possible code combinations.
Changing the Serial Number Code
1. Press and hold <MENU> + <UP> buttons at the
encryption code screen for about 3 seconds. The seri-
al number set screen will appear.
2. Push <SET> to start the first number flashing. Select
the desired number with the <UP> <DOWN> / arrow
buttons.
3. Push <SET> to set the code. Now the next code loca-
tion will begin flashing.
4. Set the next three code locations in the same manner.
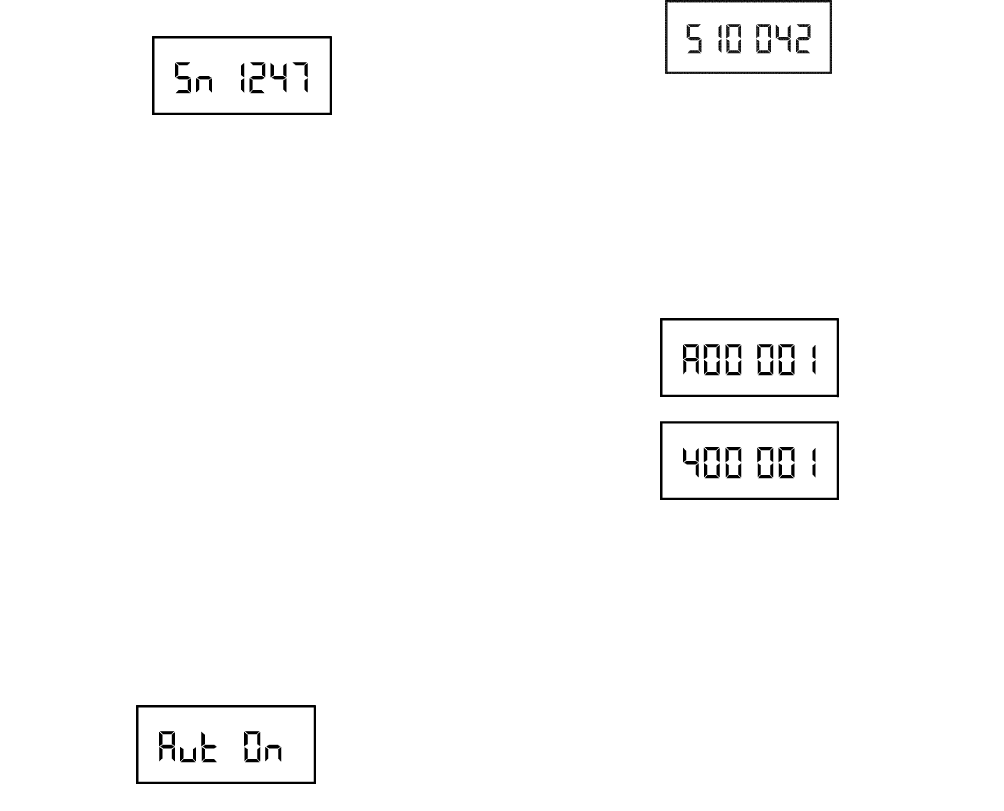
Auto Programming
This function allows the base station to change the beltpack’s
frequencies “ over-the-air”. Thus whenever the base station’s
groups / channels are changed the beltpack will automatically
follow. If the beltpack’s frequencies are changed “over-the-air”,
the beltpack will place those frequencies in group 64u, and go
to group 64u.
Auto frequency programming, via the base station changing
frequencies, only will occur at the beltpack if the following is
set: Beltpack already in communication with the base station,
beltpack auto programming set to on and beltpack transmit
power set to auto.
Enabling / Disabling Auto Programming
1. In any of the beltpack main screens press and hold
<UP> the button for 3 seconds. The following screen
will appear.
2. The auto programming option will also begin flashing.
3. Use the <UP>/<DOWN> arrow buttons to turn the
option on or off.
4. Push <SET> to accept the change. The display will
now return to the main screen.
Software / Channel Map Version
The software and channel maps of the beltpack may be dis-
played from any of the main beltpack screens.
Viewing the Software and Channel Map Version
1. In any of the beltpack main screens press and hold the
<DOWN> button for 3 seconds. The following screen
containing the software version will appear.
2. As long as the <DOWN> button is pressed the soft-
ware version in the beltpack will be displayed.
3. When the button is released the following two channel
map screens will be displayed for a second each.
4. The first screen indicates the receive channel map in
the beltpack. The second screen indicates the transmit
channel map. The above screens indicate that it is a A4
band beltpack.
5. The screen will now revert back to the main screen.
ClearScan
TM
ClearScan
TM
allows the selection of RF clear channels in an
area. The beltpack ClearScan
TM
has three modes:
1. Scan Groups- The beltpack’s receiver scans all the
factory defined groups and any user defined groups
that have been set. The result is a list of the top 20
groups, ranked in order of the most clear receive chan-
nels in that group. The <UP> arrow all the way to the
top is the group with the most clear channels.
2. Scan within a Group - The beltpack’s receiver scans all
the receive channels within a group. The result is a list of
the channels in that group ranked in order of best to worst
channels. The <UP> arrow all the way to the top is the
channel that is the best.
3. Scan Band - The beltpack’s receiver scans the entire
band of frequencies continuously. It starts at the begin-
ning of the receive band and checks the frequency
every 100 kHz until the end of the receive band, then
starts over. The user must push <SET> to stop the scan-
ning. The 100 kHz step size is as close as is needed
because the narrowest receive filters are 230 KHz
wide. This is why every 25 KHz is not scanned.
7-8


