


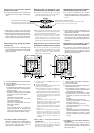
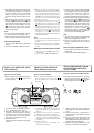


29
Synchronized recording with the CD
player
÷ In this system, the CD player starts play when
the cassette deck enters the recording mode.
Operate in the order shown
Grabación sincronizada con el
reproductor de CD
÷ En este sistema el reproductor de CD inicia
la reproducción cuando la platina de cassette
ingresa en el modo de grabación.
Opere en el orden mostrado
Nota:
Esta unidad posee características de
grabación adecuadas para cintas
normales y de CrO
2. Las cintas normales
y de CrO2 tienen características diferentes
que las cintas de metal.
Note:
This unit has recording characteristics
suitable for normal and CrO2 tapes. Normal
and CrO2 tapes have different
characteristics from metal tapes.
RECORDING (RV-B90 only) GRABACION (RV-B90 exclusivamente)
÷ Durante la grabación, el circuito ALC (control
automático de nivel), optimiza automáticamente
el nivel de grabación, haciendo innecesario el
ajuste manual del nivel de grabación.
÷ Verifique que la lengüeta de seguridad del
cassette de cinta no esté rota.
÷ During recording, the ALC (Automatic Level
Control) circuit automatically optimizes the
recording level, so manual recording level
adjustment is unnecessary.
÷ Check that the safety tab on the cassette tape
is not broken off.
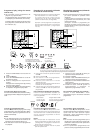
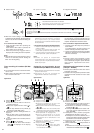
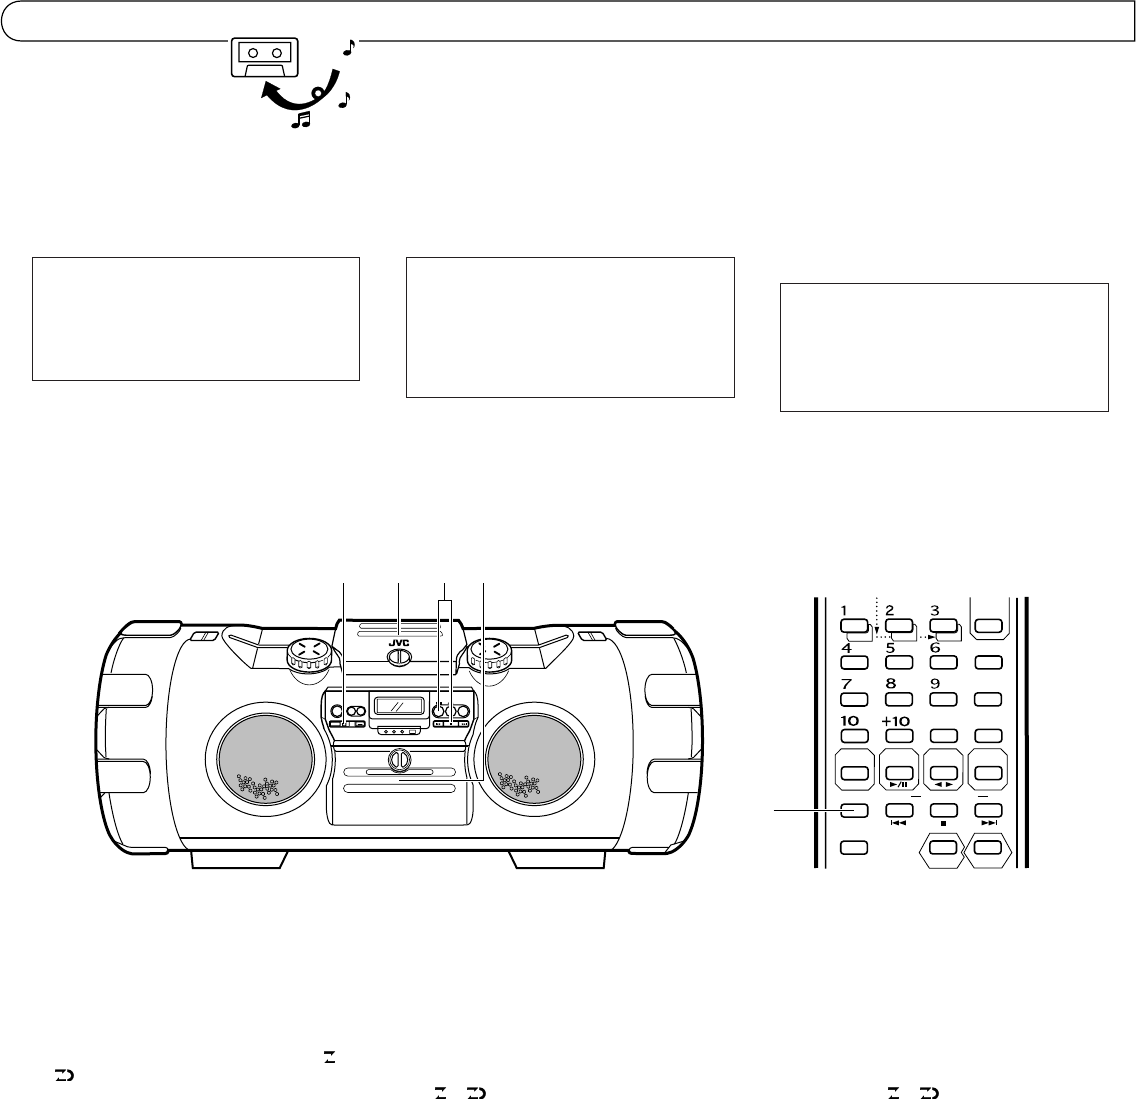
1 Load a CD and close the CD door.
2 Press the CD 3/8 button to engage the CD
mode, then press the 7 STOP button to enter
the stop mode.
3 Load a cassette with side A facing out. (Wind
past the tape leader before starting
recording.)
÷ Make sure the tape direction is set to 3
(forward direction).
4 Select the required reverse mode ( or
).
÷ When programmed play is required,
program the required tracks using the
remote control. (See page 22.)
÷ Select tracks with a total playing time which
does not exceed the tape length (refer to
the liner notes).
5 Press the ONE TOUCH REC button;
synchronized recording will start.
÷ Recording starts in the forward direction
and CD play starts automatically.
÷ The forward direction indicator (3) blinks
and the REC indicator lights up in the
display window.
÷ Non-recorded sections of approx. 4 seconds
are automatically left between tunes.
÷ When the CD player stops, the tape deck
stops automatically.
÷ To stop recording in the middle, press the 7
STOP button. The cassette deck also stops
after 4 seconds.
1 Coloque un CD y cierre la puerta del CD.
2 Presione el botón CD 3/8 para activar el
modo de CD y luego presione el botón 7
STOP para activar el modo de parada.
3 Coloque un cassette con el lado A
apuntando hacia afuera. (Bobine la porción
que no puede ser grabada antes de iniciar
la grabación.)
÷ Asegúrese de colocar el sentido de la
cinta en 3 (hacia adelante.)
4 Seleccione el modo de inversión deseado
( o ).
÷ Cuando desea la reproducción
programada, programe las pistas
deseadas utilizando el controlador remoto.
(Ver página 22.)
÷ Seleccione las pistas con un tiempo total
de reproducción que no exceda la
longitud de la cinta (refiérase a las notas
en la envoltura).
5 Al presionar el botón ONE TOUCH REC; se
inicia la grabación sincronizada.
÷ La grabación se inicia hacia adelante y
se inicia automáticamente la reproducción
del CD.
÷ El indicador de transporte de cinta hacia
adelante (3) destella y se enciende el
indicador REC en la ventanilla de
indicación.
÷ En la cinta quedan automáticamente sin
grabar secciones de 4 segundos aprox..
÷ Cuando el reproductor de CD para la platina
de cinta para automáticamente.
÷ Para detener la grabación en mitad de la
misma, presione el botón 7 STOP. La platina
de cassette también para después de
transcurridos 4 segundos.
Nota:
Questo apparecchio possiede
caratteristiche di registrazione adatte per
nastri normali . I nastri normali possiedono
caratteristiche diverse da quelle dei nastri
al cromo (CrO2) e di mettallo.
REGISTRAZIONE (solo per l’RV-B90)
÷
Durante la registrazione, il circuito ALC
(controllo automatico del livello) ottimizza
automaticamente il livello di registrazione
rendendo così superflua la regolazione
manuale del livello di registrazione stesso.
÷
Controllare che la linguetta di protezione della
registrazione della cassetta non sia stata
rimossa.
Registrazione sincronizzata col lettore
CD
÷
In questo modo di funzionamento, il lettore
CD inizia a riprodurre quando il registratore
entra nel modo di registrazione.
Eseguire le operazioni nell’ordine indicato
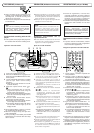
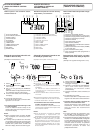
SLEEP
PROGRAM
RANDOM
REPEAT
AUTO
PRESET
SOUND
DISPLAY
REVERSE MODE
MULTI CONTROL
FM MODE
REW
FF
TAPE
TUNER
BAND
C D
DOWN UP SET
AUX
ACS
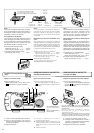
4
1
2
35
1
Inserire il disco e richiudere il portello del
vano portadischi.
2
Premere il tasto CD
3
/
8
per attivare la
modalità del CD, e agire poi sul tasto
7
STOP
per passare alla modalità di arresto.
3
Inserire una cassetta con il lato A rivolto verso
l’esterno. Prima di passare alla registrazione
far scorrere la parte iniziale guida del nastro.
÷
Verificare che la direzione del nastro sia
disposta su
3
(in avanti).
4
Selezionare la modalità di inversione
desiderata ( o ).
÷
Se si vuole effettuare la riproduzione
programmata, programmare i brani
desiderati, agendo sul telecomando
(vedere a pag. 22.)
÷
Selezionare i brani in modo che la loro
lunghezza totale non superi la durata del
nastro (vedere la durata dei brani indicata
sulla copertina del disco).
5
Agire sul tasto ONE TOUCH REC. La
registrazione in sincronizzazione si avvia.
÷
La registrazione si avvia nella direzione
in avanti e la riproduzione del disco ha
inizio in modo automatico.
÷
Sul quadrante l’indicazione di direzione in
avanti (
3
) lampeggia e quella di
registrazione REC si illumina in modo
continuo.
÷
Degli spazi non registrati da circa 4 secondi
vengono creati automaticamente tra i brani.
÷
Quando il lettore CD si ferma, anche il
registratore a cassette si ferma automaticamente.
÷
Per interrompere la registrazione, premere il
tasto
7
STOP. Il registratore si ferma dopo 4
secondi circa.