


13
9
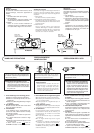
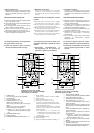
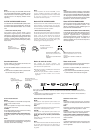
Tasto di comando polivalente (MULTI
CONTROL) (per l’RV-B90)
In caso di modalità disposta su TAPE per la
lettura di un nastro:
4
REW: Premerlo per riavvolgere il
nastro.
7
STOP: Premerlo per arrestare il
movimento del nastro.
¢
FF: Premerlo per far avanzare
rapidamente il nastro.
In caso di modalità disposta su TUNER, per
la ricezione radio:
4
e
¢
:Sintonizzazione automatica o
manuale
Tasto di sintonizzazione (TUNING) verso il
basso (DOWN) o verso l’alto (UP) (per l’RV-
B70)
4
DOWN/UP
¢
: Sintonizzazione
automatica o
manuale
9 Botón MULTI CONTROL (RV-B90)
(Cuando el modo está ajustado en TAPE)
4 REW: Presione para rebobinar la
cinta.
7 STOP: Presione para parar la cinta.
¢ FF: Presione para avanzar
rápidamente la cinta.
(Cuando el modo está ajustado en TUNER)
4/¢: Siutonización automatica/
manual
Botón TUNING (DOWN/UP) (RV-B70)
4DOWN/UP¢:Sintonización automatica/
manual
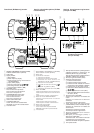
9 MULTI CONTROL button (RV-B90)
(When the mode is set to TAPE)
4 REW : Press to rewind the tape.
7 STOP : Press to stop the tape.
¢ FF: Press to fast-forward the tape.
(When the mode is set to TUNER)
4/¢ : Auto tuning/Manual tuning
TUNING (DOWN/UP) button (RV-B70)
4DOWN/UP¢ : Auto tuning/Manual
tuning
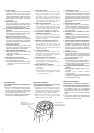
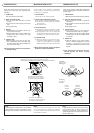
Insert the · ends first.
Primero inserte el terminal ·.
Inserire il lato
·
per primo.
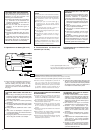
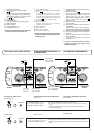
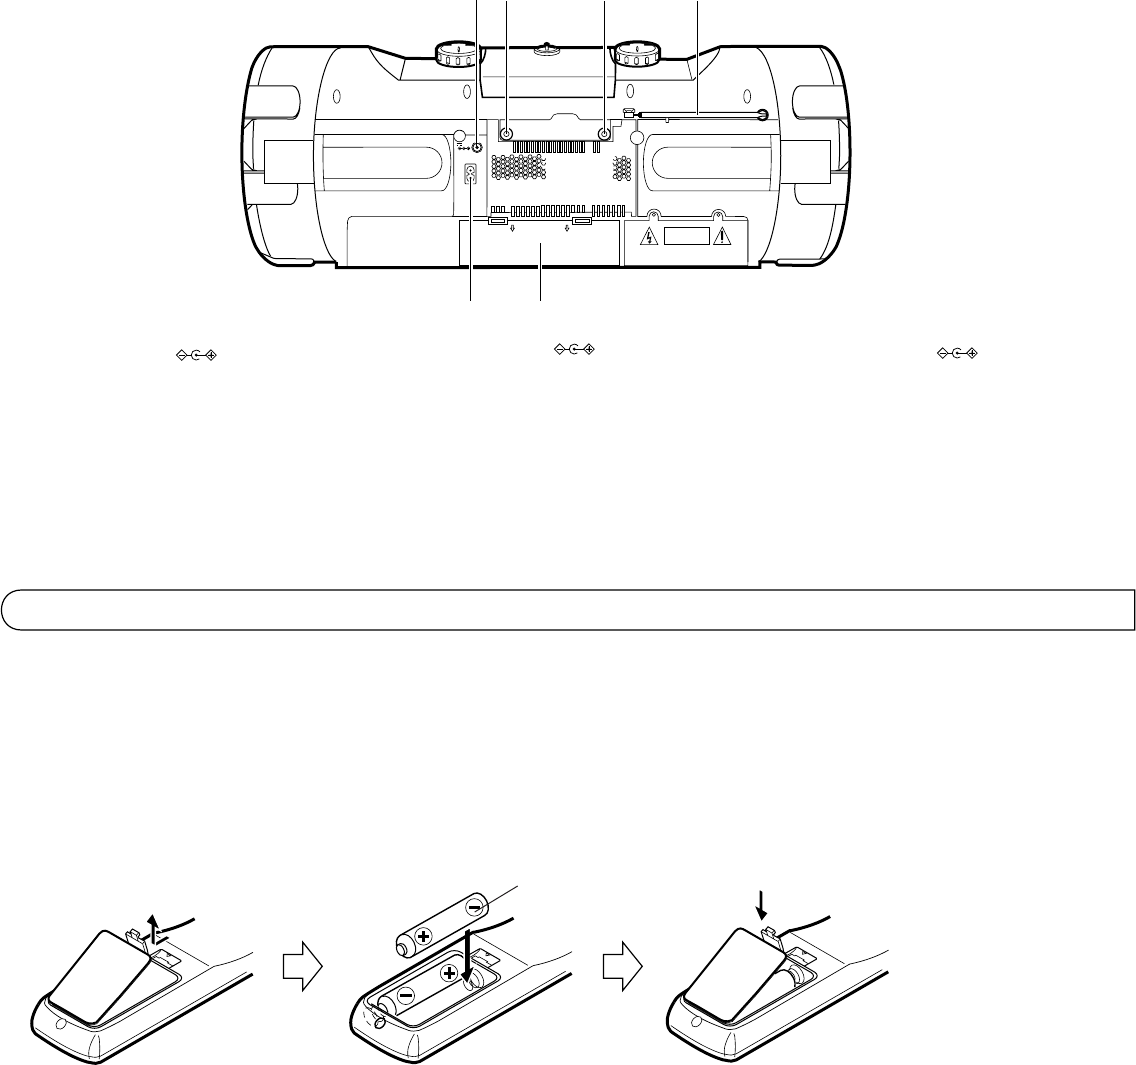
Preparation before use
÷ Installing batteries in the remote control
unit
1. Remove the battery cover from the back of
the remote control unit.
2. Insert two “R6/AA (15F)” size batteries.
÷ Insert the batteries with the ª and ·
terminals matching the indication inside
the battery compartment.
3. Replace the cover.
Preparativos antes usarla
÷ Instalación de las pilas en la unidad de
control remoto
1. Extraiga la tapa de las pilas de la parte
trasera de la unidad de control remoto.
2. Inserte dos pilas de tamaño “R6/AA (15F)”.
÷ Inserte las pilas con los terminales ª y
· de acuerdo a la indicación en el interior
del compartimiento de las pilas.
3. Recoloque la tapa.
Preparativi prima dell’uso
÷ Installazione delle batterie nel tele-
comando
1. Rimuovere il coperchio del vano batterie dal
retro del telecomando.
2. Inserire due batterie di formato “R6/AA
(15F)”.
÷
Inserire le batterie con i terminali
ª
e
·
orientati come indicato all’interno del vano
stesso.
3. Reinstallare il coperchio.
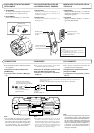
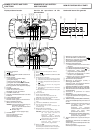
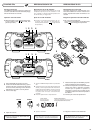
Panel trasero
Rear panel
Pannello posterlore
UNITA’ DI TELECOMANDOUNIDAD DE CONTROL REMOTOREMOTE CONTROL UNIT
CAUTION
~AC IN
PHONES
AUX IN
DC IN
12V
1
2
34
5
6
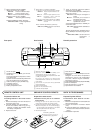
1DC IN 12V jack ( )
2 Headphone jack (PHONES) (3.5 mm dia.
stereo mini)
Connect headphones (impedance 16Ω to
1 kΩ) to this jack.
Speaker sound is automatically switched off
when the headphones are connected.
3 AUX IN (AUX input) jack (RV-B90 only)
4 Telescopic antenna
5 AC IN (AC input) jack
6 Battery compartment cover
1
Presa DC IN 12 V ( )
2
Minipresa per cuffia (PHONES) da 3.5 mm
di diametro
Collegarvi una cuffia stereo di impedenza
compresa fra i 16
Ω
ed 1 k
Ω
. Collegandovi
una cuffia, i diffusori vengono automatica-
mente messi a tacere.
3
Presa AUX IN (ingresso AUX) (solo per l’RV-B90)
4
Antenna telescopica
5
Presa di ingresso di c.a. (AC IN)
6
Coperchio del vano batteria
1 Jack DC IN 12 V ( )
2 Jack de auriculares (PHONES) (mini
estereofónico de 3,5 mm de diám.)
Conecte los auriculares (impedancia de 16 Ω
a 1kΩ), a este jack.
El sonido del altavoz se desconecta
automáticamente cuando se conectan los
auriculares.
3 Jack AUX IN (entrada AUX) (RV-B90
exclusivamente)
4 Antena telescópica
5Jack AC IN (entrada de CA)
6 Cubierta del portapila