SETUP
JBL
3-37
Performing Manual Output Level Calibration
(continued from page 3-36)
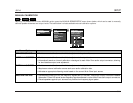
INTERNAL NOISE TEST
Opens the INTERNAL NOISE message shown on the previous page,
which indicates that the internal noise test generates loud
calibration noise signals.
When the INTERNAL NOISE message opens:
•Press the arrow button to open the SPEAKER LEVEL ADJUST
menu shown on the previous page. When the SPEAKER LEVEL
ADJUST menu opens, the internal noise test automatically
begins.
•Press the arrow button to close the message without activating
the internal noise test.
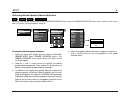
During the internal noise test, the SDP-40 sends calibration noise
signals to each speaker in the order shown on the SPEAKER LEVEL
ADJUST menu. The cursor automatically scrolls through output
level parameters, highlighting each parameter as the SDP-40 sends
the calibration noise signal to the corresponding speaker. The
calibration noise signal is sent to each speaker for about 4 seconds.
Note:
When the internal noise test begins, the SDP-40
automatically sets volume level to +0dB. Avoid
adjusting the master volume level while the test is in
progress to achieve THX reference levels (75dB).
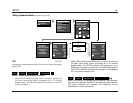
INTERNAL NOISE TESTLEVELS CALIBRATIONMANUALSPEAKERSSETUP
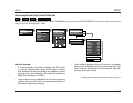
To manually calibrate output levels during the internal noise
test:
1. Set the SPL meter to “C” weighting and “SLOW” response.
2. Press the and arrow buttons to highlight the desired
output level parameter. Then, quickly press the arrow button
to select this output level parameter. The horizontal bar graph
shown on the previous page will open on the on-screen display
and automatic scrolling will stop.
Note:
During the internal noise test, it is possible to select
an output level parameter just as the cursor is about
to automatically scroll to the next parameter, causing
the SDP-40 to send the calibration noise signal to
both speakers. If this occurs, reselect the desired
speaker.
3. When the horizontal bar graph opens, press the and
arrow buttons to select the output level that achieves a 75dB
SPL meter reading from the primary listening position.
4. When the desired output level has been selected, press the
arrow button to close the parameter. The internal noise test will
continue and automatic scrolling will resume.
5. Repeat steps 2, 3, and 4 until all desired output levels have been
set.


