


2
4 Important Safety Information and Unpacking
5 Getting Started
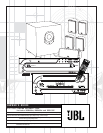
5 What’s Included
5 Installing and Connecting the Equipment
5 What We Recommend
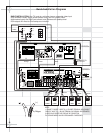
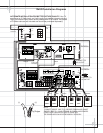
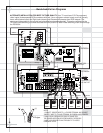
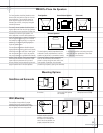
6 Quick Installation Diagrams
9 Where to Place the Speakers
9 Mounting Options
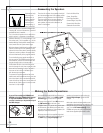
10 Connecting the Speakers
10 Making the Audio Connections
11 Making the Video Connections
11 Completing Setup
12 Quick Guide to Using the JBL Cinema ProPack 600
II
14 DCR600
II
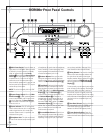
Front Panel Controls
16 DCR600
II
Front Panel Information Display
17 DCR600
II
Rear Panel Connections
19 DVD600
II
Front Panel Controls
20 DVD600
II
Front Panel Information Display
21 DVD600
II
Rear Panel Connections
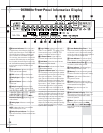
22 Remote Control Functions
26 Remote Control Function Grid
28 Remote Control Code Tables
38 Configuring the DCR600
II
Receiver
38 Memory Backup
38 Configuring the Speakers
39 Adjusting the Output Levels
40 Setting Delay Times
42 Remote Control Functions
42 Programming the Remote
42 Entering Product Codes
42 Auto-Searching for Product Codes
42 Reading Back the Programmed Code
43 Programming Macros
44 Erasing Macro Commands
44 Device Functions
44 Notes on Using the Remote With Other Devices
44 Volume Control Punch-Through
45 Channel Control Punch-Through
45 Transport Control Punch-Through
45 Reassigning Devices
45 Resetting the Remote Memory
46 Configuring the DVD600
II
DVD Changer
46 DVD Compatibility & Terminology
47 Using the Remote Control
47 Selecting Audio Output Languages
47 Selecting Subtitle Languages
48 Selecting Menu Languages
48 Parental Lock and Passwords
48 Password Selection and Control Lock
49 Clearing Passwords
49 Changing the Password
50 Setting the Aspect Ratio
50 Setting the Dynamic Range
51 Using the Digital Audio Output
51 Setting the Linear PCM Bit Rate
52 Operating the DCR600
II
Receiver
52 Surround Mode Chart
53 Selecting a Surround Mode
53 Using Digital Sources
53 Dolby Digital
53 DTS
53 Selecting a Digital Source
54 Digital Status Indicators
54 Night Mode
54 Important Notes on Digital Playback
55 PCM Audio Playback
55 Operating the Tuner
55 Station Selection
55 Preset Tuning
55 Recalling Preset Stations
55 Tape Recording
56 Operating the DVD600
II
DVD Changer
56 Loading Discs
56 Playback Basics
57 Using the DVD Disc’s Menu
58 Using the Menu Bar
58 Menus and Controls
58 Selecting Titles and Chapters
59 Changing Languages (Audio)
59 Changing Camera Angles
60 Playing CDs
60 Selecting a Track
60 Using IntroScan
60 Time Display Selection
60 Playing MP3 and Video CD Discs
61 MP3 Disc Playback
61 Programmed Playback of MP3 Discs
61 Repeat Playback of MP3 Discs
61 VCD Playback
62 Using the On-Screen Status Bar for VCD Playback
62 Playback Control
63 Programmed Play
63 Random Play
63 Repeat Play
63 Repeat A~B
63 Programmed Playlists
64 Bookmarks
64 To Enter a Bookmark
64 To Recall a Bookmarked Scene or Passage
65 DVD Language Codes
66 Troubleshooting
66 Processor Reset
69 Technical Specifications
Typographical Conventions
In order to help you use this manual with the remote control, front panel
controls and rear panel connections, certain conventions have been used.
EXAMPLE – (bold type) indicates a specific remote control or front panel button,
or rear panel connection jack
EXAMPLE – (OCR type) indicates a message that is visible on the front panel
information display
1 – (number in a square) indicates a specific front panel control
on the DCR600
II
receiver
¡ – (number in a circle) indicates a rear panel connection
on the DCR600
II
receiver
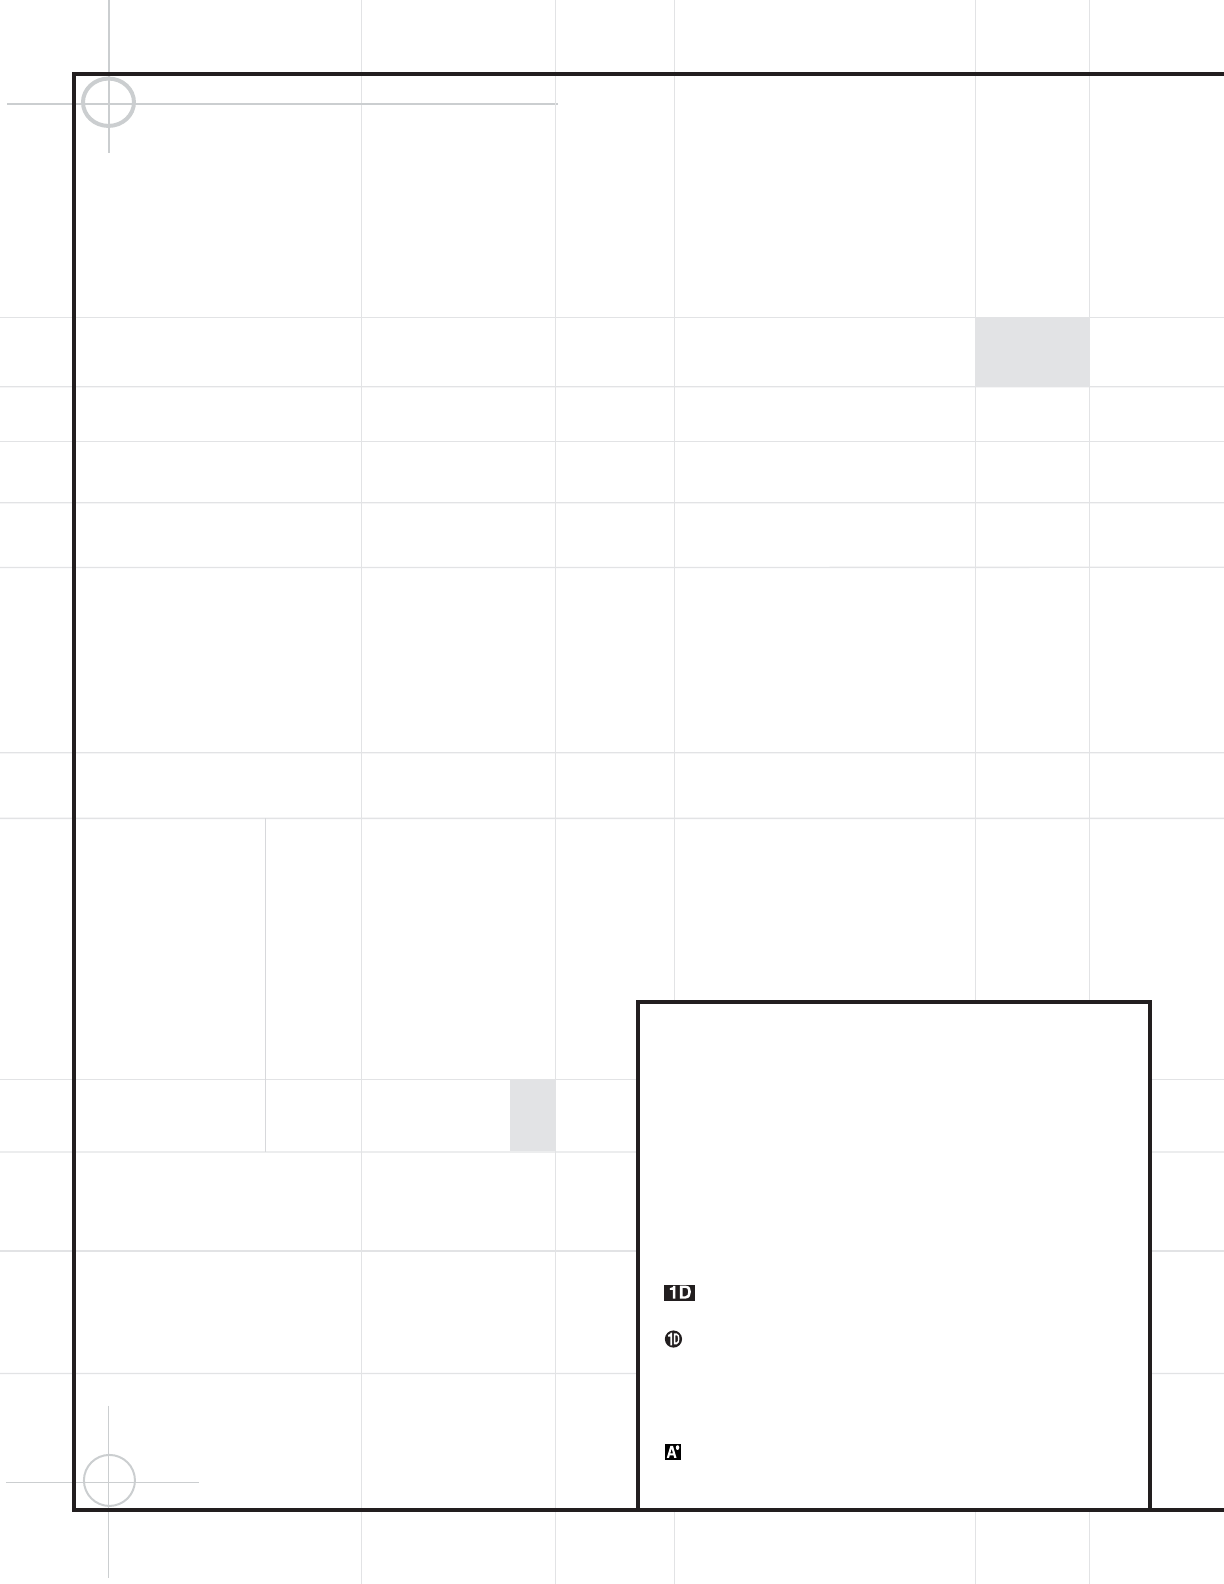
– (number followed by a capital “D” in a rectangle) indicates a specific
front panel control on the DVD600
II
DVD changer
– (number followed by a capital “D” in a circle) indicates a rear panel
connection on the DVD600
II
DVD changer
a – (number in an oval) indicates a button or indicator on the remote
A – (letter in a square) indicates an indicator in the front panel display
on the DCR600
II
receiver
– (letter with a prime in a square) indicates an indicator in the
front panel display on the DVD600
II
DVD changer