


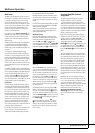


Resolution to Display: Select the highest
resolution that your TV can show. If you use
HDMI, resolution selection happens
automatically. If you use analog signals, you
must choose the proper resolution.Note: if you
choose a resolution that is higher than your
screen can show, the picture disappears. In this
c
ase, wait for approx. 10 seconds, as theAVR
returns to the previous resolution if the new one
is not confirmed within this time. Default
resolution is 576i, which is the maximum that
can be transmitted by the simplest video
connection, Composite/CVBS.
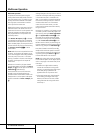
Menu Appearance
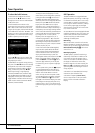
OSD Transparency:This setting allows you to
select whether video programs will be visible
when the menu system is in use. Select Normal
for a fully-transparent background, Medium for
the menu background to be partially visible or
Opaque to block the view of any video programs
while the menus are on screen.
Volume Status Messages:When the AVR is
turned on, the volume is adjusted or the source
is changed, or if a change in the input signal is
detected, a status message will be displayed on
screen. Use this setting to select how long the
message remains visible.The setting varies from
2 to 10 seconds, with a default of 3 seconds.
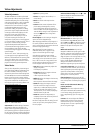
Menus: Some menu settings only remain in
effect during the current listening session,
including the settings in the Surround Modes,
Video Modes and Audio Effects menus.This
setting governs how long these menus will
remain visible after your last adjustment, varying
from 5 seconds to 5 minutes, or no time-out (the
menu does not disappear until you close it), with
a default of 5 seconds.
Setup and Slide-In Menus: This setting
determines how long the setup menus (Main
Menu, Speaker Setup Menu, Zone 2 Menu, all
slide-in menus) remain visible after your last
adjustment. Select a timeout period of 5, 10 or
15 (the default) minutes, or no timeout,which
leaves the menus on screen until you manually
clear them.We recommend setting some timeout
period to avoid the possibility of burn-in damage
to plasma or CRT displays.
Screen Saver: Use this setting to program a
timeout period for no activity (with no menus
displayed) before the AVR’s built-in screen saver
begins. Select a period of 5 (the default),10 or
20 minutes, or turn off the screen saver.We
recommend setting some timeout period to
avoid the possibility of burn-in damage to
plasma or CRT displays.
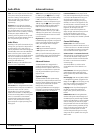
D
efault Surround Mode
I
n normal operation, when theAVR senses a
Dolby Digital or DTS digital audio data stream,it
will automatically switch the appropriate default
surround mode, with the AVR responding to the
data flags that are encoded on the DVD disc or
in the digital video broadcast.In most cases, this
is the correct mode, but you may have a
particular preference for the mode you wish to
hear when Dolby Digital or DTS is present.The
A
VR allows you to set the unit so that it will
either respond to the default or switch to your
desired mode.
If you wish to leave the default so that the mode
c
hoice encoded in the disc is always used, no
further action is needed. Simply leave the setting
at the factory default of ON.
To set the unit so that it responds to the last sur-
round mode used when a Dolby Digital or DTS
source is playing, press the
⁄
/
¤
Buttons
D
so that the blue cursor bar is highlighting the
Default Surround Mode line. Press
the OK Button
F
, followed by the
‹
/
›
Buttons
Ea
so that OFF appears,
and the setting will change.Press the OK
Button
F
again to confirm the new setting.
The unit will now use the last mode, not the
disc’s default for the two digitally encoded data
streams.
This setting does not apply to standard PCM
digital inputs or to analog sources. In those
cases, the unit will always apply the surround or
processing mode that was last used for that
input.
If you wish to make other adjustments, press the
⁄
/
¤
Buttons
D
until the blue cursor bar is
highlighting the desired setting. If you have no
other adjustments to make, press the OSD
Button
L
to exit the menu system.
Advanced Features
ENGLISH
ADVANCED FEATURES 39