


22
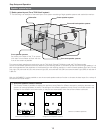
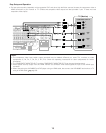
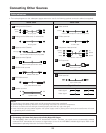
Easy Setup and Operation
4
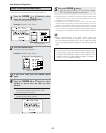
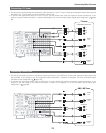
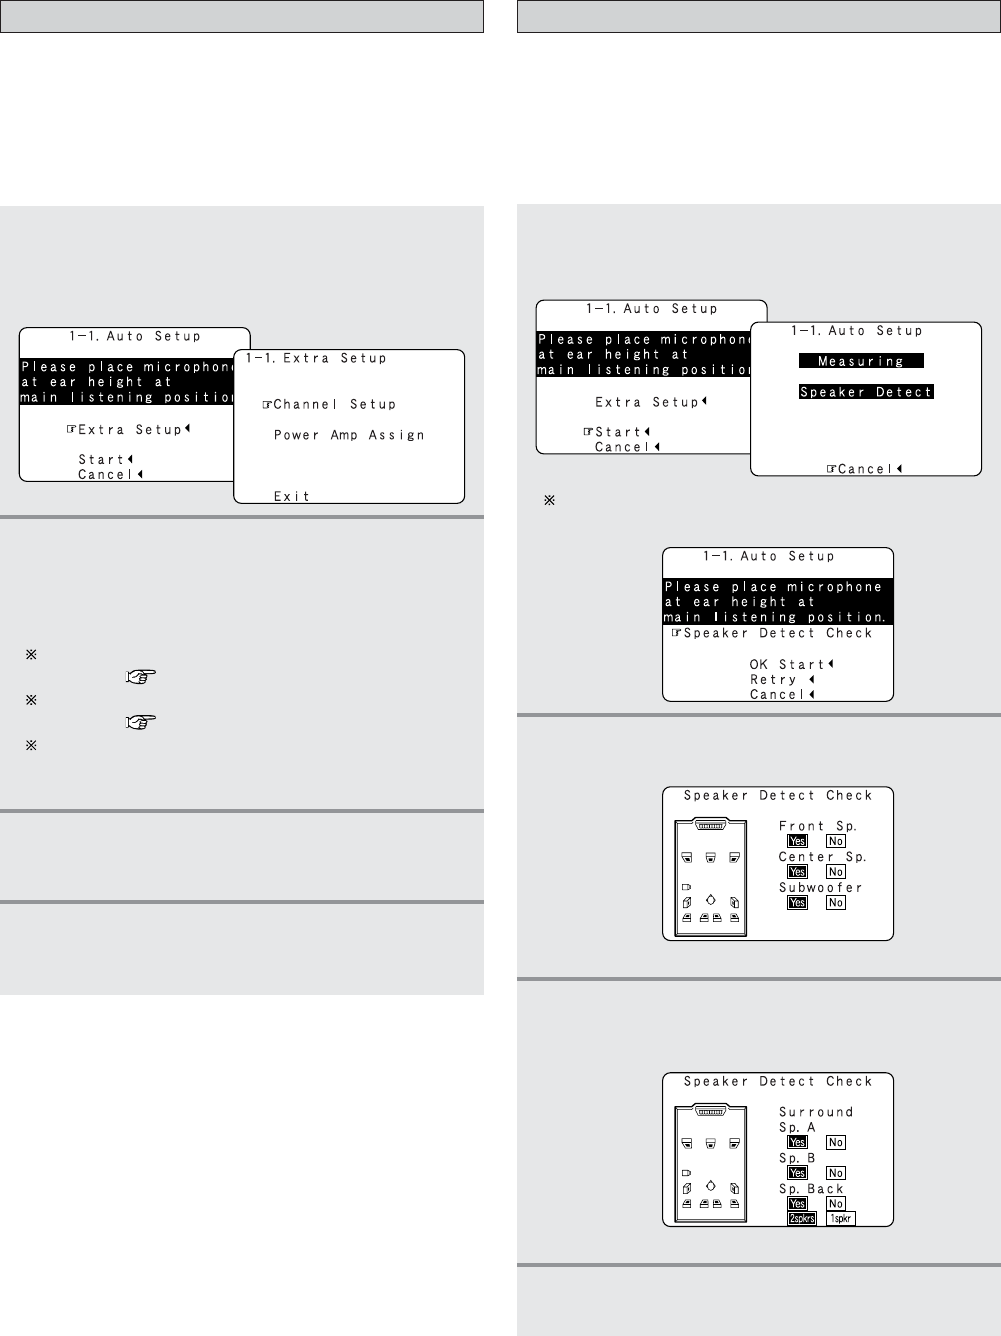
If the check ends, press the ENTER button
again.
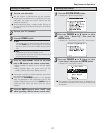
[ Second screen ]
3
Check the results of the speaker detection,
then press the
ENTER button.
• Switch to the second screen.
The screen shown at the below appears once the
preliminary measurements are completed.
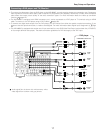
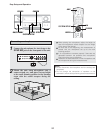
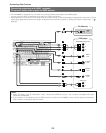
Preliminary measurements
• This procedure is used to automatically determine the
background noise, whether or not speakers are connected,
and the polarities of the connected speakers.
•To avoid affecting the measurements, turn off the air-
conditioner or any other device that makes noise and take
the measurements with the room as quiet as possible.
1
Press the CURSOR
DD
or
HH
button to select
“Start”, then press the
CURSOR
FF
button.
• Start the preliminary measurements.
2
Press the ENTER button.
• Switch to the “Speaker Detect Check” screen.
[ First screen ]
3
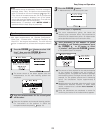
4
Once the settings are completed, press the
ENTER button at the each setting screen.
• The “Extra Setup” menu reappears.
Press the CURSOR
DD
or
HH
button to select
“Exit”, then press the
ENTER button.
• Return to the “Auto Setup” screen.
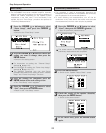
1
2
Press the CURSOR
DD
or
HH
button to select
“Extra Setup”, then press the
CURSOR
FF
button.
•Switch to the “Extra Setup” screen.
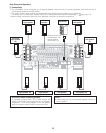
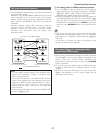
Extra Setup
• The AVR-4806CI has seven available amplifier channels,
some of which can be assigned for powering speakers in
ZONE2 and ZONE3, depending on the speaker system
complement in the main room. If this functionality is not
needed, skip this “Extra Setup” procedure and proceed to
“Preliminary Measurements”.
Press the CURSOR
DD
or
HH
button to choose the
setting you want to change, then press the
ENTER button.
•Switch to the setting screen.
For instructions on making the “Channel Setup”
settings ( page 115).
For instructions on making the “Power Amp Assign”
settings ( page 116, 117).
The speakers measured with this Auto Setup
procedure are based on the setting of these “Channel
Setup” and “Power Amp Assign” functions.