Applying a Fade In 37
CDR1000—Owner’s Manual
Applying a Fade In
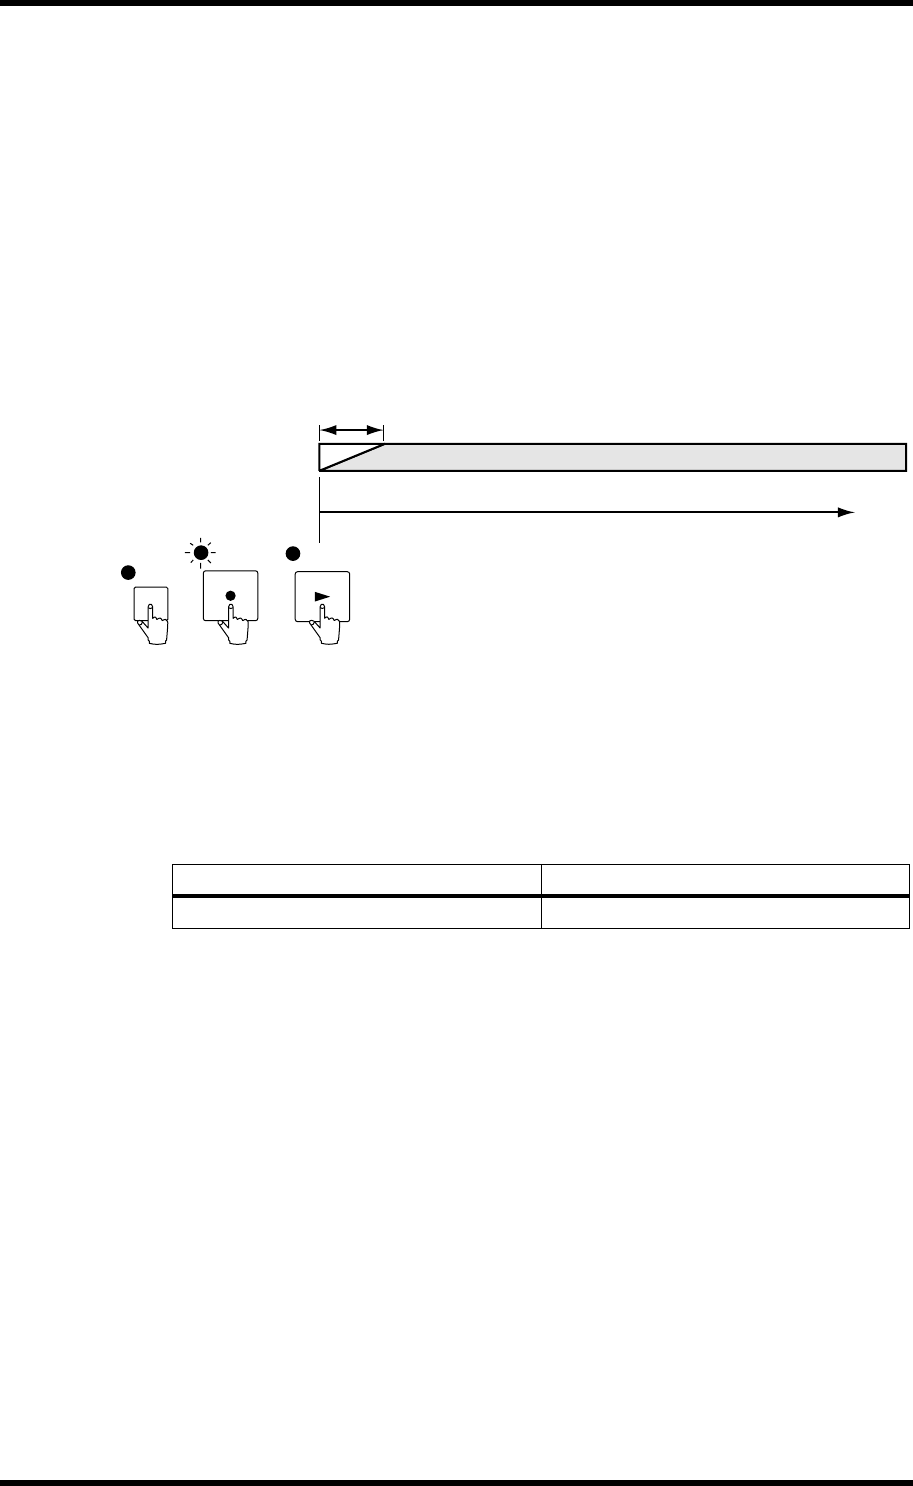
A fade in can be applied at the start of each track using the Fade In function. The length
of the fade in can be set from 1 to 10 seconds in single second steps using the Fade In
parameter. The fade in begins when recording is started from Record Standby mode by
pressing the [PLAY] button, [PAUSE] button, or footswitch.
The Fade In function is off when the Fade In parameter is set to 0.
When the Input Delay function is set, the fade in starts with the digital audio already in
the audio buffer. See “Setting the Input Delay” on page 27 for more information.
Fade In cannot be used with Sync Recording.
The following illustration shows the procedure for applying a fade in.
The Utility Fade In parameter is used to set the fade in time.
1 Use the [UTILITY] button to select “FADE IN.”
The UTILITY indicator lights up and the Fade In setting appears on the display.
2 Use the [PREV] or [NEXT] button to select a fade in time.
3 Press and hold the [UTILITY] button, or press another button to cancel Utility.
A fade in will be applied each time recording is started from Record Standby mode by
pressing the [PLAY] button, [PAUSE] button, or footswitch. See page 29 for more
information of recording.
4 To turn off the Fade In function, set the Utility Fade In parameter to 0.
Setting Description
0–10 s
Fade in time in seconds (0 = off).
Fade in
Recording
(Recording can also be started
by pressing the [PAUSE] button
or footswitch)
PLAY
Record
Standby
mode
REC
(FADE IN)
UTILITY
