7
Before use
RQT5471
EXT
LOOP
AM ANT
5–12m
A
75∞
FM ANT
GND
EXT
LOOP
AM ANT
A
15mm
30mm
EXT
LOOP
75∞
AM ANT
FM ANT
A
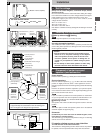
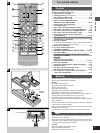
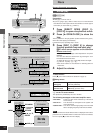
1 Flat cables.
Keep the cables as flat as possible against the back of the
unit.
Note
Connect the black connectors to the black terminals and the
blue connector to the blue terminal. Incorrect connection of the
flat cables can damage the unit.
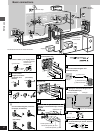
2 FM antenna.
Fix the other end of the antenna where reception is best.
3 AM loop antenna.
1 Attach the antenna holder to the rear panel of the changer .
Then clamp the antenna into the antenna holder.
2 Connect the antenna to the rear panel of the tuner/ amplifi-
er.
Keep loose antenna cord away from other wires and cords.
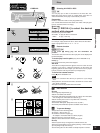
4 Front (L/R) speaker cords.
Connect the cords to the terminals of the same colour.
Note
³To prevent damage to circuitry, never short-circuit positive
(i) to negative (j) speaker wires.
³Be sure to connect only positive (red, blue or gray) wires to
positive (i) terminals and negative (black) wires to negative
(j) terminals.
5 Surround and center speaker cords.
Subwoofer cord.
(Except for the United King-
dom, Continental Europe, Australia and N.Z.)
6 Video cord(s).
[B] Only for the United Kingdom and Continental Europe
Use the RCAJ adaptor (included) if your television has a 21-
pin SCART terminal.
You do not have to connect anything to the AUDIO terminals.
[C] Except for the United Kingdom and Continental Europe
Use this connection if you have connected a VCR or Laser
Disc player (á page 51 [D]). This enables you to control the
video and audio from this equipment with [INPUT SELEC-
TOR] (á page 52).
7 AC mains lead.
[D] Insertion of connector
Even when the connector is perfectly inserted, depending on
the type of inlet used, the front part of the connector may jut
out as shown in the drawing.
However there is no problem using the unit.
[E] Except for the United Kingdom, Continental Europe,
Russia, Australia and N.Z.
If the power plug will not fit your socket, use the power plug
adaptor (included).
Note
The included AC mains lead is for use with this unit only. Do not use
it with other equipment.
For your reference:
Information you enter into the unit’s memory, except for time, remains
intact for up to two weeks after the mains lead is disconnected.
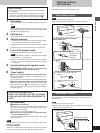
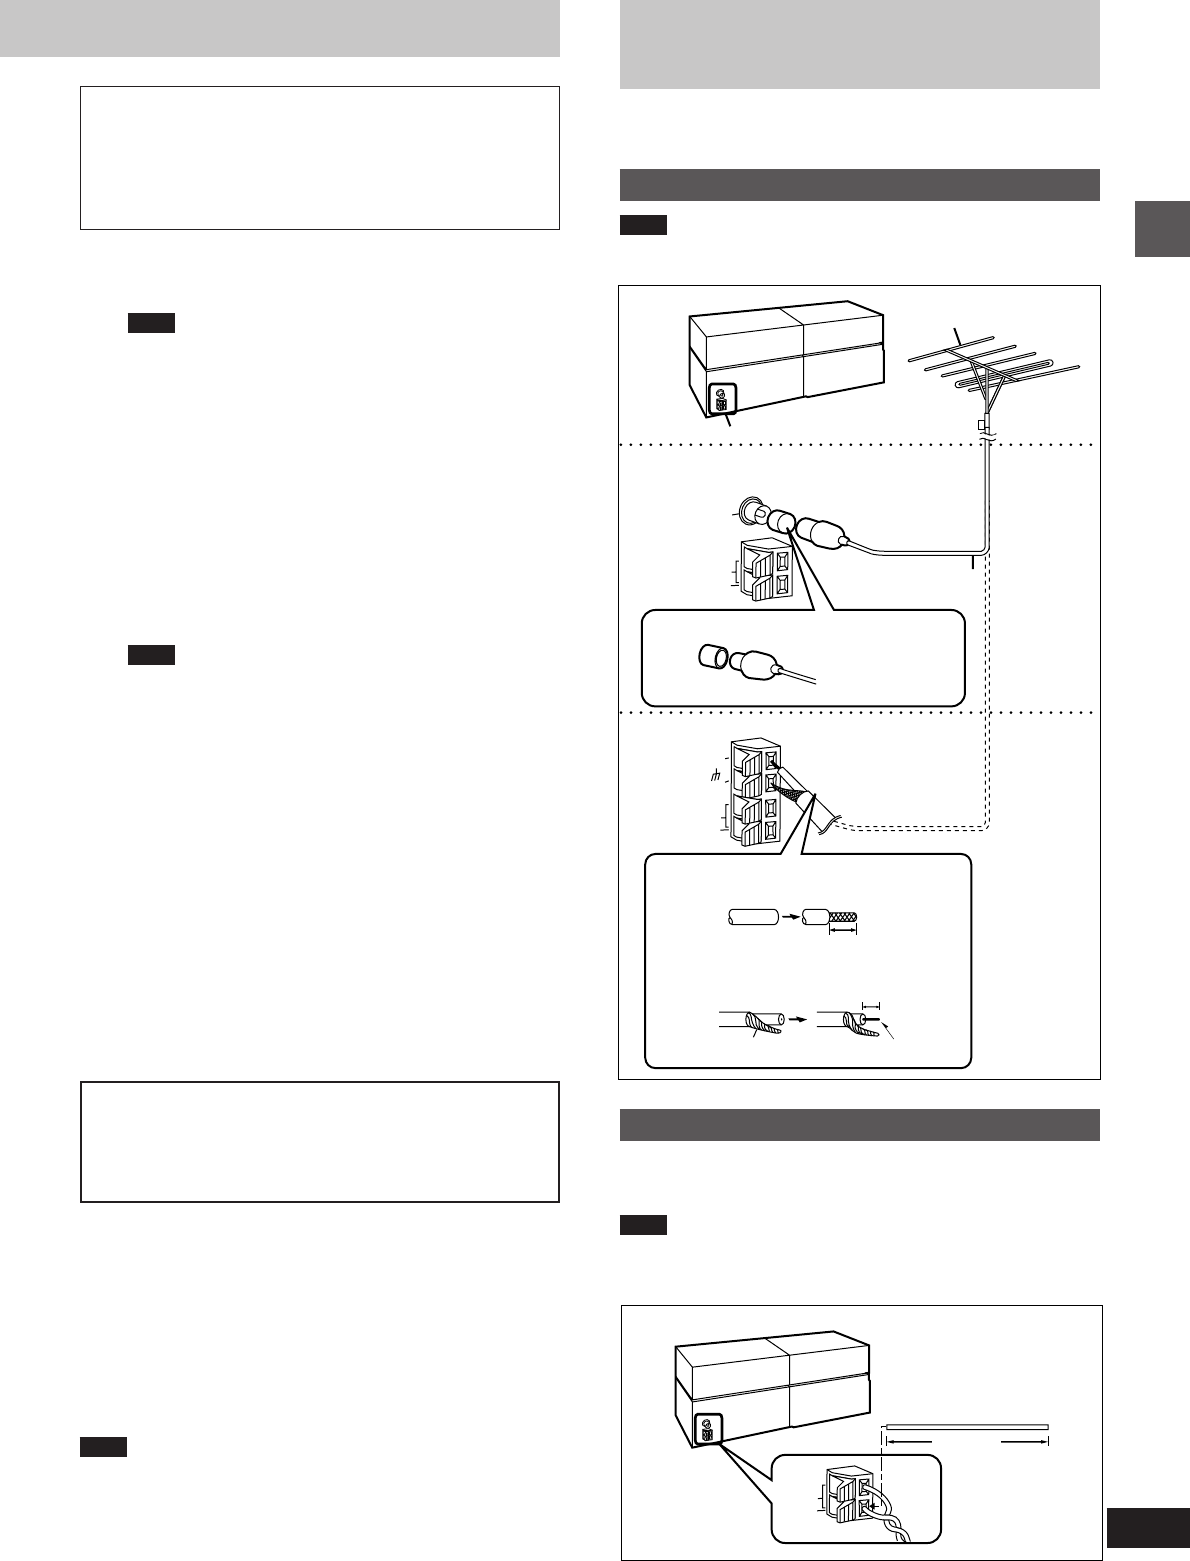
Optional antenna
connections
Use outdoor antennas if radio reception is poor.
FM outdoor antenna
Note
³Disconnect the FM indoor antenna.
³The antenna should be installed by a competent technician.
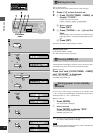
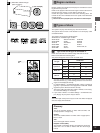
b FM outdoor antenna
1 Remove a piece of the outer vinyl
insulator.
2 Twist the shield braid to expose the
core wire.
Core wireShield braid
Use the antenna
plug adaptor
(included).
c 75 coaxial cable
(not included)
(Only for the United Kingdom)
(For the United Kingdom, Continental
Europe and Russia)
(For others)
a Tuner/amplifier
AM outdoor antenna
Run a piece of vinyl wire horizontally across a window or other con-
venient location.
Note
³Leave the loop antenna connected.
³Disconnect the antenna when the unit is not in use. Do not use the
antenna during an electrical storm.
d AM outdoor antenna
a Tuner/amplifier
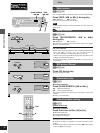
Before connection
³Do not connect the AC mains lead until all other connections
are complete.
³To prepare the AM loop antenna and speaker cords (and FM
antenna for areas other than the United Kingdom, Continen-
tal Europe, and Russia), twist the vinyl tip and pull off ([A]).
(For the United Kingdom only)
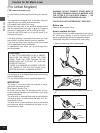
READ THE CAUTION FOR THE AC MAINS
LEAD ON PAGE 4 BEFORE PROCEEDING TO
STEP 7.


