


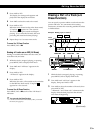

Editing Recorded MDs
33
EN
3 Press AMS or YES.
The display for erasing tracks appears and
playback of the displayed track starts.
4 Turn AMS to select the track to be erased.
5 Press AMS or YES.
When the track selected in Step 4 has been erased,
“Complete
” appears for a few seconds.
The track following the erased track begins
playing. (If you erase the last track, the track
preceding the erased track starts playing.)
6 Repeat Steps 1 to 5 to erase more tracks.
To cancel the Tr Erase Function
Press MENU/NO or p.
Erasing all tracks on an MD (All Erase)
Erasing a recordable MD deletes the disc name, all
recorded tracks, and titles.
1 While the deck is stopped, playing, or pausing,
press MENU/NO to display EDIT menu.
2 Turn AMS until “All Erase” appears in the
display.
3 Press AMS or YES.
“All Erase??” appears in the display.
4 Press AMS or YES.
When the disc name, all recorded tracks, and titles
on the MD have been erased, “Complete
”
appears for a few seconds.
To cancel the All Erase Function
Press MENU/NO or p to turn off the “All Erase??”
indication.
z You can undo the Erase Function
Use the Undo Function immediately after you erased
the track (see page 41).
Erasing a Part of a Track (a-b
Erase Function)
You can specify a portion within a track and erase the
portion with ease. It is convenient when erasing
unnecessary sections after recording satellite broadcast
or FM broadcast.
Example: Erasing a part of track A
1 While the deck is stopped, playing, or pausing,
press MENU/NO to display EDIT menu.
2 Turn AMS until “a-b Erase” appears in the
display, then press AMS or YES.
3 Turn AMS to select the number of the track, then
press AMS or YES.
“–Rehearsal–” and “Point a ok?” alternates in the
display while the deck plays back the selected
track from the beginning.
(Continued)
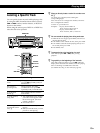
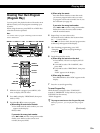
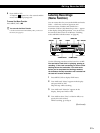
Track
number
Erasing
Point a
Point b
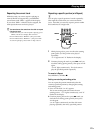
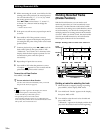
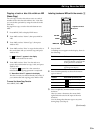
≠ AMS ±
p
0
)
r
·
§
EJECT
P
§
EJECT
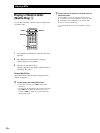
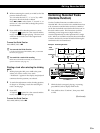
≠ AMS ±
p
0
)
r
·
P
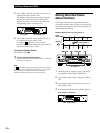
≠ AMS ±
MENU/NO
MENU/NO
YES YES
0/)
0/)