


71
GB
Getting Started
12 Press X/x to select the setting for the
Control for HDMI function.
Select [On] to use the [Control for HDMI]
function (page 105) when connecting Sony
components that are compatible with the
Control for HDMI function.
If you do not use the [Control for HDMI]
function, select [Off].
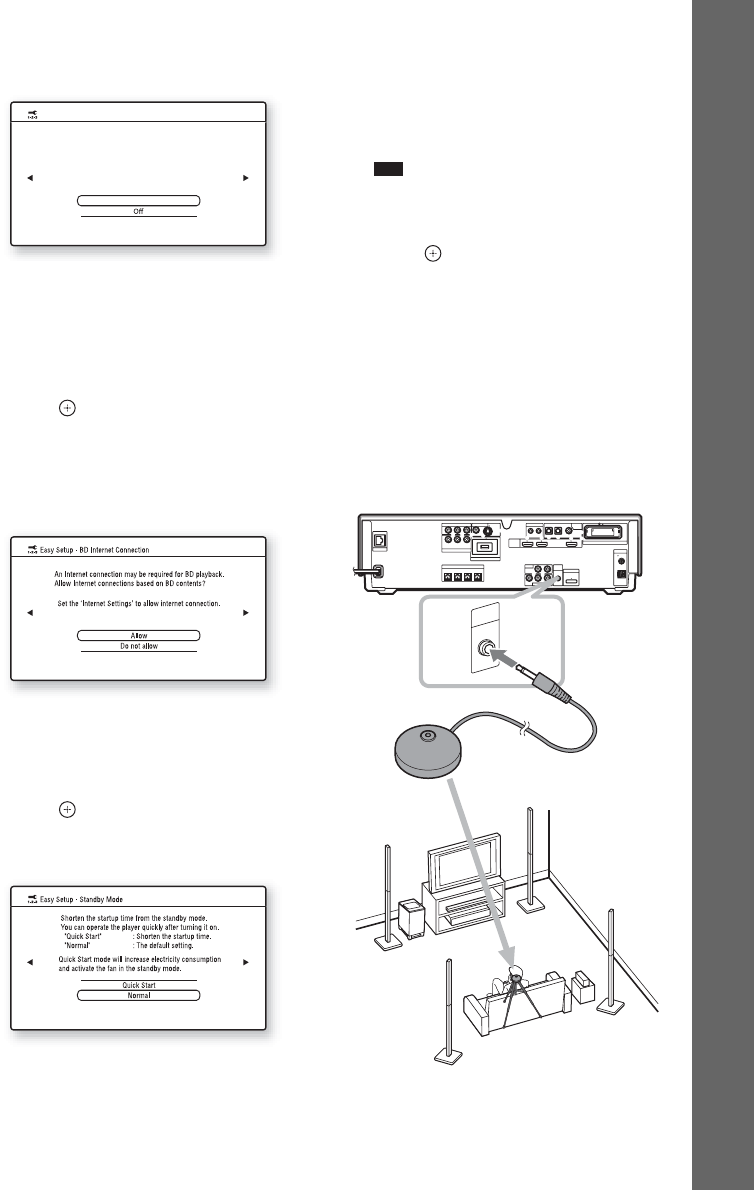
13 Press or c.
The Setup Display for [BD Internet
Connection] appears.
14 Press X/x to select the setting for the
BD Internet connections.
Select [Allow] to allow Internet
connections.
If you do not allow the connections, select
[Do not allow].
15 Press or c.
The Setup Display for [Standby Mode]
appears.
16 Press X/x to select the standby mode.
You can operate the player quickly after
turning on this function.
Select [Quick Start] if you want to shorten
the startup time from the standby mode. The
default setting is [Normal].
Note
• Quick Start mode will increase electricity
consumption and activate the fan in the standby
mode.
17Press or c.
The Setup Display for [Auto Calibration]
appears.
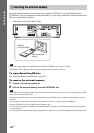
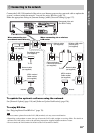
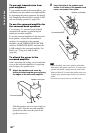
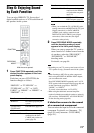
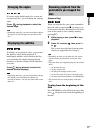
18Connect the calibration mic to the
A.CAL MIC jack on the rear panel.
Set up the calibration mic at the ear level
using a tripod, etc. (not supplied). The front
of each speaker should face the calibration
mic, and there should be no obstruction
between the speakers and the calibration
mic.
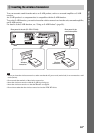
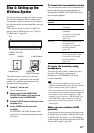
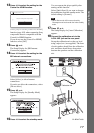
On
You can operate this unit in conjunction with a TV connected by HDMI.
Check your TV settings when using this function.
Easy Setup - Control for HDMI
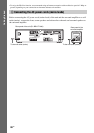
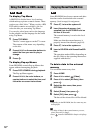
COAXIAL
OPTICAL
COAXIAL75
FM
AM
ANTENNA
DIGITAL
HDMI
DMPORT
EZW-RT10
TV
SAT/CABLE IN
VIDEO OUT IR REMOTE
LAN(100)
EXTERNAL
SPEAKER
SAT/CABLE
COMPONENT VIDEO OUT
COMPONENT VIDEO IN
A.CAL
MIC
SAT/CABLETV
IN 1 IN 2 OUT
IN
700mA
MAX
ECM-AC2
AUDIO IN
OUT IN
AUDIO
VIDEO
Y
Y
P
B
/
P
B
/ C
B
P
R
/ C
R
C
B
P
R
/
C
R
LR
LR
DC5V
DC5V 500mA MAX
S-VIDEOVIDEO
FRONT
R
FRONT
L
CENTERWOOFER
A.CAL
MIC
E
C
M
-A
C
2
Calibration mic
Ex. BDV-IT1000