


Settings and Adjustments
127
GB
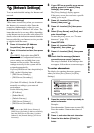
[Network Settings]
You can make detailed settings for Internet and
network.
x [Internet Settings]
These items are necessary when you connect to
the Internet via a network cable. Enter the
respective (alphanumeric) values for your
broadband router or Wireless LAN router. The
items that need to be set may differ, depending
on the Internet service provider or the router. For
details, refer to the instruction manuals that have
been provided by your Internet service provider
or supplied with the router.
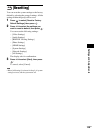
1 Press X/x to select [IP Address
Acquisition], then press .
2 Press X/x to select an item, then press
.
[Use DHCP]: Select this when DHCP
(Dynamic Host Configuration Protocol)
server settings are available from your
Internet service provider. The network
settings necessary for the system will be
assigned automatically.
If you set [DNS Server Auto Acquisition] to
[Off], set the following item:
– [DNS Server (Primary)]
– [DNS Server (Secondary)]
[Use Static IP Address]: Set the IP address
manually according to your network
environment.
Set the following items:
– [IP Address]
– [Subnet Mask]
– [Default Gateway]
– [DNS Server (Primary)]
– [DNS Server (Secondary)]
Note
• When you set the [DNS Server (Primary)]/
[DNS Server (Secondary)] addresses manually,
enter the [DNS Server (Secondary)] address.
Otherwise, the [Internet Settings] will be set
incorrectly.
3 If your ISP has a specific proxy server
setting, press X/x to select [Proxy
Settings], then press .
The [Proxy Settings] display appears.
If the proxy server does not have a specific
setting, go to step 8.
4 Press X/x to select [Use of Proxy
Server], then press .
5 Press X/x to select [On], then press
.
6 Select [Proxy Server] and [Port], and
enter the settings.
To enter the proxy server, see “To enter
characters” (page 127).
7 Press RETURN.
8 Press X/x to select [Network
Diagnostic], then press .
9 Press C/c to select [Start], then press
.
10Check that the message [Network
connections are correct.] appears.
The setup is finished. If the message does
not appear, follow the on-screen messages.
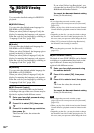
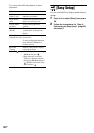
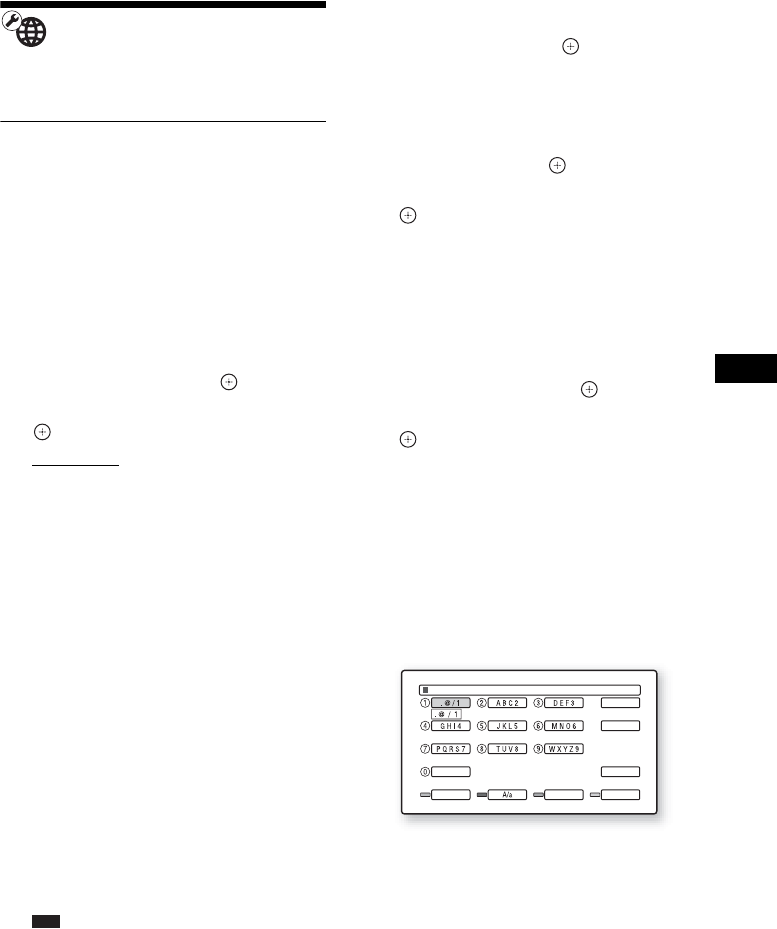
To enter characters
The display for entering characters appears
when you select [Proxy Server] in [Proxy
Settings].
1 Press the number button repeatedly to
select a character.
Example:
Press the number 3 button once to enter [D].
Press the number 3 button three times to
enter [F].
2 Press c, and enter the next character.
3 Press the blue button ([Finish]) to
finish.
Proxy Server Entry
Space 0
Letter Type Symbol
Clear
Clear All
Cancel
Finish