Rio Advanced Digital Audio Center User’s Guide | 89
5. Press Select.
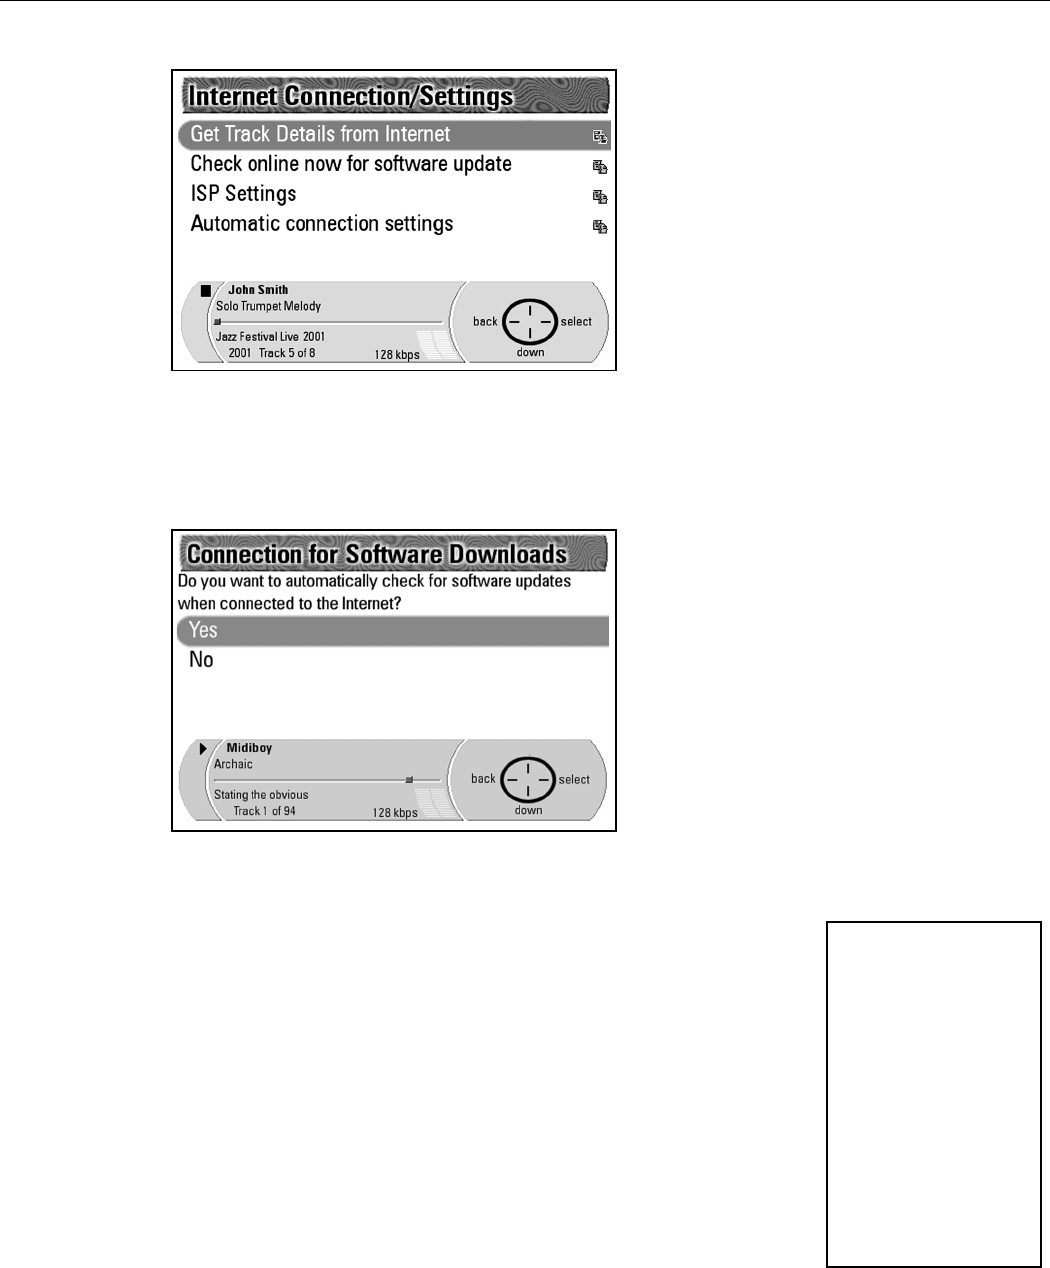
6. Press Down to highlight Automatic Connection Settings.
7. Press Select.
8. Press Down to highlight Connection for Software Downloads.
9. Press Select.
10. Press Select.
This will enter in that choice and return you to the Automatic
Connections screen.
When the Rio Advanced Digital Audio Center is connected to the Internet, it
checks our web site for software upgrades to download. It then prompts you with
the Software Upgrade Available screen. If you do not want to configure the
Rio Advanced Digital Audio Center to find and download software upgrades
automatically, you can also choose Check online now for software update on
the Internet Connections/Settings screen.
11. Press Apply Upgrade on the Navigation Button.
The system then restarts and initiates the upgrade process.
12. Press Upgrade Now on the Navigation Button.
The display changes to the Upgrading Player screen with a status bar.
Once the status bar finishes, the display changes to the Upgrading
Database screen with another status bar. Once the Upgrading Database
status bar completes, the system restarts and resumes normal functions.
Hint: If you select
Restore to “as
new”, the upgrade
software updates the
Rio Advanced Digital
Audio Center,
eliminates all stored
music files, and
resets the Rio
Advanced Digital
Audio Center back
to factory settings.
