64 | Network configuration
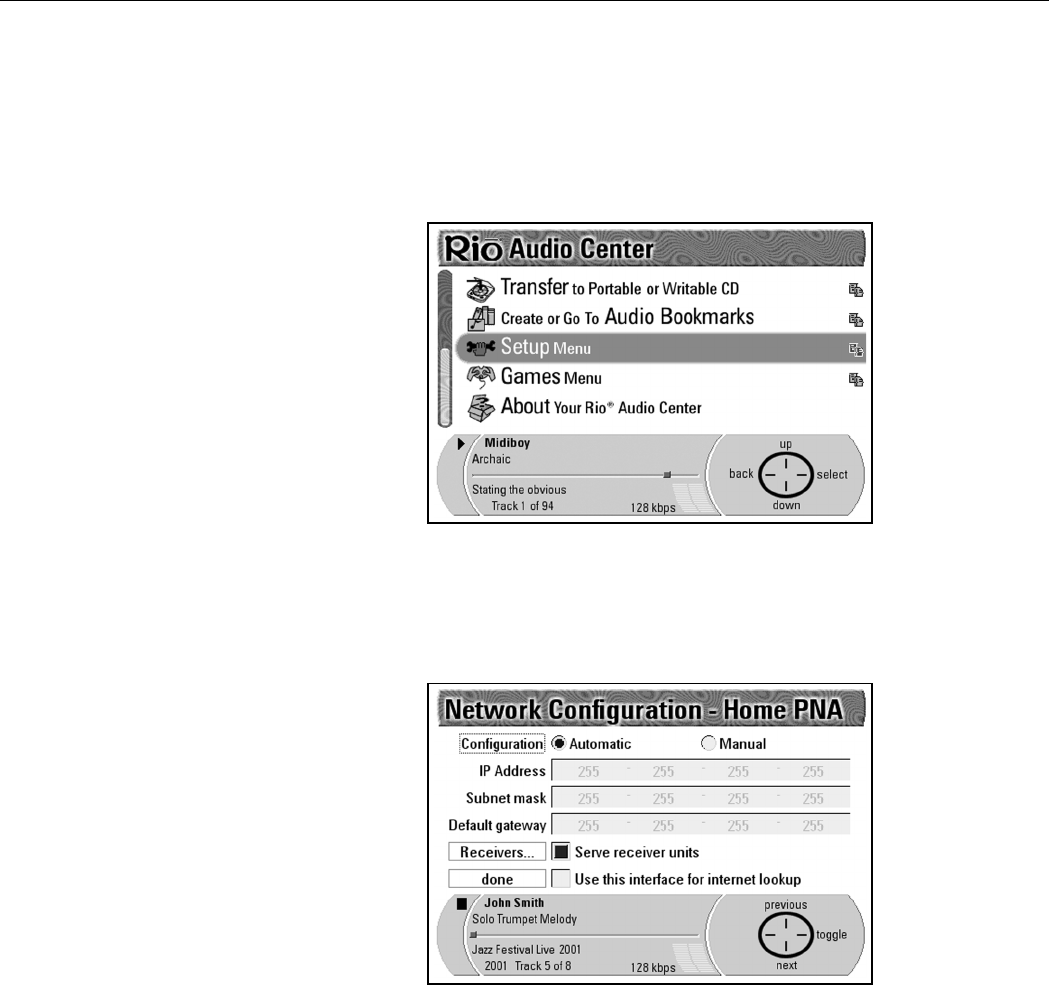
Digital Audio Center, when you Select Network Configuration, you are presented
with a submenu where you can select either Home PNA or Ethernet as your
networking option. The only difference between the two Network Configuration
screens is the title.
1. Press Menu to display the Main Menu screen.
2. Press Down on the Navigation Button to highlight Setup Menu.
3. Press Select on the Navigation Button to display the Setup Menu screen.
4. Press Down on the Navigation Button to highlight Network
Configuration.
5. Press Select on the Navigation Button to display the Network
Configuration screen.
By default the Automatic radio button is selected as the Configuration
type. You should only select Manual if you are using a system with a static IP
and know your network IP settings. Select the Manual radio button if you
wish to enter a static IP address.
6. Press Next on the Navigation Button until the dotted line box surrounds
Use this adapter for Internet lookup.
7. Press To g g l e on the Navigation Button to place a mark in that option’s
box.
8. Press Next on the Navigation Button until the Done box is highlighted.
9. Press OK on the Navigation Button to enter your settings changes and to
return to the Setup Menu screen.
