


9 Using the Tape Deck
49
En
English
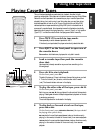
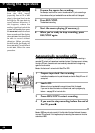
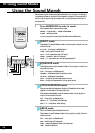
Copying tapes
Here’s how to copy a tape from TAPE II to TAPE I:
1 Press TAPE I/II.
2 Load a the tape you’re recording from into
deck II.
Recording starts in the
3
direction, so take care over which way you load the
tape.
3 Prepare tape deck I for recording.
Load a blank cassette, wind on past the leader, and switch Dolby NR on or off
as required—for best results, switch on if the tape you’re recording was
recorded using Dolby NR.
Note: It’s not possible to switch Dolby NR on and off independently for each
deck.
4 Press ASES/COPY to start recording.
Recording starts in the
3
direction and continues onto the other side, unless
the erase-protect tab is broken on the TAPE I cassette.
5 If you want to stop recording before the end of
the tape is reached, press 7.
TAPE I TAPE II
ASES/COPY
2 NR
TAPE I/II
7
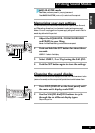
REC / STOP
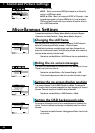
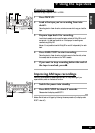
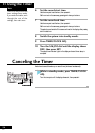
1 Switch the power into standby.
2 Press REC/STOP for about 3 seconds.
Release when the display reads B.CUT 2.
Improving AM tape recordings
Recording AM broadcasts on cassette tape can result in noisy recordings. If you
experience this, switch on the beat cut function:
Note: Switch beat cut off again by following the same procedure (the display reads
B.CUT 1 when off).