


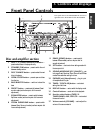
3 Controls and Displays
13
En
English
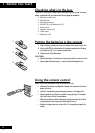
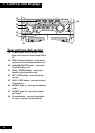
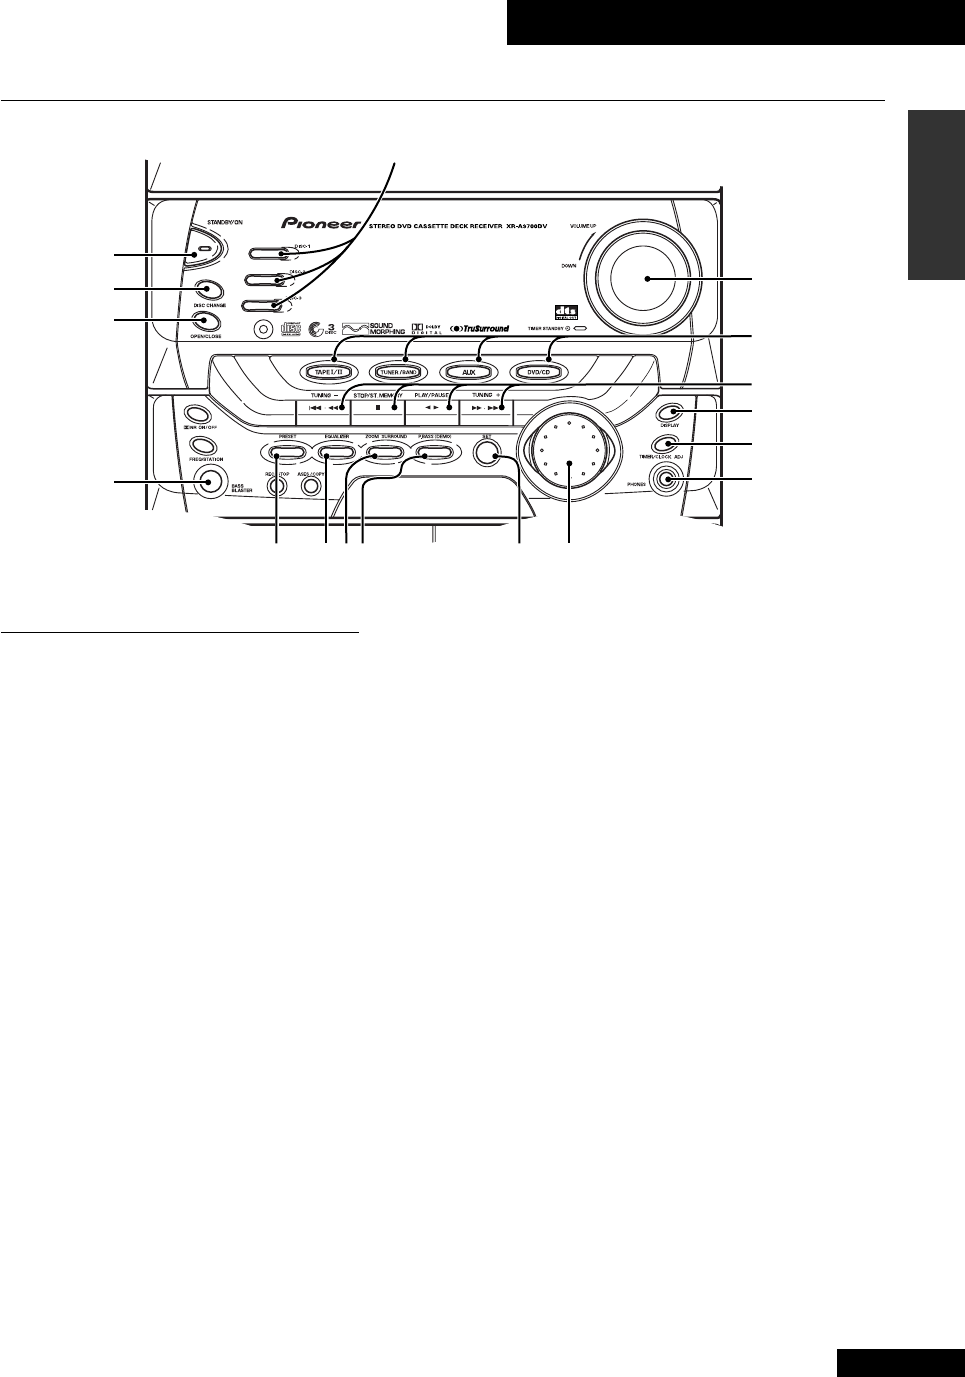
Front Panel Controls
Disc and amplifier section
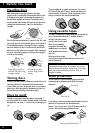
1 DISC-1,2,3 select buttons & indicators –
press to select discs in the player directly
2 STANDBY/ON button – press to switch the unit
between standby and on.
3 DISC CHANGE button – press to select the next
disc in the player
4 OPEN/CLOSE button – press to open and close
the disc tray
5 BASS BLASTER button – switch on to boost the
bass
6 PRESET button – press to switch between Preset
sound modes (use the
S.M.JOG dial for smooth
adjustment)
7 EQUALIZER button – press to switch between
Equalizer modes (use the
S.M.JOG dial for smooth
adjustment)
8 ZOOM SURROUND button – press to switch
between Zoom Surround modes (use the
S.M.JOG dial
for smooth adjustment)
S
O
U
N
D
M
O
R
P
H
I
N
G
J
O
G
DYNAMIC POWER SUPPLY AMPLIFIER
2
3
4
5
6789
10
11
17
16
15
14
13
12
1
9 P.BASS (DEMO) button – press to switch
between P.Bass modes (use the S.M.JOG dial for
smooth adjustment)
10 SET button – use to enter timer settings made with
the
S.M.JOG dial
11 SOUND MORPHING JOG (S.M.JOG) – use
to change Preset, Equalizer, Zoom Surround and P.Bass
modes. Also used when setting the timer.
12 PHONES jack (Headphones) – plug in a pair
of headphones to this jack
13 TIMER / CLOCK ADJ button – use to start
setting the clock/timer
14 DISPLAY button – use to switch the display mode
15 Control buttons – use to control disc playback
16 function select button (TAPE I/II,
TUNER/BAND, AUX, DVD/CD – use to select
the source function
17 Volume control (VOLUME) – use to adjust the
volume of the source material
Front panel shown is the XR-A9700DV. All controls are
applicable to the XR-VS100D and the XR-A9700DV.