


9 Using the Tape Deck
47
En
English
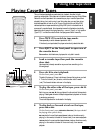
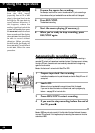
Relay play
Both tape decks are auto-reverse and will play a tape repeatedly until you press 7 or
the tape has played eight times all the way through. If two tapes are loaded, each will
be played alternately (for a maximum of eight times through each tape).
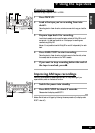
Making Tape Recordings
You can make tape recordings from any source in the system, and also from an
external component connected to the AUX IN inputs. If you're recording from CD it's
more convenient to use the ASES mode—see Automatically recording a CD below.
Once recording has started, you can't switch to another component until either the
recording has stopped, or you pause the recording. So, for example, you can't switch
over to the tuner while you're recording a CD.
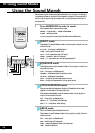
Unlike some tape decks, there's no need to set recording levels—the deck sets the
right level automatically. Also, when recording, the volume, tone and balance controls
have no effect on the recording. This means that you can record something with the
volume turned right down, if you want.
Before recording, check that the cassette erase tabs have not been broken, and that the
tape is either a type I (normal position) or type II (high position/C
rO
2
)—you can't
record on type IV (metal) tapes using this deck.
If you're recording from the start of a tape, it's a good idea to wind the tape on a little
so that you don't accidently start recording over the leader tape. You can either do this
by hand, or load the tape into the deck and play the tape for 5–6 seconds.
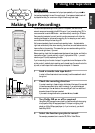
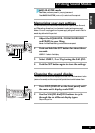
1 Load a cassette into tape deck I.
In order to follow these instructions more easily, load the cassette with side A
facing front.
2 Check the recording direction.
If you start recording in the 3 directon, both sides of the tape will be recorded
(unless the erase protect tab for side B is missing). If you switch sides and
start recording in the 2 direction, then recording will start from side B and
stop when the end of the tape is reached.
If you need to change the direction, press
2
6 twice, then 7.
3 Turn Dolby NR on or off as required.
Using Dolby NR improves the sound quality of tape recordings that are going
to be played on Dolby NR equipped players. If the tape is not going to be
played on a Dolby NR equipped player (or if you're not sure), you should
leave Dolby NR off.
4 Select the function you plan to record.
For example, press DVD/CD to record a CD, DVD or Video CD disc.
TAPE I
7
2 3
REC/STOP
2 NR
TAPE I
3
TAPE II
3
TAPE I
2
TAPE II
2