


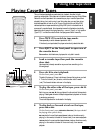

9 Using the Tape Deck
48
En
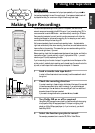
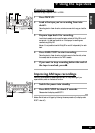
5 Prepare the source for recording.
For example, load the CD or tune in the radio station. If you’re recording a
disc, make sure that you’ve selected the correct disc and that it’s stopped.
6 Press REC/STOP.
The deck starts recording.
7 Start the source playing (if necessary).
8 When you’re ready to stop recording, press
REC/STOP again.
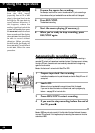
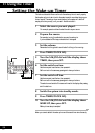
Automatically recording a CD
Auto Synchro Editing System, or ASES for short makes sure that when recording a
complete CD, a track isn’t spread over two sides of a tape. If the tape runs out midway
through a CD track, the same track is automatically recorded from the beginning
again on the other side.
Note: this feature will not work with Video CD or DVD.
1 Prepare tape deck I for recording.
Load a blank cassette, wind on past the leader, and switch Dolby NR on or off
as required.
2 Load a CD.
Make sure that you’ve selected the correct disc and that it’s stopped.
If you want to record the tracks in a different order, use the program play
feature—see page 35 for how to do this.
3 Press ASES/COPY to start recording.
4 If you want to stop recording before the end of
the CD, press 7.
Note: ASES may not work correctly if the first side of the tape finishes at the same
time as a CD track ends. If this happens, stop the recording then resume on the other
side without ASES.
TAPE I
7
ASES/COPY
2 NR
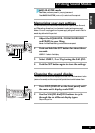
Tip
Sometimes when recording
from the AUX inputs
(especially from a CD or MD
player), the signal level can be
too high for the tape deck to
record without distortion. If
this happens, reduce the
auxiliary signal level: switch the
system into standby then press
the DOLBY NR button for about
three seconds until the display
shows ATT ON. You should now
be able to record without
distortion. (When you select
the AUX mode, the display will
show AUX ATT.) To switch back
to AT T OFF, follow the same
procedure.