


7
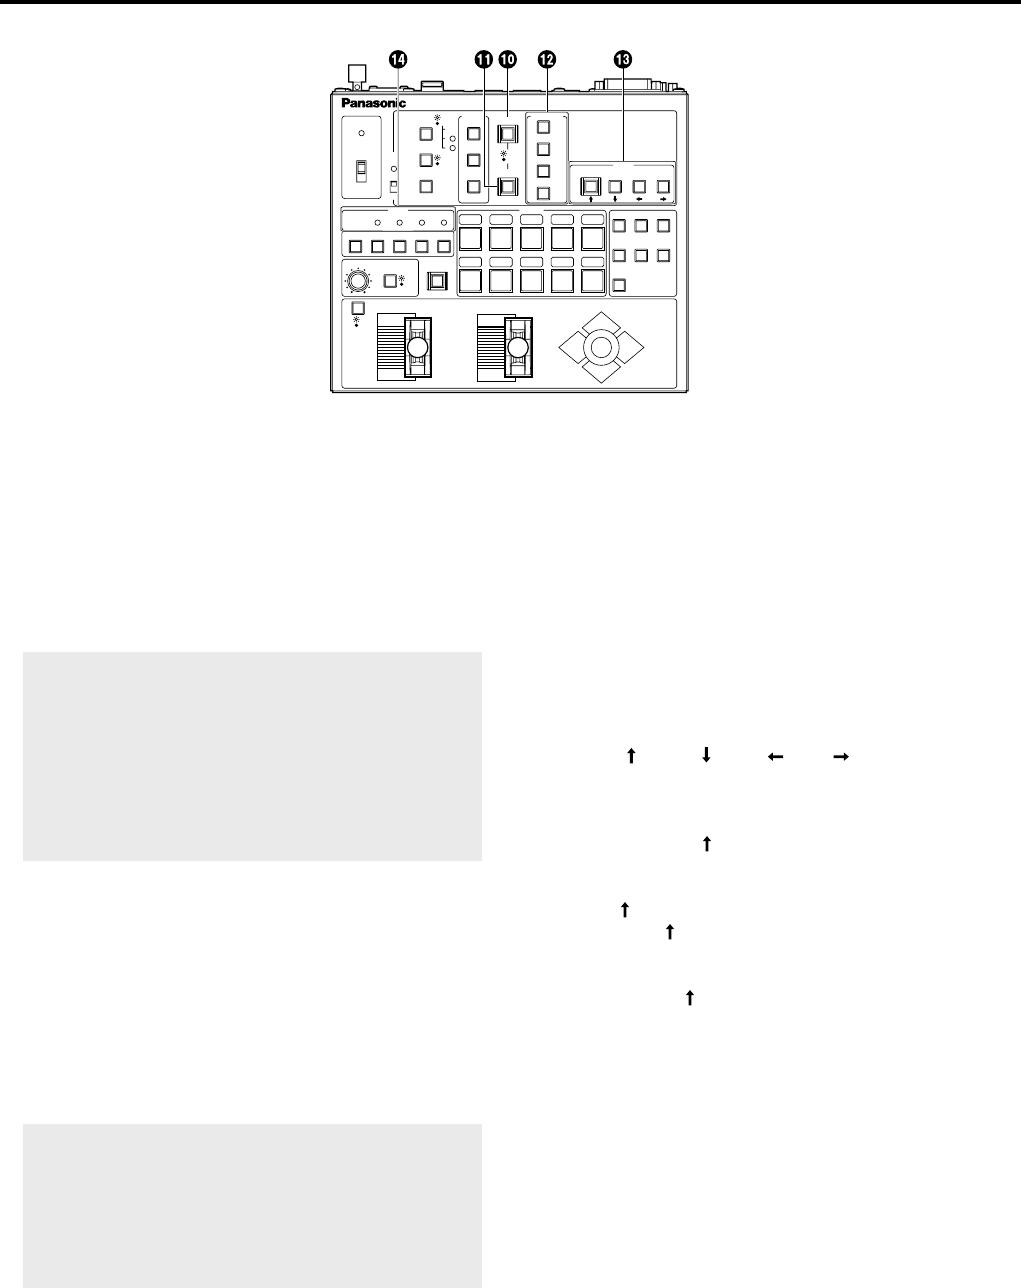
Parts and their functions
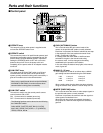
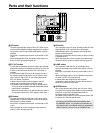
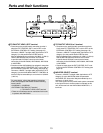
AWC button
When the WHITE BAL [A] button or [B] button has
been selected, press the AWC button to automatically
adjust the white balance and enter the adjustment in the
camera’s memory A or memory B.
While the white balance is being adjusted, the AWC
button’s lamp flashes; when it has been adjusted properly,
it goes off. It comes on when it was not possible to
perform the adjustment.
This function does not work if the MODE button
has been set to BAR (the MODE button’s lamp is
lighted) or if ATW has been selected.
It may not be possible to adjust the white balance if
there is no white object on the screen being shot.
When using a pan/tilt head other than the
AW-PH350, AW-PH360 or AW-PH650, the button’s
lamp also goes off when the white balance has not
been adjusted properly.
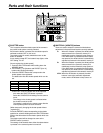
ABC button
This is used to automatically adjust camera’s black
balance in the pan/tilt head system currently selected.
Set the IRIS [AUTO/MANU] button to AUTO (the IRIS
button is now lighted), and press the ABC button.
While the black balance is being adjusted, the ABC
button’s lamp flashes; when it has been adjusted properly,
it goes off. It comes on when it was not possible to
perform the adjustment.
No operations are performed when the MODE
button has been set to BAR (the MODE button’s
lamp is lighted).
When using a pan/tilt head other than the
AW-PH350, AW-PH360 or AW-PH650, the button’s
lamp also goes off when the black balance has not
been adjusted properly.
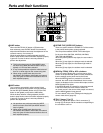
SCENE FILE [USER/1/2/3] buttons
These are used to select the SCENE FILE of the camera
in the pan/tilt head system currently selected.
The lamp of the selected SCENE FILE button lights.
[ In the case of the AW-E350, AW-E650, AW-E655,
AW-E750 and AW-E860]
When the [USER] button’s lamp lights, the user mode is
selected.
When the [1] lamp lights, the halogen mode is selected.
When the [2] lamp lights, the fluorescent light mode is
selected.
When the [3] lamp lights, the outdoor mode is selected.
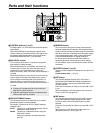
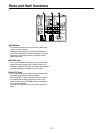
MENU/ , ITEM/ , YES/ , NO/ buttons
These are used to display the on-screen menus of the
camera in the pan/tilt head system currently selected so
that the settings can be performed on the menus.
When the MENU/ button is pressed for at least two
seconds, the menu mode is established, the on-screen
menus are displayed in the camera video output, and the
MENU/ button lamp lights.
If the MENU/ button is pressed for at least two seconds
in the menu mode, the menu mode is exited, the
on-screen menus in the camera video output are cleared,
and the MENU/ button lamp goes off.
For more details, refer to the “Setting and changing the
camera menu items” (page 25).
TALLY lamps [1] to [5]
When tally signals are input to TALLY connectors [1]
through [5], the lamps with the numbers corresponding to
the connectors come on.
1
LEVEL
IRIS
OPERATE
CAM
CONT
2 3 4
ATW
ITEM
DEF
WIP
H/F
(AF)
EXT
LAMP
ND OP
SCENE FILE
PRESET
MENU
YES
NO
B
A
SHUTTER
MODE
GAIN
5
2
ON
OFF
ON
OFF
3 4 5
ABC
MEMORY
MENU
Multi Hybrid Control Panel AW-RP555
AWC
OK
NG
WHT BAL
3
2
1
USER
TALLY
CONTROL
HIGH
LOW
TELE
WIDE
FAR
LEFT RIGHT
UP
DOWN
NEAR
MANU
AUTO
SPEED
ZOOM
FOCUS
PAN/TILT
1 2 3 4 5
6 7 8 9
10
MANU
AUT
O
0dB
L
H
CAM
BAR