


OPERATION 45
ENGLISH
Operation
connecting its analog audio outputs to the
appropriate analog inputs (e.g. DVD) of the AVR.
Additionally, the digital signals will be passed
through to the Digital Audio Outputs
A
.
Tape Recording
In normal operation, the audio or video source
selected for listening through the AVR is sent to
the record outputs. This means that any program
you are watching or listening to may be record-
ed simply by placing machines connected to the
outputs for Tape Outputs
3
or Video 1
Outputs
P7
in the record mode.
When a digital audio recorder is connected to
any of the Digital Audio Outputs
A
, you are
able to record the digital signal using a CD-R,
MiniDisc or other digital recording system.
Note that all digital signals will be passed
through to both, coaxial and optical, digital
outputs simultanously, no matter which kind of
digital input was selected.
NOTES:
• The digital outputs are active only when a digi-
tal signal is present, and they do not convert an
analog input to a digital signal, or change the for-
mat of the digital signal (e.g. Dolby Digital to
PCM or vice versa, but coaxial digital signals are
converted to optical signals and vice versa). In
additon, the digital recorder must be compatible
with the output signal. For example, the PCM dig-
ital output from a CD player may be recorded on
a CD-R or MiniDisc, but Dolby Digital or DTS sig-
nals may not.
• To make an analog recording from a digital
source is possible, but only from a PCM source
(not Dolby Digital or DTS) and correctly only with
"Surround Off" mode (with any Surround mode
only the L/R front signals will be fed to the
record outputs).
Using
When Harman Kardon’s (optional) is
connected and a compatible Apple
®
iPod
®
is
docked in The Bridge, press the DMP
Selector Button
e
D to choose the iPod
as the input source allowing playback of audio,
video and still-image materials on your iPod
through your high-quality audio/video system.
Pressing the DMP Selector Button
e
D will also activate the AVR remote’s con-
trol codes for the iPod, and you may also use the
front-panel controls to operate the iPod.You
may also select DMP as the source
from the front panel by repeatedly pressing the
Input Source Selector
%
until DMPappears
in the Upper Display Line
Ò
, although no
Input Indicator
will light.
When The Bridge is properly connected and a
compatible iPod is properly docked, the Upper
Display Line
Ò
will read DMP/CON-
NECTED
. Once that message appears, use the
remote or front-panel buttons to control the
iPod. See the Function List Table on pages 58-59
for a listing of the remote control buttons that
have been programmed to control the iPod.
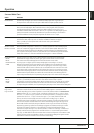
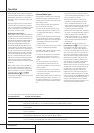
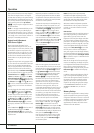
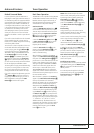
Whether or not an iPod is docked in The Bridge,
the screen shown in Figure 30 will appear on a
video display connected to the AVR, but you will
not be able to affect the screen without an iPod
docked in The Bridge. Navigate The Bridge’s
screens by using the
‹
/
›
Buttons
Ea
to
highlight a line and pressing the Set Button
F
to select the line. The
›
Button
a
scrolls
down, and the
‹
Button
E
scrolls up. Press
the Menu Button
b
to return to the previous
level of The Bridge’s menu system. Remember to
set the remote in The Bridge device mode by
pressing the Tape/The Bridge button. If it lights
in red, press it again quickly so that it lights in
green, indicating it is in The Bridge mode.
Figure 30
MUSIC: This line allows you to navigate the
audio materials stored on your iPod.
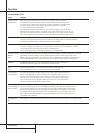
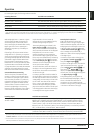
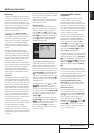
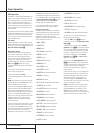
PHOTOS/VIDEOS: Selecting this item allows
you to play still images or videos stored on the
iPod. The screen shown in Figure 31 will appear,
directing you to operate the iPod’s own controls
directly to play images and videos. You may use
the AVR 347 remote instead of the iPod’s con-
trols to navigate it.Visual materials will be dis-
played on a video display connected to the AVR.
Figure 31
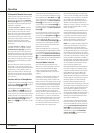
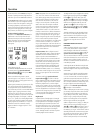
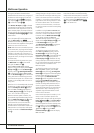
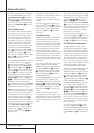
SETTING: This line accesses the Settings menu,
shown in Figure 32.The items in this menu
enable you to use the Shuffle and Repeat func-
tions on the iPod. You may also set the Resume
function, which resumes play of a selection from
the point at which it was stopped,
Figure 32
NOTE: iTunes allows you to set certain selec-
tions to always or never remember playback
position, or to be skipped in Shuffle mode. The
AVR 347’s settings cannot override these iTunes
settings.
In brief, the Reverse Search, Play and
Forward Search Buttons
P
and the
⁄
/
¤
/
‹
/
›
Buttons
DEa
and Set
Button
F
may be used in a similar manner to
the corresponding controls on the iPod.
Complete details on operating an iPod using
and an AVR remote are furnished
with .
The front-panel controls may be used to access a
limited number of iPod functions. Press the RDS
select button
^
to play or pause the current
track.The Tuning Selector
)
may be used to
search reverse (left side of button) or forward
(right side of button) through the tracks. Press
the Tuner Band Selector
!
to call up the
iPod’s menu. Press the Preset Stations
Selector
#
to scroll, and the Set Button
@
to select.
While a selection is playing, the song title, artist
and album name, if available on the iPod, will
scroll across the upper line in the front panel
Message Display
Ò
.The lower line will dis-
play the elapsed time of the track on the left, the
play mode icon, and the time remaining on the
right.
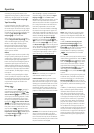
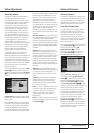
In addition, if a video display is connected to the
AVR, a screen will appear briefly to display
information about the iPod’s status and the
track.The top line will display the play mode
icon, with the phrase “Now Playing” appearing
to the right to remind you that you are viewing
the status of the current track, as opposed to
another menu screen. Below that the AVR dis-
plays the total number of tracks in the current
play list on the right (all materials on the iPod
are considered one of the play lists) with the
number of the current track on the left.The song
title, artist and album are displayed.At the bot-
tom of the screen is a graphic bar indicating the
current play position within the track, with the
elapsed and remaining times appearing below
the bar.