There are two ways to correct distortion in projected images as below.
• Quick Corner
This allows you to manually correct each of the four corners of the
projected image separately.
s p.15
We recommend using Quick Corner to accurately adjust keystone
distortion.
• H/V-Keystone
This allows you to manually correct distortion in the horizontal and
vertical directions independently. You can perform easy H/V-Keystone
corrections by using the [
w
/ ] [
v
/ ] [
<
/ ] and [
>
/ ] buttons
on the projector's control panel.
s Quick Start Guide
q
Shift the lens to the position shown below when performing
horizontal and vertical keystone. When the lens shift is not
positioned as below, the distortion is not corrected accurately.
• The horizontal lens shift is set to the center.
• The vertical lens shift is set to the top or bottom.
The correction may not be properly performed according to the
zoom adjustment value.
These two methods cannot be used together. When the Keystone
correction method is selected from the configuration menu, the
correction method you choose is assigned to the [
w/ ], [v/ ], [</
], and [
>
/ ] buttons on the control panel. The default setting for
Keystone is set to H/V-Keystone, so when [
w
/ ], [
v
/ ], [
<
/ ],
and [
>/ ] buttons are pressed, H/V-Keystone correction is carried out.
Because Quick Corner and H/V-Keystone correction can be carried out
while projecting a test pattern, you do not need to make preparations
by connecting a computer or other equipment.
Correcting Distortion with Quick Corner
Procedure
A
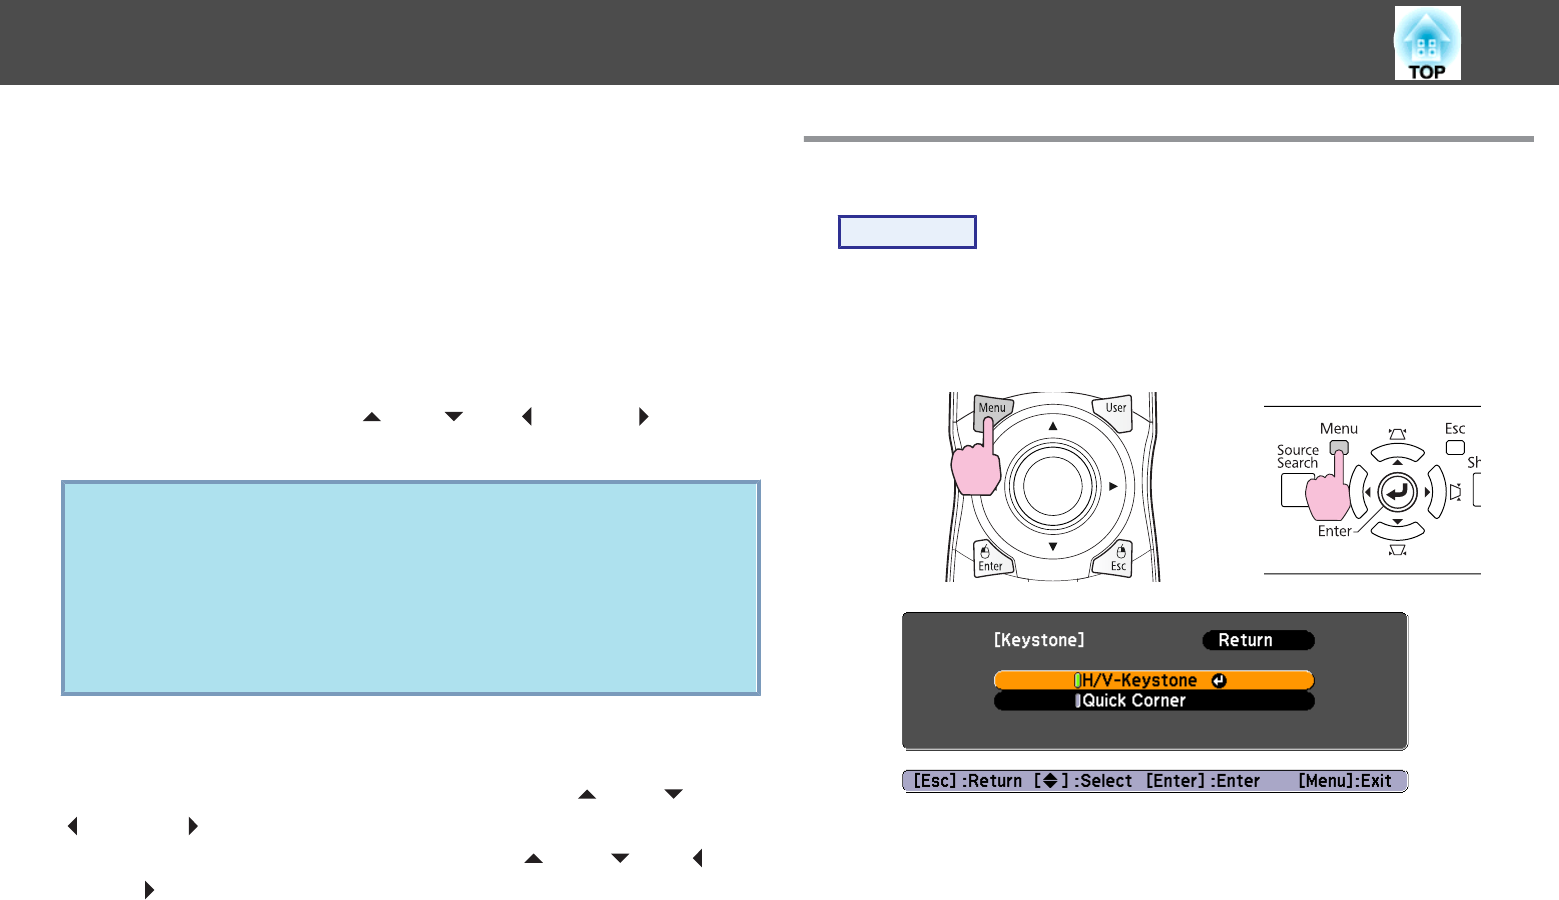
Press the [Menu] button, and then from the configuration
menu select Settings - Keystone.
s "Using the
Configuration Menu"
Using the Remote Control Using the Control panel
B
Select "Quick Corner", and then press the [Enter] button.
Press the [Enter] button again to display the selection screen from
which you can select one of the four corners.
Correcting Distortion in the Projected Image
15
