


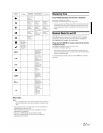
F/RSUb.WL~
3WAY
slUJ
6 Turn the
Rotary
encoder
to adjust the output level.
Adjustable output level: -12 to 0 dB.
7 Repeat steps 3 to 6 to make adjustment to the other
bands.
• While adjusting the X-over, you should consider thefrequency
response
of
the connected speakers.
• The storedcontents are
not
deleted even when resetting the unit
or
disconnecting the battery.
• The storedcontents can be recalled bypeiforming operation in
"Recalling the Stored Crossover Settings" (page 17).
• Pressing
~
IRTN
when X-over is adjustedwill return to the previous
item.
If
MultEQ is turnedon, the A.SEL button is ineffective. For details,
refer to "Turning MultEQ
on/off"
(page 13).
•
About
the 4.2ch(
F/R/Sub-
W)/2.2ch(
3WAY)
system
You
can switch to 4.2ch(
F/R/Sub-
W)/2.2ch(3WAY) system mode
with the 4.2ch(
F/R/Sub-
W)/2.2ch(3WAY) switch on the bottom
side
of
the unit(pages
40
to 42).
When setting to "3WAY":
The unit can be operated in a 2.2ch system.
When setting to
"F/R/Sub-
W":
The unit can be operated in a 4.2ch system.
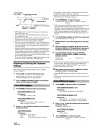
Recalling
the
Stored
Crossover
Settings
1 Press
A.SEL
to recall the DSP adjust mode.
Media Xpander H Crossover H T.Correction H
Parametric EO/Graphic
EO
H Media Xpander
2 Turn the
Rotary
encoder
to select the Crossover
mode, and then press
~/II/ENT.
3 Press
anyone
of the
preset
buttons
(1
through
6)
that has your desired characteristic
in
memory.
4 Press the
preset
buttons
again to return to the
DSP adjust mode.
5 Press and hold
~/ESC
for at least 2 seconds to
return to normal mode.
• Pressing
~
IRTN
during the procedure will return to the previous
mode.
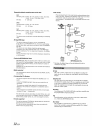
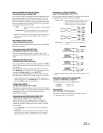
About
Time
Correction
The
distance
between
the listener and the speakers
in
a
car
vary widely
due to the
complex
speaker placement.
This
difference
in
the distances
from the speakers to the listener creates a shift
in
the sounds
image
and
frequency characteristics. This is
caused
by
the time delay
between
the
sound
reaching
the
listener's
right versus the left ear.
To correctthis, this unit is able to delay the audio signal to the speakers
closest to the listener. This effectively creates a perception
of
increased
distance for those speakers.
The
listener
can
be
placed
at
an
equal
distance
between
the left and right speakers for
optimum
staging.
The
adjustment will
be
made
for
each
speaker
in
3.4cm
steps.
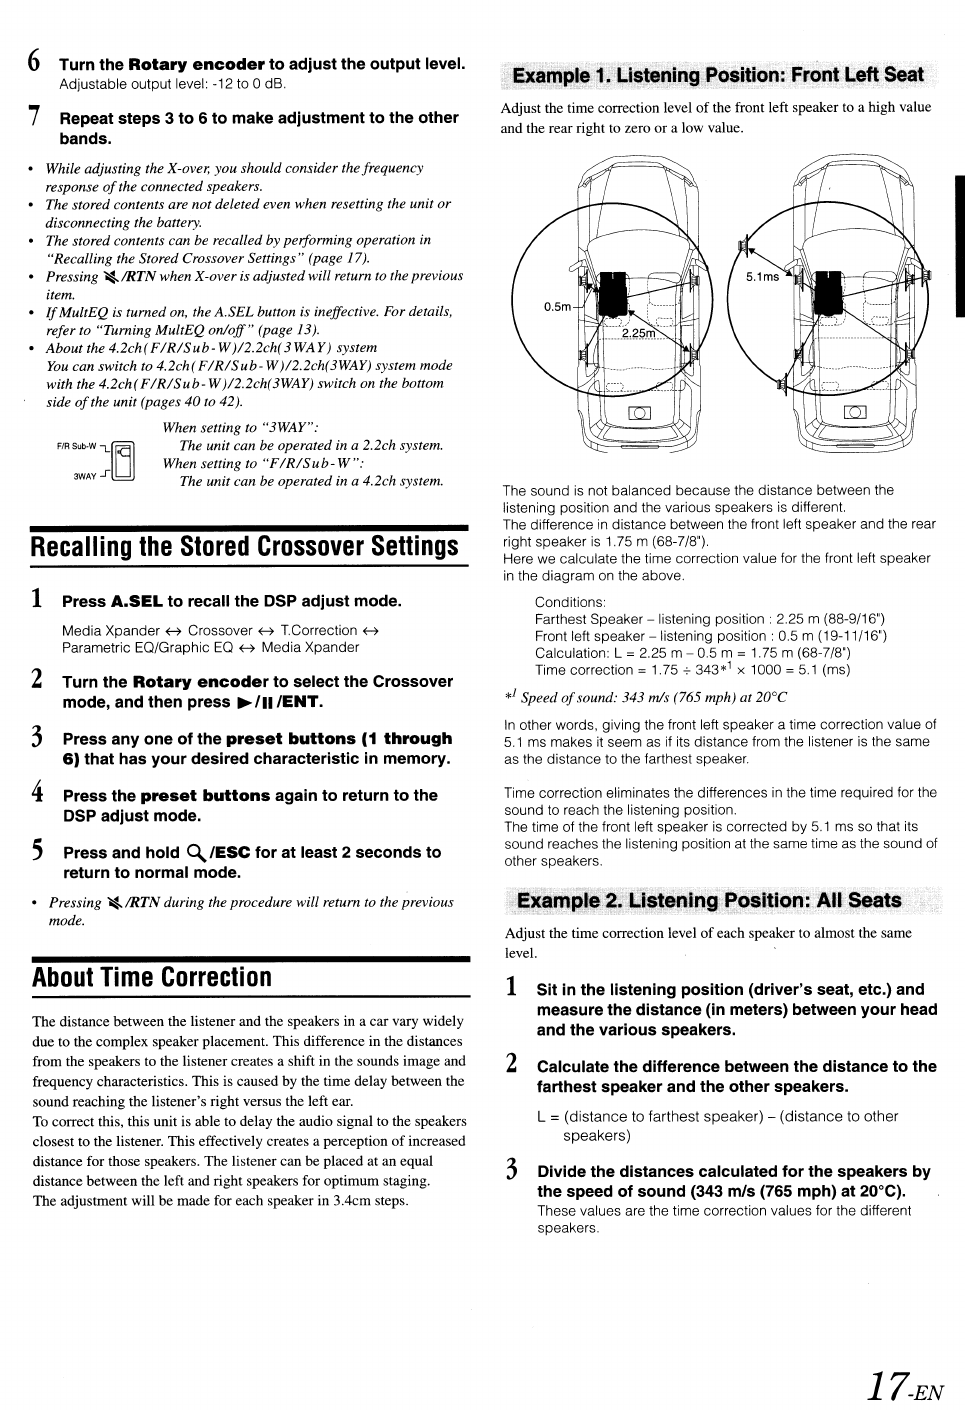
Adjust the time correction level
of
the front left speaker to a high value
and
the
rear
right to zero
or
a low value.
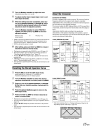
The sound
is
not balanced because the distance between the
listening position and the various speakers
is
different.
The difference
in
dLstance between the front left speaker and the rear
right speaker
is
1.75 m (68-7/8").
Here we calculate the time correction value for the front left speaker
in
the diagram on the above.
Conditions:
Farthest Speaker - listening
position:
2.25 m (88-9/16")
Front left speaker
-listening
position:
0.5 m (19-11/16")
Calculation: L
= 2.25 m - 0.5 m = 1.75 m (68-7/8")
Time correction
= 1.75
-7-
343*1 x 1000 =
5.1
(ms)
*1
Speed
of
sound:
343
m/s (765 mph) at 20°C
In
other words, giving the front left speaker a time correction value of
5.1
ms makes it seem as if its distance from the listener
is
the same
as the distance to the farthest speaker.
Time correction eliminates the differences
in
the time required for the
sound to reach the listening position.
The time of the front left speaker
is
corrected by
5.1
ms so that its
sound reaches the listening position at the same time as the sound of
other speakers.
Adjust the time correction level
of
each
speaker to almost the same
level.
1 Sit
in
the listening position (driver's seat, etc.) and
measure the distance (in meters) between your head
and the various speakers.
2 Calculate the difference between the distance to the
farthest speaker and the other speakers.
L = (distance to farthest speaker) - (distance to other
speakers)
3 Divide the distances calculated for the speakers by
the speed of sound (343
m/s (765 mph) at 20°C).
These values are the time correction values for the different
speakers.
17-EN