


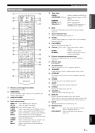
When you use this product for the first time, perform setup following the steps below. See the related pages for details on
operations and settings.
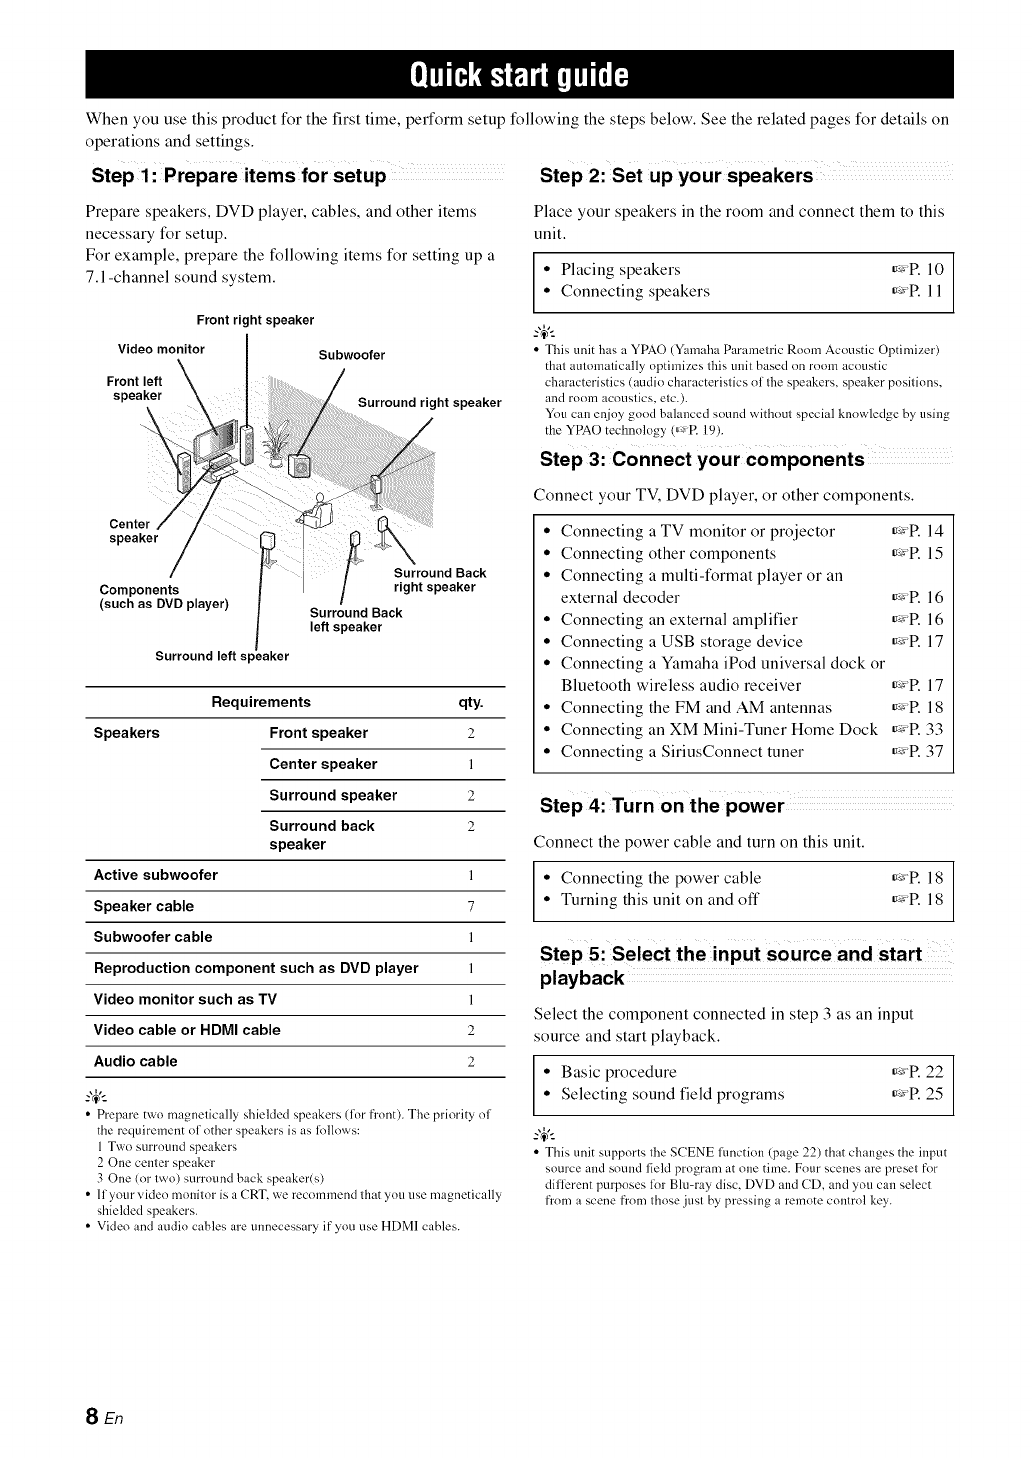
Prepare speakers, DVD player, cables, and other items
necessary for setup.
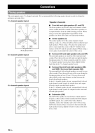
For example, prepare the following items for setting up a
7. l-channel sound system.
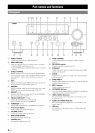
Front right speaker
Video monitor Subwoofer
Front left
speaker Surround right speaker
Center
speaker
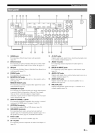
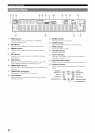
Components
(such as DVD player)
Surround left s
Surround Back
right speaker
Surround Back
left speaker
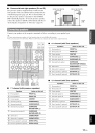
Speakers
Requirements qty.
Front speaker 2
Center speaker 1
Surround speaker 2
Surround back 2
speaker
Active subwoofer 1
Speaker cable 7
Subwoofer cable 1
Reproduction component such as DVD player 1
Video monitor such as TV 1
Video cable or HDMI cable 2
Audio cable 2
• Prepare two magnetically shielded speakers (%r front). The priority of
the requirement of other speakers is as lollows:
1Two surroundspeakers
2 Onecenter speaker
3 One(or two)surround back speaker(s)
• lfyour vide()monitorisa CRT,werecommend thatyou use magnetically
shielded speakers.
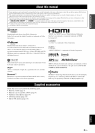
• Videoand audio cables areunnecessary if you use HDMIcables.
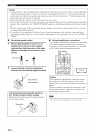
Place your speakers in the room and connect them to this
unit.
• Placing speakers _'R 10
• Connecting speakers _'R 11
--'4'--
• This unit has a YPAO (Yamaha Parametric Room Acoustic Optimizer)
that automatically optimizes this unit based on room acoustic
characteristics (audiocharacteristics of thespeakers,speaker positions,
and room acoustics, etc.).
Youcan enjoy good balanced soundwithout special knowledge by using
theYPAOtechnology (_¢+R19).
Step 3: Connect your components
Connect your TV, DVD player, or other components.
• Connecting a TV monitor or projector _'R 14
• Connecting other components _'R 15
• Connecting a multi-format player or an
external decoder _'R 16
• Connecting an external amplifier _'R 16
• Connecting a USB storage device _'R 17
• Connecting a Yamaha iPod universal dock or
Bluetooth wireless audio receiver _'R 17
• Connecting the FM and AM antennas _'R 18
° Connecting an XM Mini-Tuner Home Dock _'R 33
• Connecting a SiriusConnect tuner _'R 37
Step 4: Turn on the power
Connect the power cable and turn on this unit.
• Connecting the power cable _'R 18
• Turning this unit on and off _'R 18
playback
Select the component connected in step 3 as an input
source and start playback.
• Basic procedure _'P. 22
• Selecting sound field programs _'P. 25
-4'--
• Thisunit supportsthe SCENE lunction (page 22) thatchanges theinput
source and soundfield programat one time. Fourscenes arepresetfor
diflbrentpurposes lor Bin-raydisc, DVD andCD, andyou canselect
froma scene fromthose just by pressing a remote controlkey.
SEn