


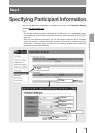


Step 3
Changing ProjectPhone Settings
After participant information has been configured on the PJP-MC24, configure the
participants’ ProjectPhones to join conferences via the PJP-MC24.
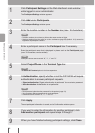
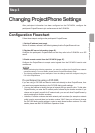
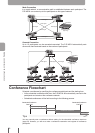
Conguration Flowchart
Follow these steps to congure the participants’ ProjectPhones.
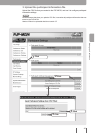
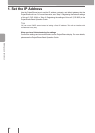
1. Set the IP address (next page).
Set the IP address, netmask, and default gateway that the ProjectPhone will use.
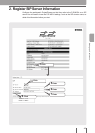
2. Register SIP server information (page 45).
Congure the participant’s ProjectPhones so that they refer to the PJP-MC24 as a SIP
server.
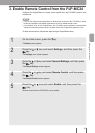
3. Enable remote control from the PJP-MC24 (page 47).
Congure the ProjectPhone to accept control signals from the PJP-MC24 used to start
conferences.
Note
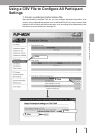
• Before performing the following operations, you need to congure the ProjectPhones network
connection settings. For more details, please see the ProjectPhone Setup Guide.
• The following explanation gives examples of how the settings would be congured using the
PJP-100H ProjectPhone.
If a participant is using a PJP-50R:
If you are using a PJP-50R and want to make calls directly to other ProjectPhones, then
you need to pay special attention to the PJP-50R dialing prex settings.
• You can use prexes to identify the type of network that you want to call to. To dial other
ProjectPhones, you enter the IP network prex, followed by the location number. If you
choose not to specify a prex for IP network calls, you can call other ProjectPhones by
simply entering their location numbers.
• However, if location numbers start with network prex numbers (for example a network
prex is set to zero and there is a location number “0010” then you will have to change
the PJP-50R dialing prex settings in order to reach those location numbers. For more
details, please see the PJP-50R Basic Operation Guide.
43
Setting up a Conference