


33
English
AUTO SETUP
PREPARATION
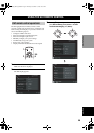
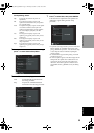
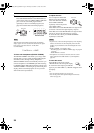
For Equalizing, select:
Skip To skip the selected item and perform no
adjustments.
Flat To average the frequency response of all
speakers. Recommended if all of your speakers
are of similar quality.
Front To adjust the frequency response of each speaker
in accordance with the sound of your front
speakers. Recommended if your front speakers
are of much higher quality than your other
speakers.
Low To average the frequency response of all
speakers, giving priority to the accuracy of bass
frequencies.
Mid To average the frequency response of all
speakers, giving priority to the accuracy of mid-
range frequencies.
High To average the frequency response of all
speakers, giving priority to the accuracy of high
frequencies.
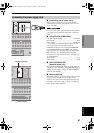
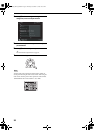
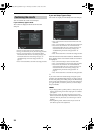
5 Once you have selected the desired setting,
press l to move back to Setup Menu.
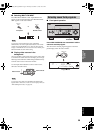
6 Press n to select Setup Type, then select:
Auto To automatically perform the entire
auto setup procedure.
Step To pause for confirmation between
each check in the auto setup procedure.
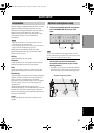
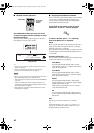
7 Press n to select Start, then press ENTER.
Loud test tones are output from each speaker and
“Measuring” appears during the auto setup
procedure.
• To pause the auto setup procedure, press one of the cursor
buttons (
k/n/l / h) or ENTER. In the pause mode,
press k to RETRY the procedure,
l to cancel auto setup,
o
r n to skip to the next item without completing the
current procedure.
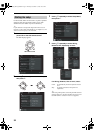
• If “E10:Internal Err” appears during testing, restart the
procedure from step 3.
• If “E12:No Speaker” appears on the GUI display after the
Wiring check, all 9 speakers and 2 subwoofers are not
connected. If you did connect all of the speakers and
subwoofers, first check the physical connections, then
press ENTER, and then k (RETRY) to retry the Wiring
check.
00EN.00_DSPZ9_GB.book Page 33 Thursday, November 13, 2003 10:55 AM