Connecting your equipment
03
27
En
Selecting the Speaker system
The front height terminals can be used for front wide and
Speaker B connections, in addition to for the front height
speakers. Also, the surround back terminals can be used
for bi-amping and ZONE 2 connections, in addition to for
the surround back speakers. Make this setting according
to the application.
Front height setup
*Default setting
1 Connect a pair of speakers to the front height
speaker terminals.
See Standard surround connection on page 25.
2 If necessary, select ‘
Normal(SB/FH)
’ from the
Speaker System
menu.
See Speaker system setting on page 115 to do this.
Front wide setup
1 Connect a pair of speakers to the front height
speaker terminals.
See Standard surround connection on page 25.
2 Select ‘
Normal(SB/FW)
’ from the
Speaker System
menu.
See Speaker system setting on page 115 to do this.
Speaker B setup
You can listen to stereo playback in another room.
1 Connect a pair of speakers to the front height
speaker terminals.
See Standard surround connection on page 25.
2 Select ‘
Speaker B
’ from the
Speaker System
menu.
See Speaker system setting on page 115 to do this.
Bi-Amping setup
Bi-amping connection of the front speakers for high
sound quality with 5.1-channel surround sound.
1 Connect bi-amp compatible speakers to the front
and surround back speaker terminals.
See Bi-amping your speakers on page 26.
2 Select ‘
Front Bi-Amp
’ from the
Speaker System
menu.
See Speaker system setting on page 115 to do this.
ZONE 2 setup
With these connections you can simultaneously enjoy
5.1-channel surround sound in the main zone with stereo
playback on another component in ZONE 2.
1 Connect a pair of speakers to the surround back
speaker terminals.
See Standard surround connection on page 25.
2Select ‘
ZONE 2
’ from the
Speaker System
menu.
See Speaker system setting on page 115 to do this.
About the
audio connection
• With an HDMI cable, video and audio signals can be
transferred in high quality over a single cable.
About the video converter
The video converter ensures that all video sources are
output through all of the MONITOR VIDEO OUT jacks.
The only exception is HDMI: since this r esolution cannot
be downsampled, you must connect your monitor/TV to
the receiver’s HDMI video outputs when connecting this
video source.
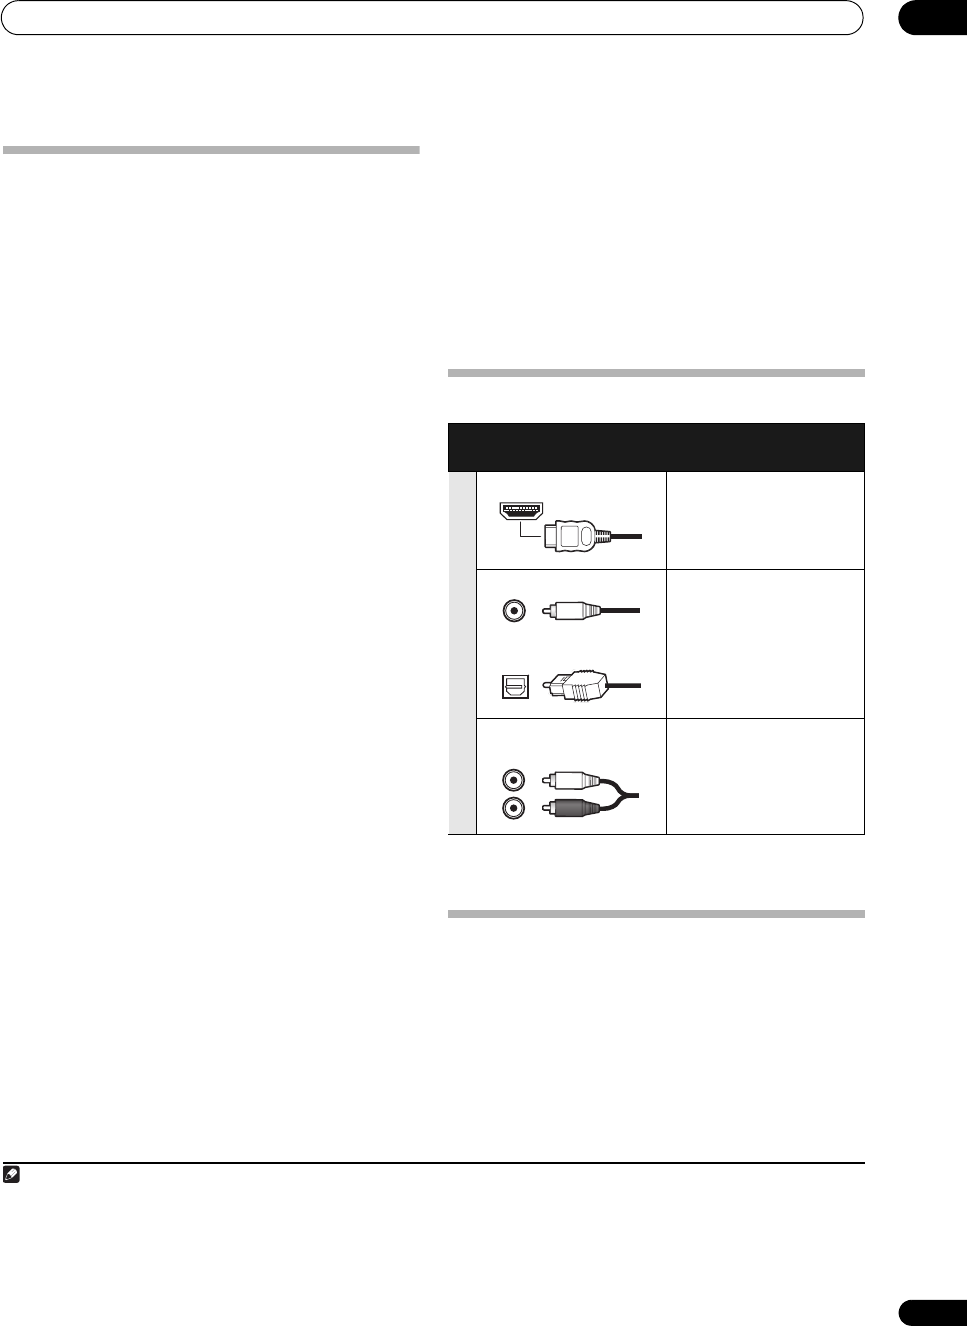
1
Types of cables and
terminals
Transferable audio
signals
Sound signal priority
HDMI HD audio
Digital (Coaxial) Conventional digital audio
Digital (Optical)
RCA (Analog)
(White/Red)
Conventional analog audio
Note
1 • If the video signal does not appear on your TV, try adjusting the resolution settings on your component or display. Note that some
components (such as video game units) have resolutions that may not be converted. In this case, try switching Digital Video Conversion (in
Setting the Video options on page 78) OFF.
• The signal input resolutions that can be converted from the component video input for the HDMI output are 480i/576i, 480p/576p, 720p and
1080i. 1080p signals cannot be converted.
• Only signals with an input resolution of 480i/576i can be converted from the component video input for the composite MONITOR OUT
terminals.
SC-37_35_UXJCB.book 27 ページ 2010年3月9日 火曜日 午前9時32分


