


The Advanced MCACC menu
11
105
En
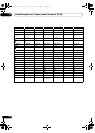
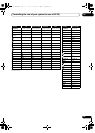
2 Select the parameters you want to set.
Use / to select the item, then use / to set.
• Auto MCACC – The default is ALL (recommended),
but you can limit the system calibration to only one
setting (to save time) if you want.
1
• EQ Type (only available when the Auto MCACC
Menu above is EQ Pro & S-Wave) – This determines
how the frequency balance is adjusted.
After a single calibration is performed, each of the
following three correction curves can be stored
separately in the MCACC memory. SYMMETRY
implements symmetric correction for each pair of left
and right speakers to flatten the frequency-amplitude
characteristics. ALL CH ADJ is a ‘flat’ setting where all
the speakers are set individually so no special weighting
is given to any one channel. FRONT ALIGN
2
sets all
speakers in accordance with the front speaker settings
(no equalization is applied to the front left and right
channels).
• THX Speaker (only available when the Auto MCACC
Menu above is ALL or Speaker Setting) – Select YES
if you are using THX speakers (set all speakers to
SMALL), otherwise leave it set to NO.
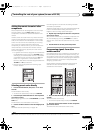
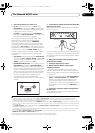
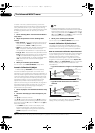
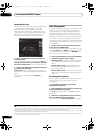
• STAND.WAVE Multi-Point (only available when the
Auto MCACC Menu above is EQ Pro & S-Wave) – In
addition to measurements at the listening position,
you can use two more reference points for which test
tones will be analyzed for standing waves. This is
useful if you want to get a balanced ‘flat’ calibration
for several seating positions in your listening area.
Place the microphone at the referen
ce poi
nt
indicated on-screen and note that the last
microphone placement will be at your main listening
position:
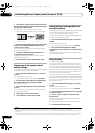
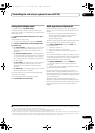
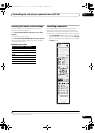
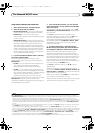
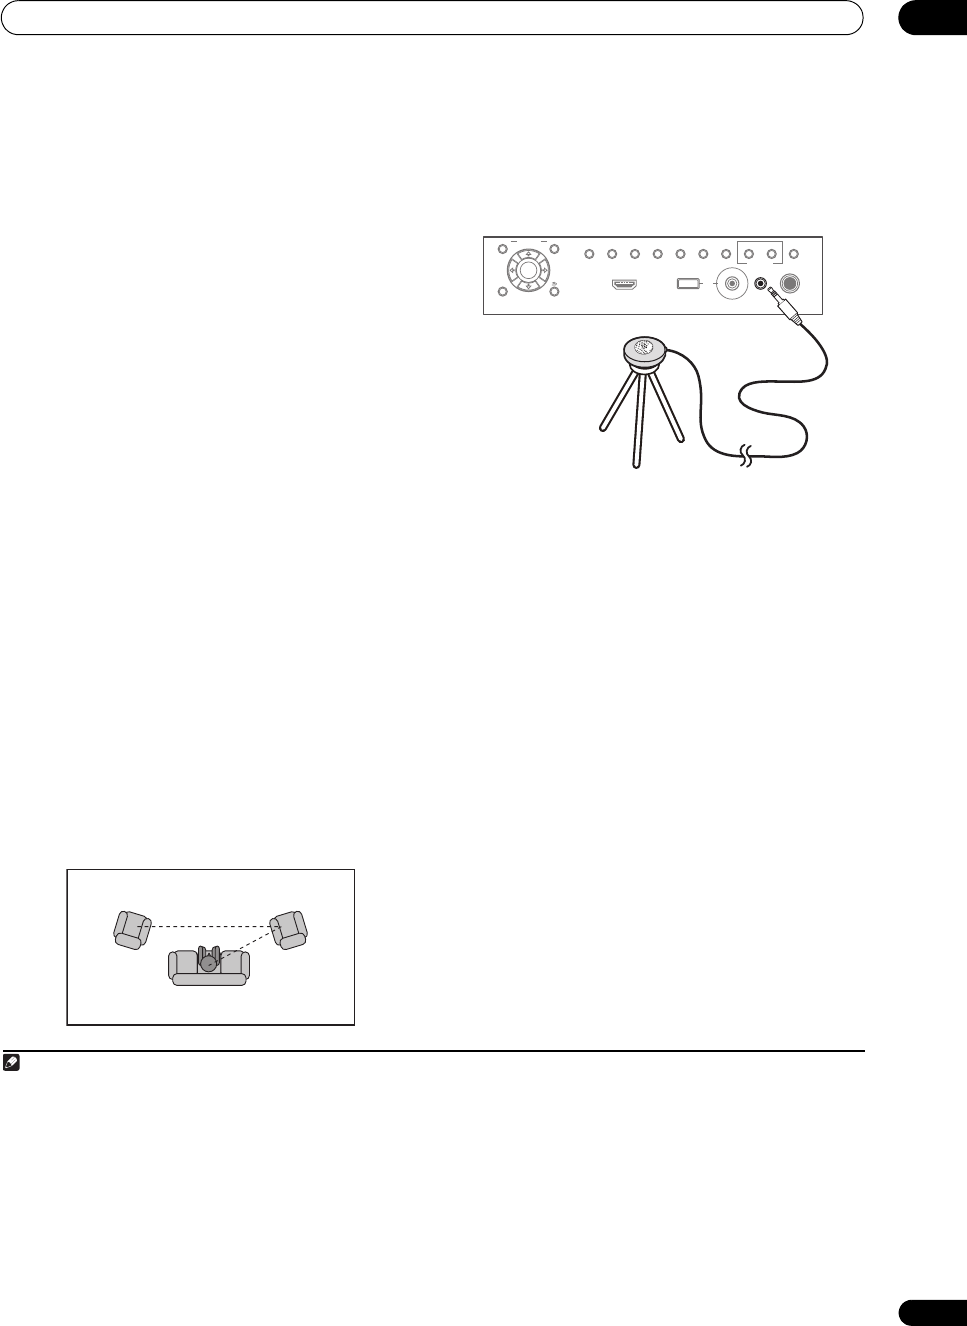
3 Connect the microphone to the
MCACC SETUP MIC
jack on the front panel.
Make sure there are no obstacles between the speakers
and the microphone.
If you have a tripod, use it to place the microphone so that
it’s about ear level at your normal listening position. If you
do not have a tripod, use some other object to install the
microphone.
3
4 When you’re finished setting the options, select
START
then press
ENTER
.
5 Follow the instructions on-screen.
6 Wait for the Auto MCACC Setup to finish
outputting test tones.
A progress report is displayed on-screen while the
receiver outputs test tones to determine the speakers
present in your setup. Try to be as quiet as possible while
it’s doing this.
4
•With error messages (such as Too much ambient
noise! or Check microphone) select RETRY after
checking for ambient noise (see Problems when
using the Auto MCACC Setup on page 45) and
verifying the mic connection. If there doesn’t seem to
be a problem, you can simply select GO NEXT and
continue.
7 If necessary, confirm the speaker configuration in
the GUI screen.
The configuration shown on-screen should reflect the
actual speakers you have.
Note
1• When data measurement is taken (after selecting ALL or Keep SP System), the reverb characteristics data (both before- and after-
calibration) that this receiver had been storing will be overwritten. If you want to save the reverb characteristics data before measuring,
connect a USB memory device to this receiver and transfer the data.
• When measurement is taken of data other than SYMMETRY (after selecting ALL or Keep SP System), the data are not measured after the
correction. If you will need to measure after correction data, take the measurement using the EQ Professional menu in the Manual MCACC
setup (page 106).
• The EQ Pro & S-Wave measureme
nt is also taken when Keep SP S
ystem or EQ Pro & S-Wave is selected. See Acoustic Calibration EQ
Professional on page 108 for more on this.
• Either effect of Acoustic Calibration EQ Professional and Standing Wave can be switched on and off in the respective MCACC preset. For
details, see Setting the Audio options on page 76.
2 If you selected ALL or Keep SP System as your Auto MCACC menu, you can specify the MCACC preset where you want to save the
SYMMETRY, ALL CH ADJ and FRONT ALIGN settings.
1 2
3
2nd reference
point
3rd reference
point
Main listening
position
3 It may not be possible to measure correctly if the microphone is placed on a table, sofa, etc.
4 Do not adjust the volume during the test tones. This may result in incorrect speaker settings.
PHONES
SPEAKERS
CONTROL
MULTI-ZONE
ON/OFF
MCACC
SETUP MIC
PARAMETER
ENTER
(TUNE)
(TUNE)
(PRESET)(PRESET)
AUDIO VIDEO
TUNER EDIT
USBHDMI 5
VIDEO CAMERA
iPod
iPhone
AUTO SURR/ALC/
STREAM DIRECT
HOME
THX
STANDARD
SURROUND
ADVANCED
SURROUND
STEREOBAND
HOME MENU RETURN
Microphone
Tripod
SC-37_35_UXJCB.book 105 ページ 2010年3月9日 火曜日 午前9時32分