


16
Connecting the AV Receiver—Continued
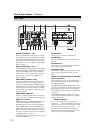
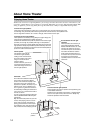
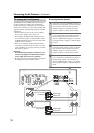
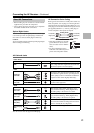
Connecting a Powered Subwoofer
Using a suitable cable, connect the AV receiver’s PRE
OUT: SUBWOOFER to an input on your powered sub-
woofer, as shown. If your subwoofer is unpowered and
you’re using an external amplifier, connect the PRE
OUT: SUBWOOFER to an input on the amp.
You can connect the powered subwoofer with two SUB-
WOOFER PREOUT jacks respectively.
The same signal is output from each jack.
Speaker Connection Precautions
Read the following before connecting your speakers:
• You can connect speakers with an impedance of
between 6 and 16 ohms. If you use speakers with a
lower impedance, and use the amplifier at high vol-
ume levels for a long period of time, the built-in amp
protection circuit may be activated.
• Disconnect the power cord from the wall outlet before
making any connections.
• Read the instructions supplied with your speakers.
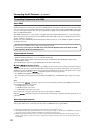
• Pay close attention to speaker wiring polarity. In other
words, connect positive (+) terminals only to positive
(+) terminals, and negative (–) terminals only to nega-
tive (–) terminals. If you get them the wrong way
around, the sound will be out of phase and will sound
unnatural.
• Unnecessarily long, or very thin speaker cables may
affect the sound quality and should be avoided.
• If you use 4 or 5 speakers, connect each of the two
surround speakers to the SURR L/R terminals. Do not
connect them to the SURR BACK L/R or FRONT
HIGH L/R terminals.
• Be careful not to short the
positive and negative wires.
Doing so may damage the AV
receiver.
• Make sure the metal core of
the wire does not have contact
with the AV receiver’s rear
panel. Doing so may damage
the AV receiver.
• Don’t connect more than one cable to each speaker
terminal. Doing so may damage the AV receiver.
• Don’t connect one speaker to several terminals.
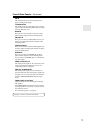
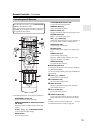
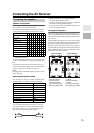
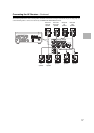
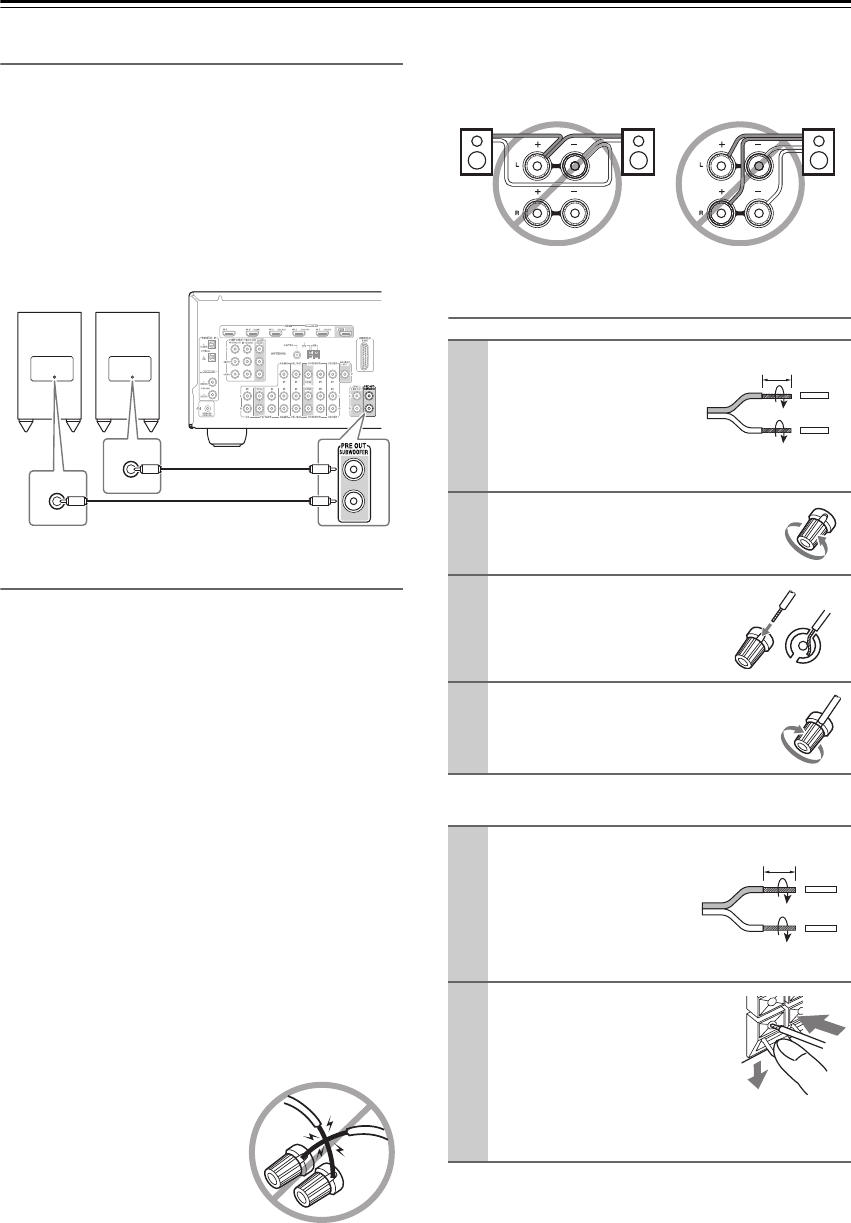
Connecting the Speaker Cables
FRONT HIGH L/R, ZONE 2 L/R
LINE INPUT
LINE INPUT
Powered
subwoofer
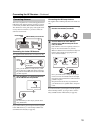
1
Strip 1/2"-5/8" (12-
15 mm) of insulation
from the ends of the
speaker cables, and
twist the bare wires
tightly, as shown.
2
Unscrew the terminal.
3
Fully insert the bare
wires.
4
Screw the terminal tight.
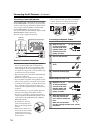
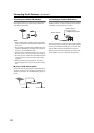
1
Strip 3/8"-1/2" (10-
12 mm) of insulation
from the ends of the
speaker cables, and
twist the bare wires
tightly, as shown.
2
While pressing the lever,
insert the wire into the
hole, and then release the
lever.
Make sure that the termi-
nals are gripping the bare wires, not the
insulation.
1/2"-5/8"(12-15 mm)
3/8"-1/2"(10-12 mm)