81
Advanced Setup—Continued
.
Note:
This procedure can also be performed on the AV receiver
by using its [Setup] button, arrow buttons, and [Enter]
button.
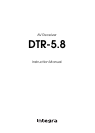
Changing the AV receiver’s ID
1
Press the [Receiver] button fol-
lowed by the [Setup] button.
The main menu appears onscreen.
2
Use the Up and Down [ ]/[ ]
buttons to select “7. Hardware
Setup,” and then press [Enter].
The Hardware Setup menu appears.
3
Use the Up and Down [ ]/[ ]
buttons to select “1. Remote
Control,” and then press [Enter].
The Remote Control menu appears.
4
Use the Left and Right [ ]/[ ]
buttons to select a value.
Remote ID
With this setting, you can change the
AV receiver’s remote control ID. You
may need to change this if the remote
controller’s control codes overlap with
those of another Integra component
located in the same room.
If you change the AV receiver’s remote
control ID, be sure to set the same ID
on both the AV receiver and remote
controller (see page 83). The default ID
for both is 1.
7. Hardware Setup
1. Remote Control
2. Zone2
3. Tuner
4. Analog Multich
5. HDMI
7–1. Remote Control
Remote ID 1
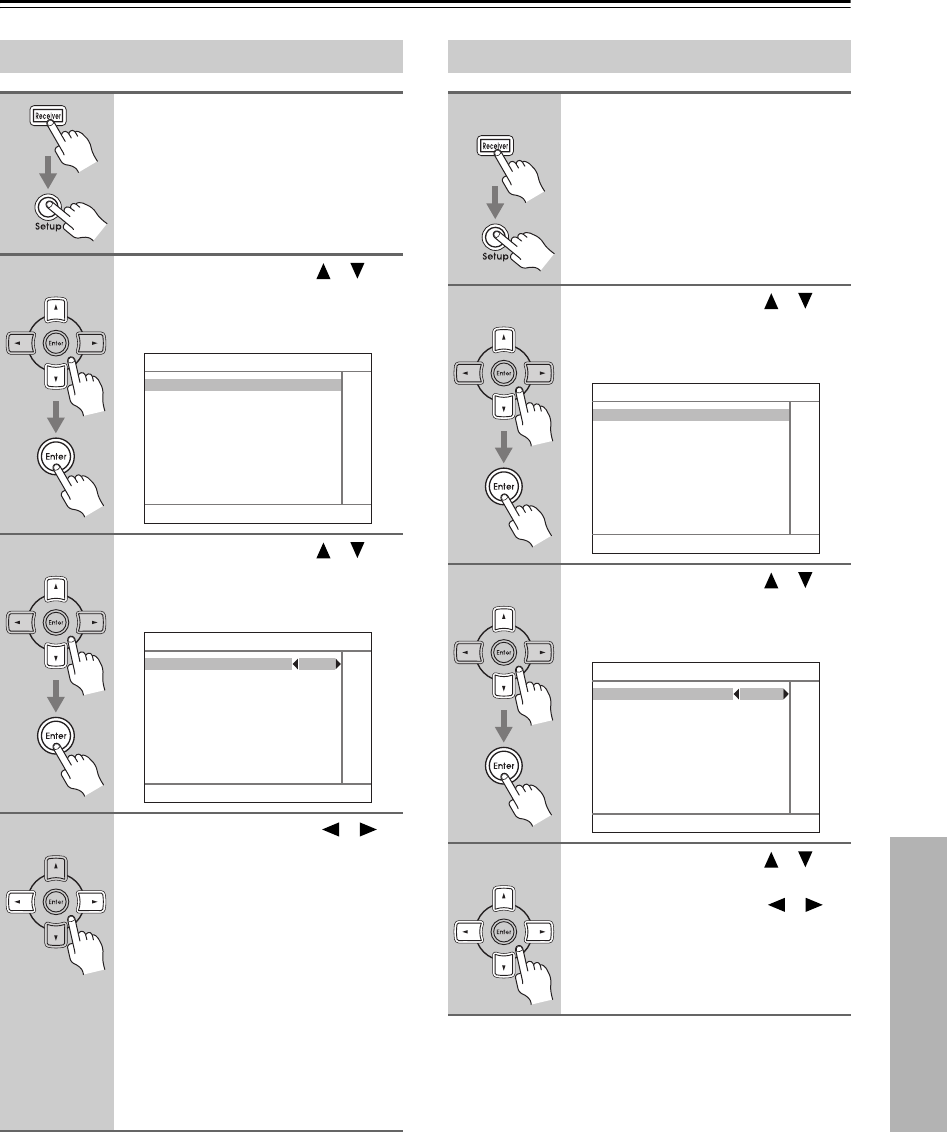
HDMI Setup
1
Press the [Receiver] button fol-
lowed by the [Setup] button.
The main menu appears onscreen.
2
Use the Up and Down [ ]/[ ]
buttons to select “7. Hardware
Setup,” and then press [Enter].
The Hardware Setup menu appears.
3
Use the Up and Down [ ]/[ ]
buttons to select “5. HDMI,” and
then press [Enter].
The HDMI menu appears.
4
Use the Up and Down [ ]/[ ]
buttons to select the settings and
use the Left and Right [ ]/[ ]
buttons to select them.
The HDMI settings are explained on
page 82.
7. Hardware Setup
1. Remote Control
2. Zone2
3. Tuner
4. Analog Multich
5. HDMI
7–5. HDMI
HDMI Audio Out Off
Lip Sync Disable
xvYCC Disable
Control Disable
Power Control - - -
TV Control - - -