31
Selecting the On ScreenSelecting the On Screen
Selecting the On ScreenSelecting the On Screen
Selecting the On Screen
Display (OSD) LanguageDisplay (OSD) Language
Display (OSD) LanguageDisplay (OSD) Language
Display (OSD) Language
We have preset the initial Default On Screen Display (OSD)
Language to English. This means that all of the on screen
menus and icons will appear in English. If English is your
preferred language no adjustment is necessary and you can
skip to the next section.
If you wish to change the On Screen Display (OSD) Language
to something else, your choices are German, Italian, French
or Spanish. Follow the 3 steps below to select a different On
Screen Display (OSD) language.
STANDBY
SUB
TITLE
DVD TUNER AUX
LANGUAGETITLE RETURN
ANGLEGO TO
MENU
ZOOM
SETU P
AUDIO
1
DISPLAY
23
456
789
>10 0
N/P
SLEEP MUTE
OPEN/
CLOSE
ENTER
N
A-B REPEAT PROG. SELECT
LI STE NIN G
TEST
TONE
ADJ/VOL
STO P
PLAY/ PAUSE
STEP
SLO W
+
STA
-
STA
+
ST/MO
TU
TUN
+
MEMO
SETUP
SETUPSETUP
SETUP
ENTER
ENTERENTER
ENTER
/ / /
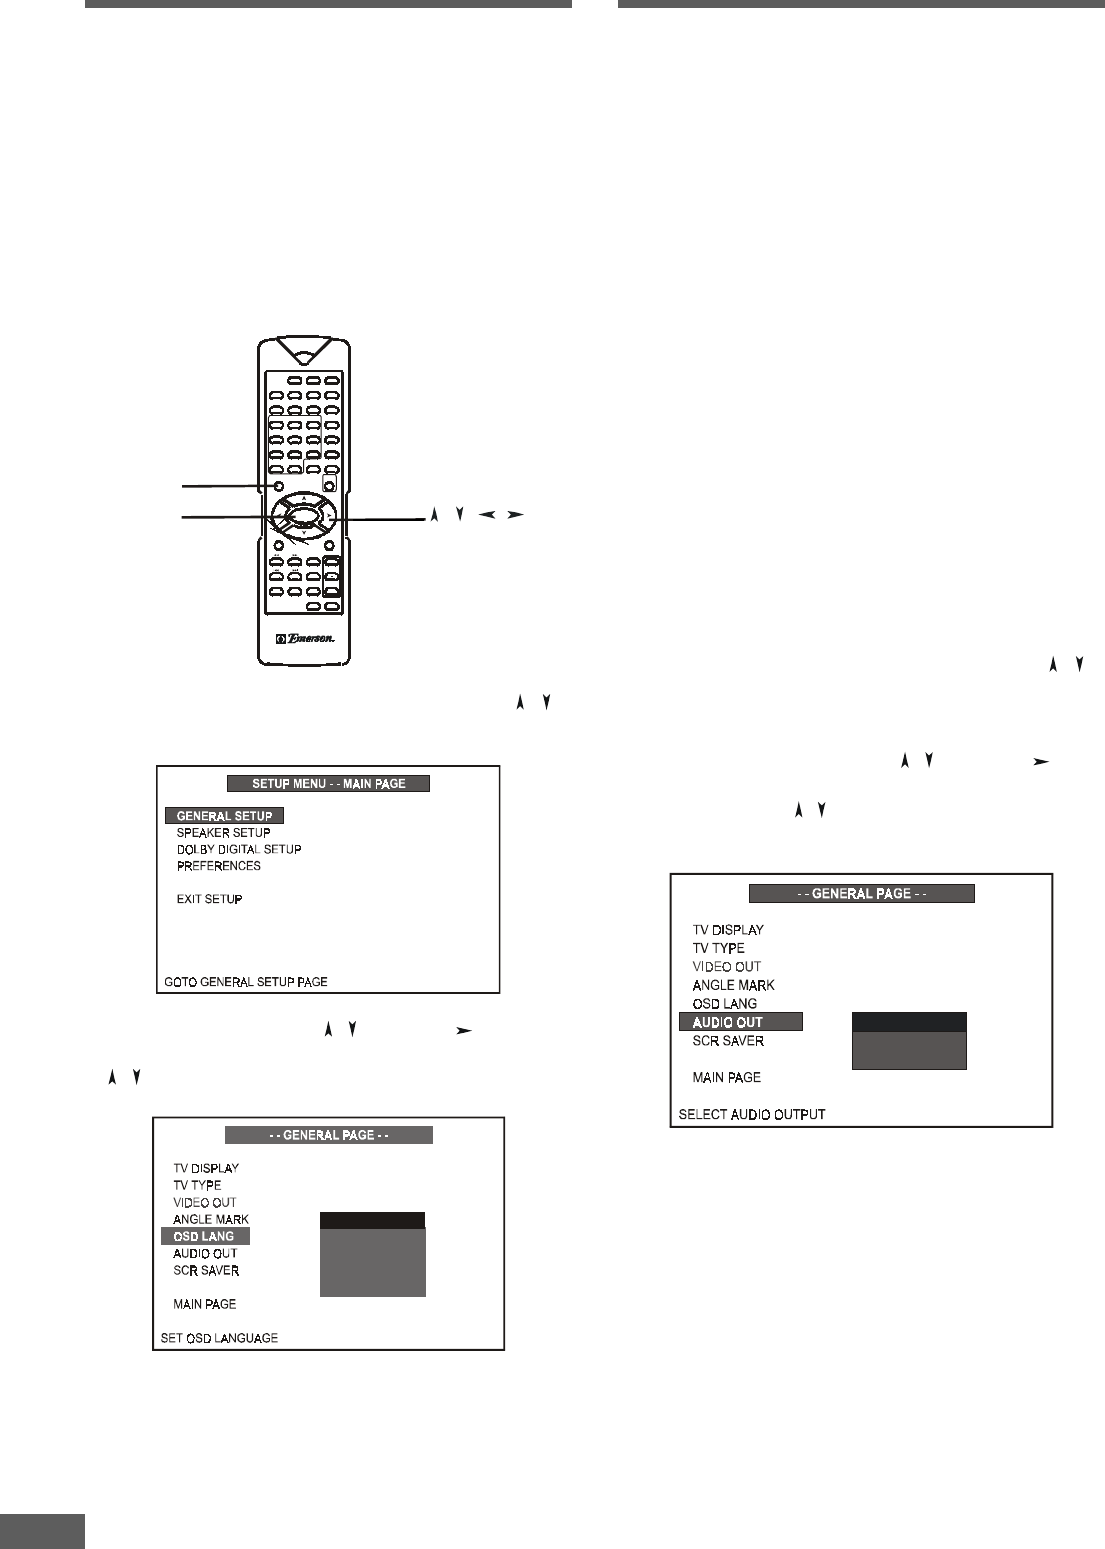
1 Press SETUP button to enter SETUP MENU. Use / to
select GENERAL SETUP, and then press ENTER button.
2 Highlight OSD LANG using / , then press button to go
to the right option list. Select the desired language using
/ , then press ENTER to confirm your selection.
ENGLISH
SPANISH
FRENCH
ITALIAN
GERMAN
3 Press SETUP again to exit SETUP MENU.
Note:
• If the disc you are viewing does not support the On Screen
Display (OSD) language you selected the player will
automatically default to the language specified on the disc
itself.
Selecting the Audio OutSelecting the Audio Out
Selecting the Audio OutSelecting the Audio Out
Selecting the Audio Out
(Output) Mode(Output) Mode
(Output) Mode(Output) Mode
(Output) Mode
You system is supplied with 5 satellite speakers and one
subwoofer. We assume that you are going to connect these 6
speakers to the respective speaker output terminals on the
back panel of the main unit. Therefore we have set the initial
Default Audio Out mode setting to "Analog". If you are
connecting the 6 speakers to the main unit (or if you are
connecting the Left / Right Audio Out jacks on this unit to an
external receiver or amplifier) the proper Audio Out mode
setting is "Analog". No further adjustments are required and
you can skip to the next section.
If you are planning to connect the Coaxial or Optical digital
audio output jacks on this system to an external receiver with
its own built in Dolby Digital and /or MPEG decoder
follow the 3 steps below to select the SPDIF/RAW Audio Out
mode.
If you are planning to connect the Coaxial or Optical digital
audio output jacks on this system to an external receiver that
accepts PCM (Pulse Code Modulation) audio signals follow
the 3 steps below to select the SPDIF/PCM Audio Out mode.
1 Press SETUP button to enter SETUP MENU. Use
/ to
select GENERAL SETUP (see page 27), and then press
ENTER button.
2 Highlight AUDIO OUTPUT using
/ , then press button
to go to the right option list. Select ANALOG, SPDIF/RAW or
SPDIF/PCM using / , then press ENTER to confirm your
selection.
ANALOG
SPDIF/RAW
SPDIF/PCM
3 Press SETUP again to exit SETUP MENU.
Notes:
• If you select the SPDIF/RAW Audio Out mode and your
audio source is either a DVD or an audio CD the output from
the Coaxial and Optical audio output jacks will be PCM.
• In the Analog (Default) Audio Out mode setting there will be
no output from the Coaxial or Optical digital audio output
jacks.
• If the Audio Out mode is not set correctly you may not get any
sound output at all, or you will not get true 5.1 channel digital
audio output.


