


11
UnpacUnpac
UnpacUnpac
Unpac
kingking
kingking
king
Check that you have the following items:
• Main unit (1).
• Subwoofer (1).
• Speakers (5).
• Remote control (1).
• AAA batteries (2).
• Video cable (4 feet x 1).
• Subwoofer cord (16 feet x 1).
• Front speaker cords (13 feet x 2, red / black).
• Center speaker cord (9 feet x 1, blue / black).
• Surround speaker cords (26 feet x 2, gray / black).
• AM loop antenna (1).
• FM antenna (1).
• Owner's Manual (1).
• Quick Set Up Guide.
InserInser
InserInser
Inser
ting Bating Ba
ting Bating Ba
ting Ba
tteries into thetteries into the
tteries into thetteries into the
tteries into the
RR
RR
R
emote Contremote Contr
emote Contremote Contr
emote Contr
olol
olol
ol
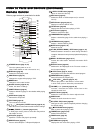
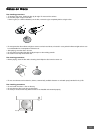
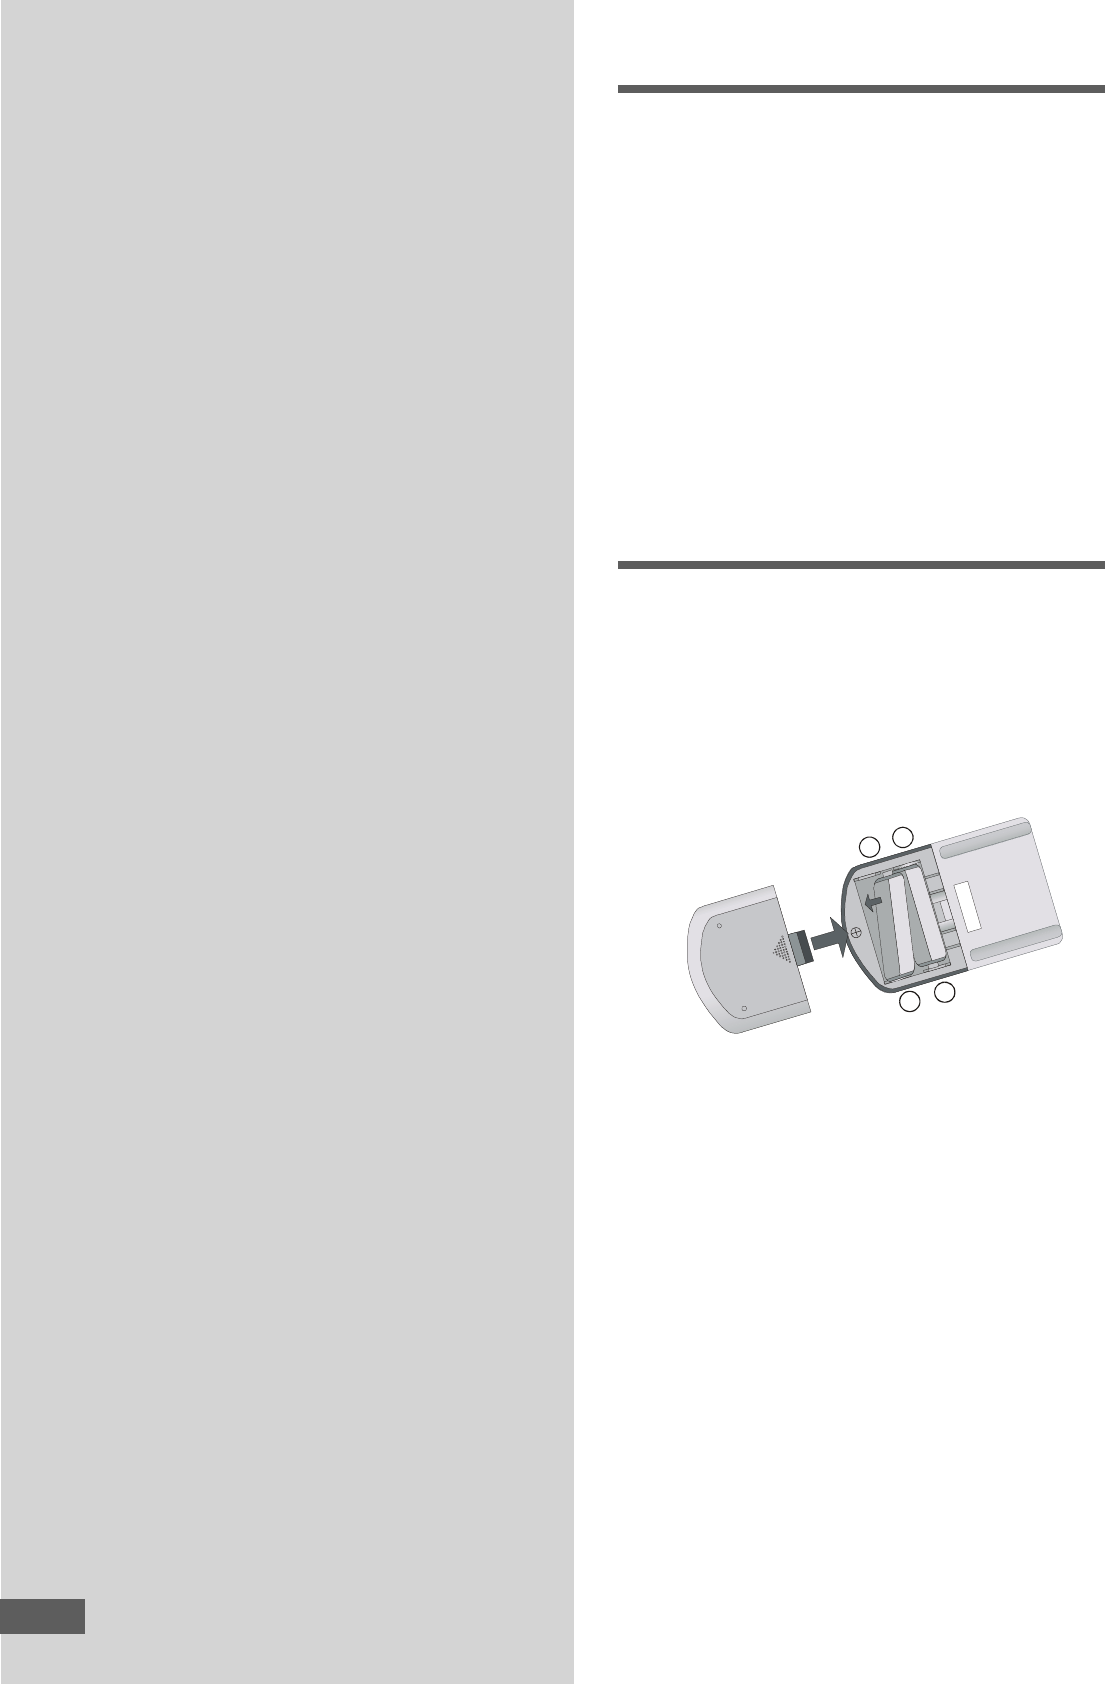
You can control the system using the supplied remote. Insert
two batteries by matching the + and - on the batteries with the
markings in the battery compartment. When using the remote,
point it at the remote sensor on the front panel of this system.
Notes:
• Do not leave the remote in an extremely hot or humid place.
• Do not use a new battery with an old one.
• Do not drop any foreign object into the remote casing.
particularly when replacing the batteries.
• Do not expose the remote sensor to direct sunlight or lighting
apparatuses. Doing so many cause a malfunction.
• If you will not use the remote for an extended period of time,
remove the batteries to avoid possible damage from battery
leakage and corrosion.
• Use only the size and type of batteries specified.
• Be sure to follow the correct polarity when installing the
batteries as indicated in the battery compartment. Reversed
batteries may cause damage to the device.
• Do not mix different types of batteries together (e.g. Alkaline
and Carbon-zinc) or old batteries with fresh ones.
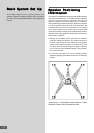
InstallationsInstallations
InstallationsInstallations
Installations
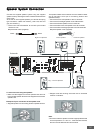
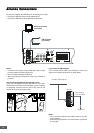
This section describes how to connect the system to the
speakers, a TV monitor with audio / video input jacks and
other video components. You cannot connect this system to
a TV monitor which does not have a video input connector.
Be sure to turn off the power of each component before
making the connections.
+
-
-
-
-
+
11